This article was co-authored by wikiHow staff writer, Nicole Levine, MFA. Nicole Levine is a Technology Writer and Editor for wikiHow. She has more than 20 years of experience creating technical documentation and leading support teams at major web hosting and software companies. Nicole also holds an MFA in Creative Writing from Portland State University and teaches composition, fiction-writing, and zine-making at various institutions.
The wikiHow Tech Team also followed the article's instructions and verified that they work.
This article has been viewed 24,487 times.
Learn more...
This wikiHow teaches you how to manage your junk mail protection options in Microsoft Office for Windows and macOS. You'll also learn how to categorize messages as "junk" and prevent spammers from sending you more junk messages in the future.
Steps
Editing Junk Mail Preferences on a PC
-
1Open Microsoft Outlook. It’s usually in a folder called Microsoft Office, which you’ll find in the All Apps area of the Start menu.
-
2Click the Home tab. It’s near the top-left corner of Outlook.Advertisement
-
3Click Junk.
-
4Click Junk E-Mail Options.
-
5Select a level of protection. Choose from the following:[1]
- No Automatic Filtering: All messages will arrive in your inbox and none will be categorized as Junk.
- Low: Only the most obvious junk mail messages will be labeled as such. Choose this if you don’t get a lot of spam to begin with.
- High: If you get a lot of spam, this option is your best bet. You should add anyone you always want to receive messages from to your contacts and safe lists to make sure you receive them. Also, be sure to check your Junk folder periodically, as Outlook may misinterpret regular messages as spam.
- Safe Lists Only: Choose this only if you don’t want to receive any messages to your inbox except those from people you’ve specifically added to your Safe Senders list.
-
6Add people to your Safe Senders list. This is encouraged if you’re using a higher level of spam protection, such as High or Safe Lists Only:[2]
- Click the Home tab.
- Click Junk.
- Click Junk E-Mail Options.
- Click the Safe Senders tab.
- Click Add.
- Enter an email address or domain name you want to permit through your spam filters.
- Click OK.
- Check the box next to ″Automatically add people I e-mail to the Safe Senders List.″


Editing Junk Mail Preferences on a Mac
-
1Open Microsoft Outlook. You’ll usually find it on the Launchpad and in the Applications folder.
-
2Click the Tools menu. It’s in the menu bar at the top of the screen.[3]
-
3Click Junk Email Preferences. This option is called Junk E-mail Protection in some versions of Outlook.
-
4Allow all messages from a certain domain. If you don’t want a certain person or organization’s messages to ever be identified as Junk, add their address or domain name to the Safe Senders list. Click the Safe Senders (Safe Domain in some versions) tab, then add the address or domain to the list.
-
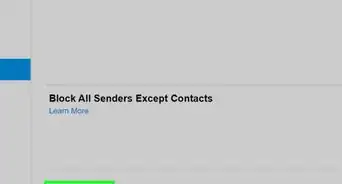
5Block all messages from a certain sender or domain. Click the Blocked Senders tab, then add the email address or domain name you want to block. All messages from this domain or sender will automatically be categorized as Junk.


Marking a Message as Junk on a PC
-
1Open Microsoft Outlook. It’s usually in a folder called Microsoft Office, which you’ll find in the All Apps area of the Start menu.
-
2Click the message you want to mark as junk. This selects the message and opens it in the reading pane.
-
3Click the Home tab. It’s near the top-left corner of Outlook.
-
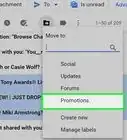
4Click the Junk icon. It’s near the top-left corner of the Home tab in the ″Delete″ section. A menu will expand.
-
5Click Block Sender. A confirmation message will appear.
-
6Click OK. This sender is now blocked and the message has been moved to the Junk folder.


Marking a Message as Junk on a Mac
-
1Open Microsoft Outlook. You’ll usually find it on the Launchpad and in the Applications folder.
-
2Select the message you want to mark as junk. You can click it once to select it, or open it in the reading pane.[4]
-
3Click Junk. It’s the gray person icon with a slashed-out red circle. You’ll find it in the icon bar at the top of Outlook. A menu will expand.
-
4Click Block Sender. This moves the message to the Junk folder and blocks additional messages from this address.


References
- ↑ https://support.office.com/en-us/article/change-the-level-of-protection-in-the-junk-email-filter-e89c12d8-9d61-4320-8c57-d982c8d52f6b
- ↑ https://support.office.com/en-gb/article/add-recipients-of-my-email-messages-to-the-safe-senders-list-be1baea0-beab-4a30-b968-9004332336ce
- ↑ https://support.office.com/en-us/article/customize-junk-e-mail-protection-in-outlook-for-mac-6a567773-9961-4d06-9fe9-b2dd47d74980#ID0EAABAAA=2016
- ↑ https://support.office.com/en-us/article/label-a-message-as-junk-or-not-junk-44d9bad9-c8e2-479f-8344-8549bb65019d
About This Article