This article was co-authored by wikiHow staff writer, Darlene Antonelli, MA. Darlene Antonelli is a Technology Writer and Editor for wikiHow. Darlene has experience teaching college courses, writing technology-related articles, and working hands-on in the technology field. She earned an MA in Writing from Rowan University in 2012 and wrote her thesis on online communities and the personalities curated in such communities.
The wikiHow Tech Team also followed the article's instructions and verified that they work.
This article has been viewed 105,884 times.
Learn more...
Did you know that you can organize your open applications and windows so that they are easier to see? Mac OS X's Spaces (part of Mission Control since OS X 10.7 "Lion") is a feature that allows you to spread your programs across up to 16 separate desktop areas, so you can have a "Working On" desktop space and a "Taking a Break" space. Having your activities broken up like that allows you to easily switch from "Working On" to "Taking a Break" when you can't look at your work any longer! This wikiHow article teaches you how to use spaces on Mac OS X.
Steps
Creating and Deleting Spaces
-
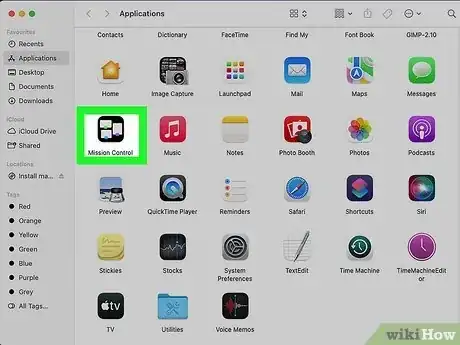
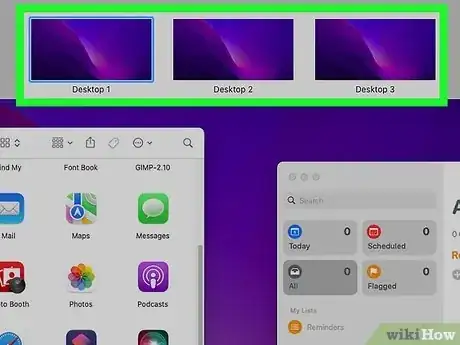
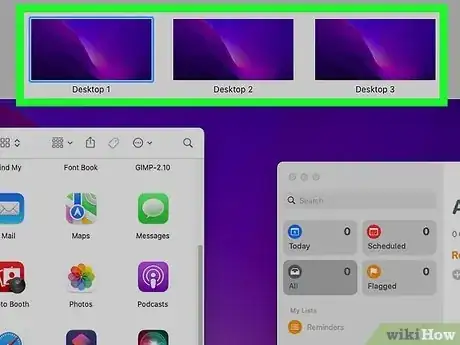
1Open Mission Control. In order to begin to understand how the concept of Spaces works, you'll need to open the Mission Control screen. This shows you the spaces you have active—each of the numbered desktops at the top of the screen represents a space. There are three different ways to access Mission Control:
- Press the "F3" key (it should also have a few squares and rectangles on it).
- Click on the "Mission Control" icon on your dock.
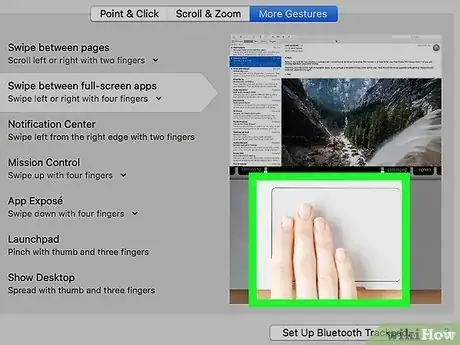
- If you have a trackpad, push upwards on the pad with three fingers.[1]
-
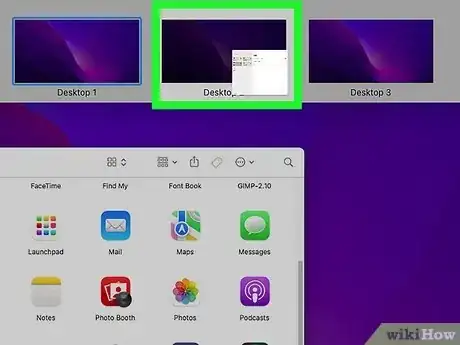
2Arrange active programs. To move an active program to its own space, simply drag it with the mouse and drop it on the chosen space.
- To open up an additional desktop space from Mission Control, move your mouse towards the top-right of the screen. A "+" sign will appear. Click it, and additional space will open. There is a total limit of 16 spaces.
- To remove an open desktop space, move your mouse to the space at the top of the Mission Control screen, and click the "x" that appears in the top left. If you have any open programs on the space that you close, they will be automatically moved to your first space.
Advertisement -
3Click on a space to leave Mission Control. When you click on a space, Mission Control will disappear and your display will show only the space you selected.[2]
Switching Between Spaces
-
1Use the trackpad. To switch between spaces on a Mac with a trackpad, swipe left or right on the pad with a four-fingered gesture. This will cycle you through the open spaces in your chosen direction.
-
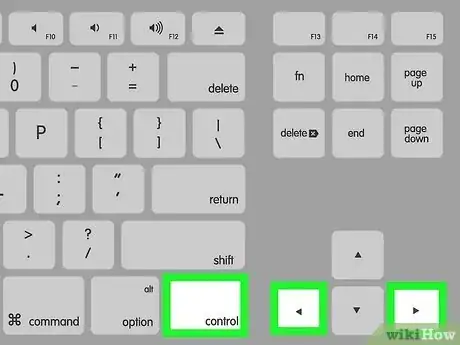
2Use keyboard shortcuts. If you don't like using the trackpad, you can cycle left and right through your open spaces by pressing CTRL+LEFT ARROW or CTRL+RIGHT ARROW.
- This shortcut also can be used to go to each space individually. To do so, press CTRL and the number of your desired space, e.g. CTRL+2 to go to the second space.
-
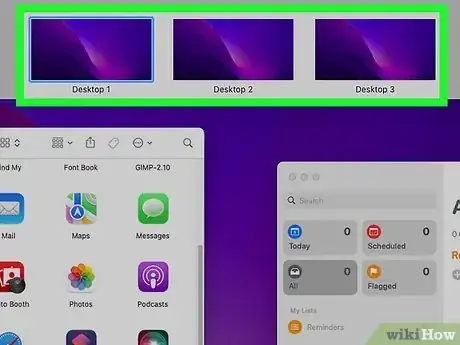
3Use Mission Control. If you don't want to use the trackpad or keyboard shortcuts, you can open Mission Control, where you'll see your Spaces displayed at the top of your screen. Click one to make it active.
Full Screen Apps
-
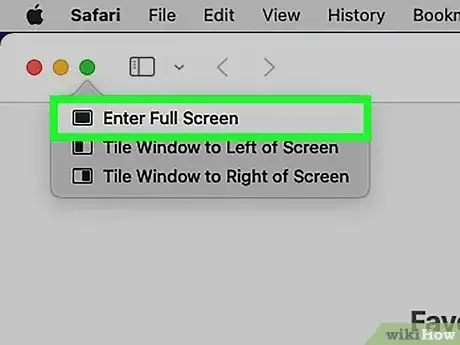
1Check if the application you are running supports full-screen mode. If it does, you will see a full-screen icon that looks like two diagonal arrows in the top-right of the program window.
- OS X Lion is the first version of the OS X operating system to offer full support for running applications full screen. When you run a program in full-screen mode, it creates its own desktop space.
-
2Click the icon to switch to full-screen mode. Use the methods above to switch between your spaces, one of which will now contain only your full-screen application.
-
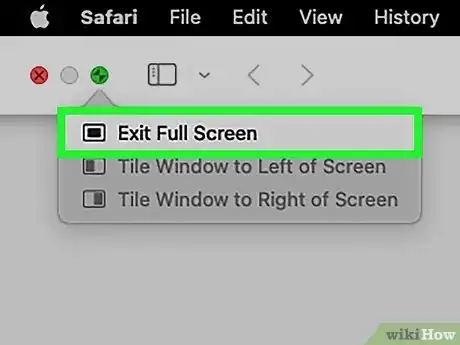
3Leave full-screen mode when finished. To switch a full-screen program back to normal, move your mouse to the top right corner of the screen. Click the blue icon that appears in the top right of the full-screen program window. Your program will return to its original space.[3]
Moving Applications Into Spaces
-
1Drag the application you wish to move. If you wish to move an open program to a different space, just drag it right to the edge of the screen. After a two-second pause, the program will move into the next space along.
- Spaces in OS X Lion allows you to expand into other desktop spaces while you work, without visiting Mission Control.
- If dragging isn't an option for you, you can instead hover your cursor over the application's title bar. At the same time, press and hold the trackpad or mouse, then press the Ctrl + Right/Left arrow keys to move the application one space to the right or left.
-
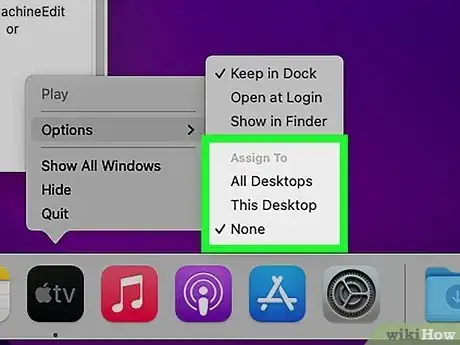
2Decide how you want the application to open. Click and hold an app's icon in the Dock to get more options about how the application opens:
- All Desktops: the app will open in every space.
- This Desktop: the app will only open in your current space.
- Desktop on Display [X]. If you have more than one monitor open, this app will only open on the space on the specific monitor.
- None: this app opens in whichever space you're using at the time.
Assigning Apps to Spaces
-
1Go to the Space where you want to assign the app. You can do this by accessing Mission Control and clicking the space you want to use.
-
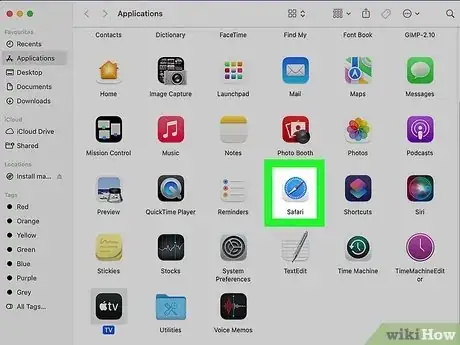
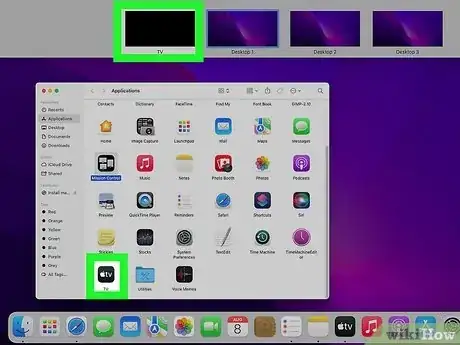
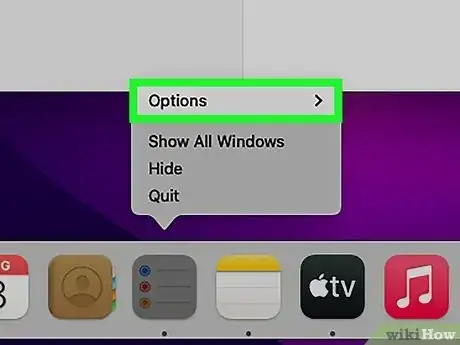
2Right-click or two-finger click an application. A menu will pop up at your cursor. You can find the app icon in the Applications folder in Finder or in the Dock.
-
3Click Options. This will open a new window where you can further customize this app.
-
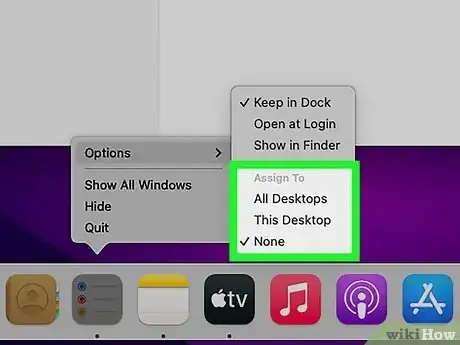
4Choose when your app opens in the space. If you're working from home and need a specific program to open with a group of other apps and programs, click This Desktop so that the app always opens in the space that's currently active.
- Choose All Desktops if you want the app to open in all spaces.
- Choose Desktop on Display [X] if you have multiple monitors connected and only want the app to open on a specific space on a specific display.
- Choose None if you don't want it to open in any specific space and it'll open in your current space instead.[4]
- After you do this, that app will open in the specified space only. To change that, go to System Preferences > Mission Control and deselect the checked box for switching.
Community Q&A
-
QuestionHow can I put different windows from the same app in different spaces?
 Community AnswerClick the windows tab in the top bar, and select "open new window." Position the new windows however you like.
 -
QuestionHow do I delete multiple spaces (I currently have 264)?
 FancyghostCommunity AnswerYou should be able to hold the Command key as you click multiple spaces. Then you can right click and take action on them.
References
- ↑ https://support.apple.com/guide/mac-help/aside/mchl2e58adda/10.13/mac/10.13
- ↑ https://support.apple.com/guide/mac-help/work-in-multiple-spaces-mh14112/10.13/mac/10.13
- ↑ https://support.apple.com/guide/mac-help/use-apps-in-full-screen-or-split-view-mchl9c21d2be/10.13/mac/10.13
- ↑ https://support.apple.com/guide/mac-help/work-in-multiple-spaces-mh14112/mac






-Step-6.webp)


