wikiHow is a “wiki,” similar to Wikipedia, which means that many of our articles are co-written by multiple authors. To create this article, 11 people, some anonymous, worked to edit and improve it over time.
This article has been viewed 79,979 times.
Learn more...
There are many websites on the internet that allow you to share your photographs. One of the most popular and successful of these is Shutterfly.[1] Shutterfly not only provides a place for you to upload and share your photos, but also allows you to order professional prints and a variety of other products with your images on them, such as mugs and photo books. These instructions will get you started with Shutterfly, teaching you how to create an account, upload and share photos, and access the other features the Shutterfly's website offers.
Steps
Creating an Account
-
1Go to the Shutterfly website.
-
2Review the terms of use and privacy policies. While it's easy to skip over this information, there are a few features that should be noted before you decide to use Shutterfly. For example, Shutterfly does not allow certain types of images,[2] and does collect information about you which may be shared with third parties, unless you opt out.[3]Advertisement
-
3Create an account. If you aren't already signed up, an account creation window should open automatically when you go to the website. Creating an account is simple: just enter your name and email address in the spaces provided, and create a password.
- If the account creation window doesn't open automatically, just click "sign up" in the upper right-hand corner of your screen.


Uploading Your Photographs
-
1Transfer your photos to your computer. If you don't know how to do this, consult the instructions for your camera, phone, or tablet for details.
-
2Open your Shutterfly page. Click on "My Shutterfly" at the top of the screen. This will take you to your personal Shutterfly page.
- Once you've logged into your account, most of Shutterfly's functions can be accessed from your "My Shutterfly" page.
-
3Prepare to upload your pictures. Once you've opened your Shutterfly page, click the "Add pictures" button. This will take you to another screen that allows you to select the files you want to upload and create an album to put them in.
-
4Select your pictures. Click the "Choose files" button. This will allow you to select pictures saved on your computer that you wish to upload. To upload several photographs at once, hold down the "CTRL" key on your keyboard as you click on the photos you want to upload. Then click "Open."
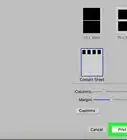
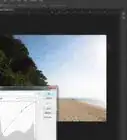
- Shutterfly only accepts photographs in JPG or JPEG formats. If your photographs are saved as some other type of file, you will need to convert them.
- If you need to convert your pictures to JPEG format, even the most basic graphic creation programs will allow you to do this. For example, in Microsoft Paint, just open the picture you need to convert, then choose "Save as" and select the JPEG format. This creates a new copy of your picture in the desired format.
-
5Create an album and upload your pictures. Once you've selected your images, enter a name for the album of photos you're about to upload in the bottom left-hand corner of the screen. Then click the "Start" button.
- For example, if the pictures are from a trip to the Grand Canyon, you might call the album "Grand Canyon 2014."
- If you've already created an album and wish to upload your photos into it, select "upload to an existing album" and choose the appropriate album from the dropdown menu below.
-
6View your pictures. Once your pictures are done uploading, you can view them by clicking the "View pictures" button. You can also view them at any time by clicking on the "My Pictures" option at the top of the homepage.
- You can view your photos individually by clicking on them one at a time, or use the slideshow option to view them sequentially.


Sharing Photographs
-
1Decide how to share your photos with others. There are two ways you can share your photos on Shutterfly: via email or by setting up a Share Site page where people can view your pictures.
- Sending your pictures via email is the simpler method, and may be easier for users who are less experienced with computers. The next few steps explain how to share pictures in this way.
-
2Start the sharing process. Return to your "My Shutterfly" page and scroll down to the third module, entitled "My shared pictures and projects." Click on "Share pictures." From the next screen, click the "Get started" button on the right side of the screen.
- The "Get started" button is for people who haven't shared pictures before. Next time you want to email your pictures, you'll be able to skip this.
-
3Select pictures to share. A new screen will open that allows you to select the images or albums you wish to share. When you're done, click "Next."
- To choose pictures individually, browse through your pictures, selecting the ones you wish to share.
- While browsing an album, you can choose to share all the pictures in it using the "Share this album" link in the top right-hand corner of your screen.
- You can share up to 250 pictures at a time.
-
4Send your pictures. A new screen will appear that will prompt you to enter the email addresses of the people you want to share with, along with a subject for the email and any message you'd like to include with your photos. When you're done and ready to send your pictures, click "Share now."
- After you share your pictures, you can choose to save the email addresses you sent them to for future use. If you often send photos to the same groups of people, you can also create groups within your Shutterfly address book using the "Add group" button.
-
5Share your photos with a Share Site. A Share Site is a secure, personal website where viewers you authorize can see your pictures. You can make your Share Site accessible to everyone, or you can limit access to specific people. Click the "Share" tab at the top of the page, and in the Share Sites box, click the "Create a site" button to get started. Creating a Share Site is a bit more involved than sending photos by email, but the Shutterfly website walks you through the process step by step.
- If you want to set up a Share Site and are having problems navigating the process, Shutterfly also provides a document with detailed instructions.


Creating Photo Products
-
1Decide what you want to create. In addition to sharing your pictures online, Shutterfly also allows you to order prints of your photographs, to create customized greeting cards and invitations, and to create photo books, mugs, and a variety of other items.
-
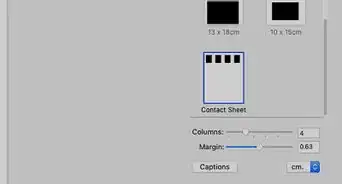
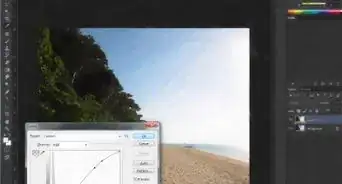
2Order prints. Ordering prints is simple. Start by opening the "My Pictures" tab, selecting the photographs you want, and clicking the "Print" option near the top of the page. From here, you can select the size and quantity you want, and choose to either have them shipped directly to you or to pick them up at any Target store.
-
3Order cards or photo books. Similarly, cards and photo books can be created using the corresponding options near the top of the "My Pictures" page. Step by step instructions will guide you through the creation of these products.
- Photo books are professionally printed albums. When you design one through Shutterfly, you can choose from a variety of sizes and styles. The Shutterfly website walks you through the process, but if you run into difficulties, they also provide detailed written instructions.
-
4Order photo gifts. Using Shutterfly, you can turn your photographs into mugs, candles, ornaments, calendars, photo quilts, and much more. You can click "More products" in the top right-hand corner of the "My Pictures" screen, or open the "Store" tab to browse the numerous options.
- Creating these products is a little more complicated, but again, the website guides you through the steps of turning your photographs into many types of gifts and keepsakes.


Community Q&A
-
QuestionHow do I delete blank pages in my photo book?
 Community AnswerClick "delete," or go under "options" to delete the blank pages.
 -
QuestionWhat is turnaround time?
 Community AnswerWhen using a website like Shutterfly you must give them some time to create whatever type of book it is you are trying to make. Turnaround Time simply means, the time it takes for Shutterfly to create your book and have it shipped. For example, a quick turnaround time is 2-3 days because they are saying they can have the book in your hands by the third day (excluding weekends).
 -
QuestionCan I add a caption to an individual photo?Community AnswerYes, you can add a caption to any individual photo that you would like.
Warnings
- If you opt to create a Share Site, make sure your privacy settings do not allow unwanted visitors to view your photographs.⧼thumbs_response⧽
- Similarly, if you are creating a Share Site for your child's sports team or class play, make sure your security settings are appropriate and that you aren't posting personal information about children that could fall into the wrong hands.[6]⧼thumbs_response⧽


-Step-53.webp)


References
- ↑ http://www.businessweek.com/articles/2013-01-03/shutterflys-improbably-long-survival-and-success
- ↑ http://shutterfly-inc.com/terms.html
- ↑ http://shutterfly-inc.com/privacy.html
- ↑ http://www.shutterfly.com/mobile/index.jsp
- ↑ http://www.techhive.com/article/2046150/hands-on-shutterfly-photo-story-for-ipad-dispatches-photo-books-with-narration.html
- ↑ http://www.motherjones.com/politics/2013/05/shutterfly-teamsnap-eteamz-ssl-hackers-kids-data
About This Article
To use Shutterfly, start by creating an account and opening your personal Shutterfly page to “Add pictures.” Once you click this button, you will be able to select the files you want to upload and create an album to put them in. Since Shutterfly only accepts photographs in JPG or JPEG formats, save your photo in either of these formats. After you select your photos, name your album and save it to your page. Additionally, use Shutterfly to share images with others by setting up a Share Site page. To learn how to order prints of your photographs from Shutterfly, keep reading!