This article was co-authored by wikiHow Staff. Our trained team of editors and researchers validate articles for accuracy and comprehensiveness. wikiHow's Content Management Team carefully monitors the work from our editorial staff to ensure that each article is backed by trusted research and meets our high quality standards.
This article has been viewed 37,686 times.
Learn more...
Printing photos can be a low-cost way to preserve precious memories. With the proliferation of smartphones and social media, it is becoming increasingly less common to take the time to print photos but many people still prefer to have physical photos to keep and cherish. There are many options for printing photos, including printing them yourself, ordering prints online, or printing them in a store.
Steps
Printing Photographs at Home
-
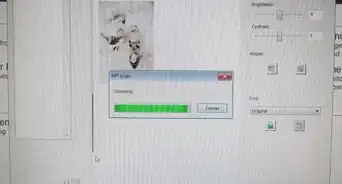
1Purchase a pigment printer. For best quality, you should obtain a pigment printer that is used primarily for producing high-quality prints. A pigment printer will place the ink on top of the paper, whereas a dye printer sinks the ink into the paper. The difference can be quite significant in terms of how long the photo will last.
- Pigment-printed photos are rated for 200 years, whereas dye-printed photos can fade within a few months or years, depending on sunlight exposure.[1]
-
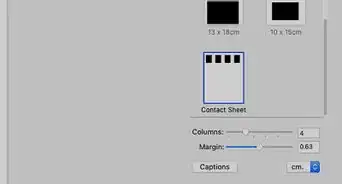
2Choose the photo size. The 4" x 6" and 5" x 7" photographs are ideal for albums and scrapbooks. The 8.5" x 11" or 8" x 10" photo paper works well for printing 8" x 10" photographs that you plan on framing or displaying, including family portraits and wedding photos. When printing the photos, purchase the photo paper of the size that you would like, then select the size from the print menu or on the printer itself, if it has an interactive screen.
- Load the photo paper into the tray of the printer. There should be an instruction manual to point out where the paper tray is. If you don't have the manual, these can often be found online with a quick Google search.
- You may have to purchase a special printer that can accommodate larger prints if that is what you desire.
Advertisement -
3Choose the photo paper finish. You can choose a glossy or matte finish, or a finish somewhere in between the two. The “finish” refers to how shiny the photograph will be once it is printed onto the photo paper. Glossy paper will give you deep, vibrant colors. A matte paper offers you a rich texture and resists fingerprints. A luster finish will be between matte and glossy.[2]
- Glossy is great for showing the details and colors of the photo but is susceptible to glare when a light is reflecting off the surface of the photo. It is also prone to retaining fingerprints if someone handles the photo with greasy or sticky fingers.
- Luster is popular with professional portrait photographers, particularly for wedding and family portraits. The balance between glossy and matte makes for a nice, professional finish.
- Matte finishes are great for reducing the glare on a photograph by deflecting the light and will also prevent fingerprints from sticking to its surface. A matte finish is ideal for photos that are frequently handled.
-
4Choose your ink cartridges. Most printers will come with a recommended set of color cartridges to purchase or will manufacture cartridges that are made specifically for your printer model. You may not be able to purchase third-party ink cartridges if your printer only accommodates cartridges of a certain size or shape. Before purchasing your printer, find out what cartridges it requires or accepts so that you know what to expect when purchasing cartridges in the future.
- Printer ink is often purchased from office supply stores, such as Staples. It can also be purchased online from Amazon.com or any office supply stores that offer online ordering.
- The ink cartridges are usually found within its own tray of the printer. You may have to pull this tray out to access the cartridges.


Printing Photographs Online
-
1Sign up for an account with a photo printing company. You can create an account to print photos with a reputable photo printing company such as Snapfish, Shutterfly or Kodak. There are certain big box stores that will have online portals to order photos online, such as Meijer. The images can then be picked up in a store near you or shipped to you.[3]
- Visit the website of the company you have chosen to print your photos.
- If you are not already a member, click “Join Now” or “Sign Up,” usually in the upper right or left corner of the website. If you are a member, log into your account.
-
2Upload your photographs. Once you are logged in, follow the prompts to upload your images. This option is often found at the top menu on the website and should say something like “Order Prints” or “Upload Photos.” Click on the appropriate menu item to begin uploading your images. You may also be prompted to crop your photos at this time.
- Select the photographs that you would like to print, then select the size and quantity. You may have to do this one photo at a time, depending on how the service provider designs the process.
- Glossy photos will have a very shiny appearance whereas luster will have a much more subtle shine. Since you will not be able to physically see the difference, keep in mind that is generally best to choose a glossy finish if you want to display vivid colors but can retain fingerprints, whereas luster will not show colors as vividly but can better resist fingerprints.
-
3Review your purchase. When you are finished uploading your images and are satisfied with the size and quantity of each one, review your order. This information should including shipping costs and will require you to enter your credit information. Make sure that everything is correct before finalizing the order. Once you are finished, all that's left to do is wait for your prints to arrive!


Ordering Photographs for In-Store Pickup
-
1Go to a store that offers photo printing services. There should be stores near you that offer photo printing services, such as CVS, Walgreens, or a large store like WalMart. There may also be specialty photo printing shops nearby. Conducting a quick search on a search engine should yield results for printing shops near you. For example, you can type “photo printing shop in Detroit, MI” into a search engine to pull up results for your area.
-
2Visit the in-store kiosk. There should be an area dedicated to photo printing. There should be sales associates available to assist you as well as a couple of kiosks (also known as a computer station) where you can upload your photos. Some kiosks will allow you to upload images directly from your smartphone or you can bring a flash drive with all of your images with you to the store. If you need assistance, a clerk should be available to assist you with your printing needs.
- Select the format. In-store kiosks will often give you the option of making special prints, such as photo books, calendars, posters, and even mugs or T-shirts. Simply select the option that you are looking for, such as standalone prints. You can also do more than one format if you desire.
- Choose the size and quantity. Once you have your images uploaded to the computer at the kiosk, you will be prompted to choose size and quantity of the images to be printed. This may be done one photo at a time and should allow you the opportunity to adjust or crop the images so that they fit the print perfectly.
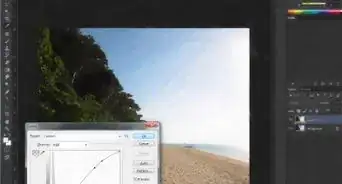
- Make adjustments such as zooming, color adjustment, changing the image to black and white and more, while placing your order.
- Select either the one-hour or multiple-day option. This timeframe refers to when you will be able to pick up your photos. Most stores now offer a pickup time within the same day; however, if multiple-day rates are offered, they are generally less expensive.
-
3Finalize your order. The system may already send the data to the printing clerks or it may issue a ticket confirming your order number. If you placed your order online for in-store pickup, print out and retain a copy of your order confirmation. You may also receive an email confirming your order if you entered that information while working at the kiosk.
-
4Pick up your photographs. Your confirmation email or ticket may have the pick-up information but some places will send you an email when it is ready to be picked up. Most stores will have the order filed by last name, and that alone should be sufficient for pick-up. Having your redemption ticket or online confirmation handy will aid the sales associate if they have any issues locating your order.


Warnings
- Make sure to pay close attention to detail when ordering prints, as it can be easy to pick the wrong size, quantity, or photo finish.⧼thumbs_response⧽

-Step-53.webp)

References
About This Article

To print photos at home, start by getting some photo paper in the size that you want your photos to be. Go with glossy photo paper if you want deep, vibrant colors, or try matte paper if you want a rich texture that doesn't show fingerprints. Next, load the photo paper into the paper tray on your printer. Finally, print your photos onto the paper one at a time, making sure each one is aligned properly so none of the photo gets cut off. To learn how to order photo prints online, scroll down!


-Step-53.webp)


