X
This article was co-authored by wikiHow Staff. Our trained team of editors and researchers validate articles for accuracy and comprehensiveness. wikiHow's Content Management Team carefully monitors the work from our editorial staff to ensure that each article is backed by trusted research and meets our high quality standards.
This article has been viewed 28,253 times.
Learn more...
Water, coffee, and other liquid spills can put your laptop out of commission. Before your laptop succumbs to an expensive disaster, follow our guide for buying and creating waterproof protective laptop gear.
Steps
Method 1
Method 1 of 3:
Buying Protective Gear
-
1Get a silicone or plastic keyboard cover. Spills on your keyboard can the most damaging of them all. The tiny holes underneath many laptops’ keys can allow liquids to do quick damage to the machine. Water-resistant keyboard covers fit directly on top of the keys, preventing liquids from slipping in.[1]
- You can also use keyboard covers to personalize your laptop. Some even come in rainbow colors!
- If you can, visit an electronics shop to test the covers. They can make it more difficult to type, so you should pick the one you think you’ll adjust to most quickly.
- Buy a keyboard cover made specifically for your laptop. It needs to be a snug fit to work correctly.
-
2Invest in a waterproof case. Choose a customized case that fits right over the top and bottom halves of your laptop. Many of these cases are heavy plastic, which is a good water-resistant material. The case will leave the side ports and fan on the bottom of the laptop exposed, so don’t expect it to protect against anything but small spills.
- Generally, cases will only fit correctly if they’re made specifically for your laptop.
Advertisement -
3Choose a padded waterproof sleeve. Look for a sleeve that’s labeled “waterproof” or “water-resistant.” Some of these sleeves may even contain an outer and an inner bag for extra protection. This will keep your laptop dry when you’re on the move or traveling.[2]
- Nylon and neoprene are both water-resistant materials.
- You don’t need to buy a sleeve made just for your laptop. Instead, look for a sleeve that’s the right size.
-
4Find a carrier made of water-resistant materials. For a final layer of protection, make sure your travel bag is also waterproof. Most backpacks and purses will only hold up against a small amount of liquid. Choose carriers that are made specifically to resist a good soaking.[3]
- This is especially important if you bring your laptop along on outdoor excursions frequently. It’s also not a bad idea if you have an outdoor commute to and from work.
-
5Shop around for the best deals. Laptop accessories can get pretty pricey. Choosing the extra perk of water resistance can make that price tag jump even higher. Look in several spots to compare prices before settling down to buy your gear.
- Big electronics retailers may have better deals and sales than laptop manufacturers.
- If you make your purchase online, see if you qualify for free shipping. Otherwise, you’ll need to factor in that additional cost.


Advertisement
Method 2
Method 2 of 3:
Making Your Own Gear
-
1Pick a good workspace. You’ll need some room for cutting and taping. Pick an empty, sturdy table in a room with good lighting.
-
2Cut a few sheets of clear polyethylene. Measure your laptop. Use scissors to cut three sheets of polyethylene that are a few inches (or several centimeters) longer than your laptop’s measurements.[4]
- You can purchase clear polyethylene sheets at hardware stores or online.
-
3Tape the sheets over the surfaces of your laptop. Place the sheets on the surfaces of your laptop and use scissors to trim off the excess. Use duct tape to secure the sheets to the outer sides of your laptop and over the keyboard and trackpad. Don’t cover the trackpad with tape.[5]
- If your laptop has a fan on the bottom, you’ll need to cut a hole to leave this exposed.
- Don’t cover up any ports or openings on the sides of the laptop.
- Before you tape down the surface covering the keyboard, press on the sheet to make it fit as closely as possible above the keys.
-
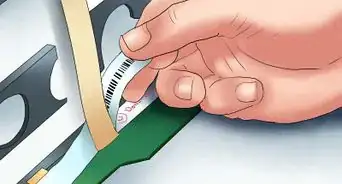
4Cover the borders of the laptop with 40 mil PVC liner. Measure the length and width of all the outer edges of your laptop. Use scissors or a utility knife to cut four curved pieces of PVC liner. Use duct tape to attach the pieces to the edges of your laptop. Only tape them on top. You should be able to flip them up to expose any ports or openings.[6]
- You can purchase PVC liner online or at hardware stores.
- It’s best to go for 40 mil or thicker.
- This flip-up skirt will allow liquids to drain off the sides in case of a spill.
-
5Make plugs for the ports with custom earplug putty. Go online to find customizable earplug putty. Use a cotton ball dipped in mineral oil to lubricate the ports and openings on the sides of the laptop. Then push the putty in the openings and allow them to harden for about five minutes. You now have custom watertight plugs![7]
- You can purchase mineral oil at your local pharmacy.
-
6Tape together two pieces of neoprene to make a sleeve. Go online to buy a swath of neoprene fabric. Cut two sheets that are about 1 inch (2.54 cm) longer than your laptop. Use duct tape to connect the two sheets, leaving only one opening along a shorter side.
- To create a closure, buy adhesive velcro strips and place them on the inside of the opening.
- If you’re good at sewing, skip the tape! Just sew the two sides together using a thick needle and water-resistant thread. You can also sew in a zipper for the opening.


Advertisement
Method 3
Method 3 of 3:
Avoiding and Troubleshooting Spills
-
1Keep liquids and foods away from your laptop, if possible. If you can, avoid eating or drinking near your laptop. This is the best way to ensure that you don’t spill anything on it.[8]
-
2Cover any cups that are near your laptop. If you work for several hours or most of the day on your laptop, you probably won’t be able to keep all liquids away from it. Choose coffee and water cups with covers. Drink soup from a thermos. You can also keep a good foot (about 30 cm) of space between liquids and your laptop. A little extra reaching is better than a tragic spill![9]
-
3Unplug any AC adapters if you do spill. Immediately after you spill any liquids, unplug the charger from the wall and disconnect it from your computer. This will stop electricity from flowing to the battery.
-
4Turn off your laptop right after a spill. Shut down your laptop as quickly as possible. The faster you’re able to turn off the computer, the more likely it is that your computer can be fixed. If nothing else, this should protect your files.
- Resist the urge to turn the laptop back on. It’s important to wait until you’ve either disassembled and cleaned it yourself, or have taken it to a repair shop.[10]
-
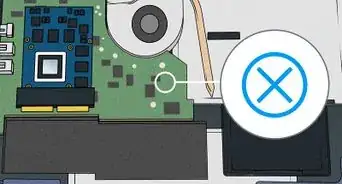
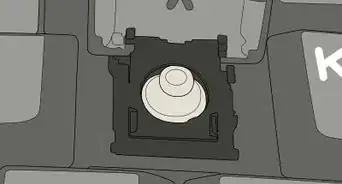
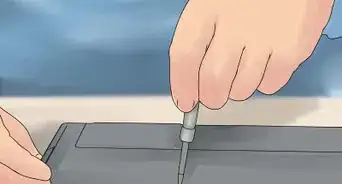
5Remove the battery. If you know how, take out the battery. Set it aside. If you don’t know how to remove the battery, go online to find instructions on your manufacturer’s website.
- It should be pretty easy to remove most laptop batteries. You shouldn’t need any special tools or experience with electronics.
-
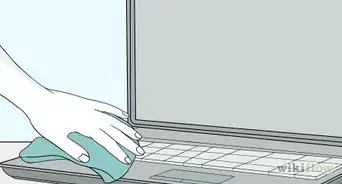
6Wipe off any liquid that’s on the outside of your computer. Use a soft, lint-free cloth to wipe up excess liquid so it stops seeping into the laptop. Completely dry the outer surfaces of the laptop and the space on the inside where you’ve removed the battery. Dry off the battery if it’s also wet.
-
7Turn the laptop upside down to drain for at least 12 hours. Put the laptop on its side, laying the surface with the most openings flat on a desk or table. Once it’s drained all day or overnight, use your lint-free cloth to wipe up any liquid that came out of the computer.[11]
- Don’t use a blow dryer to try to speed up the drying process.
-
8Disassemble your computer if you’re experienced with electronics. Disassembling most computers requires tools and knowledge about how to take it apart and put it back together again. If you don’t have those tools and experience, it’s a much better idea to see a professional.[12]
- Laptops are expensive machines, so don’t test your skills unless you’re sure you know what you’re doing.
-
9Go to a repair shop if you don’t know how to take it apart. Many large electronics retailers have laptop repair shops. Your laptop’s manufacturer may also have a store you can visit to get the computer checked out. Go online to look up your options, and then make some calls to get price estimates.[13]
- You may find that repair shops aren’t willing to give estimates without seeing the machine first. To encourage them to give you an idea, you can say something like: “I know you’re not able to tell me exactly how much this will cost, but how much does it typically cost to repair laptops that have gotten wet?”


Advertisement
Warnings
- DIY waterproofing solutions may not be as effective as the ones you pay for. They may also make it more difficult for you to use your laptop, so only go this route if you need to.⧼thumbs_response⧽
Advertisement
Things You’ll Need
- Keyboard cover
- Laptop case
- Neoprene or nylon sleeve
- Water-resistant carrier
- Polyethylene sheets
- Scissors and a utility knife
- 40 mil PVC liner
- Customizable earplug putty
- Mineral oil
- Cotton balls
- Neoprene fabric
- Duct tape


References
- ↑ http://www.bbc.com/travel/story/20121213-six-ways-to-shield-your-laptop
- ↑ http://www.wisebread.com/the-5-best-waterproof-laptop-cases
- ↑ http://www.wisebread.com/the-5-best-waterproof-laptop-cases
- ↑ http://www.popularmechanics.com/technology/gadgets/how-to/a5455/4327743/
- ↑ http://www.popularmechanics.com/technology/gadgets/how-to/a5455/4327743/
- ↑ http://www.popularmechanics.com/technology/gadgets/how-to/a5455/4327743/
- ↑ http://www.popularmechanics.com/technology/gadgets/how-to/a5455/4327743/
- ↑ https://appuals.com/how-to-protect-your-laptop-from-water-damage/
- ↑ https://appuals.com/how-to-protect-your-laptop-from-water-damage/
- ↑ http://www.dummies.com/computers/pcs/what-to-do-when-you-spill-something-on-your-laptops-keyboard/
- ↑ https://appuals.com/how-to-protect-your-laptop-from-water-damage/
- ↑ https://appuals.com/how-to-protect-your-laptop-from-water-damage/
- ↑ https://appuals.com/how-to-protect-your-laptop-from-water-damage/
About This Article

wikiHow Staff
wikiHow Staff Writer
This article was co-authored by wikiHow Staff. Our trained team of editors and researchers validate articles for accuracy and comprehensiveness. wikiHow's Content Management Team carefully monitors the work from our editorial staff to ensure that each article is backed by trusted research and meets our high quality standards. This article has been viewed 28,253 times.
How helpful is this?
Co-authors: 5
Updated: December 17, 2021
Views: 28,253
Categories: Laptop Maintenance and Repair
Advertisement