This article was co-authored by wikiHow staff writer, Travis Boylls. Travis Boylls is a Technology Writer and Editor for wikiHow. Travis has experience writing technology-related articles, providing software customer service, and in graphic design. He specializes in Windows, macOS, Android, iOS, and Linux platforms. He studied graphic design at Pikes Peak Community College.
The wikiHow Tech Team also followed the article's instructions and verified that they work.
This article has been viewed 158,287 times.
Learn more...
While Samsung Galaxy phones provide lots of bells and whistles for users, some seem to develop a laggy camera. If your camera is taking too much time to focus on the image or is delayed in taking the picture after you tap the Capture button, there are some possible solutions. The cause may be extensive memory usage and software problems. You may also be using a resolution that is too high. Sometimes the camera just gets laggy as the phone gets older. If your Samsung Galaxy’s camera appears laggy, you can try some safe troubleshooting before bringing it into an authorized Samsung Galaxy service center. This wikiHow teaches you how to fix a laggy camera on a Samsung Galaxy.
Steps
Rebooting the Device
-
1Press and hold the Power button on your phone. The power button is on the right side of your phone. This displays the Power menu.
-
2Tap Restart. It's the second option in the Power menu.Advertisement
-
3Tap Restart. This confirms that you want to restart your device and reboots your device.
-
4Try the camera out. Tap the stock Android camera app, which is usually the plain camera icon, to open the camera. Point it at an object, and press the Capture button on the screen. If it still lags, try another method.


Changing the Camera Setting
-
1Open the camera app. Do this by tapping on the camera icon from the home screen or app drawer.
-
2
-
3Tap Rear picture size. It's the first option below "Pictures." This allows you to change the resolution of your pictures on your rear-facing camera.
-
4Tap Resolution. It's below the aspect ratio you have selected. This allows you to change the resolution of your camera.
-
5Tap a lower resolution. Using a lower resolution will reduce the amount of data your phone needs to process. This will lower the amount of lag on your camera. Tap the back arrow in the upper-left corner to return to the Camera Settings menu when you are finished.
-
6Tap Front picture size. It's the second option below "Pictures." This allows you to change the resolution of your pictures on your front-facing camera.
-
7Tap a lower resolution. There are only a few image sizes available for the front-facing camera. Tap a lower image to reduce the amount of data your phone needs to process. This will reduce the amount of lag. Then tap the arrow in the upper-left corner to return to the Camera Settings menu.
-
8Tap Rear video size. It's the first option below "Videos." This allows you to change the resolution of your videos.
-
9Tap Resolution. It's below the aspect ratio you have selected. This allows you to change the resolution of your videos.
-
10Select a lower resolution. If you have UHD or QHD selected, you may want to select FHD or HD instead. If you have 60 frames-per-second (FPS) selected, you may also want to bump it down to 30 FPS. Tap the arrow in the upper-left corner to return to the Camera Settings menu.
-
11Tap Front video size. It's the second option below "Videos." This allows you to change the resolution of your videos on your front-facing camera.
-
12Tap Resolution. It's below the aspect ratio you have selected. This allows you to change the resolution of your videos.
-
13Select a lower resolution. If you have QHD selected, you may want to select FHD or HD instead. Tap the arrow in the upper-left corner to return to the Camera Settings menu.
-
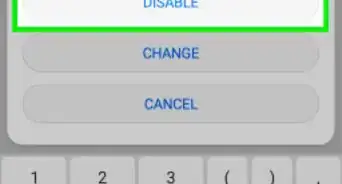
14Disable “Disable Stabilization.” If you have Video Stabilization turned on, tap the toggle switch next to Video Stabilization to turn it off.
-
15Turn HDR off. High dynamic range (HDR) provides a little extra color in your photos and videos. If you find your camera is lagging, you may want to turn it off. Tap the toggle switch next to HDR to turn it off.
-
16Take a picture. Point it at an object, and press the Capture button on the screen. If it still lags, try another method.


Clearing the Cache Memory
-
1
-
2Scroll down the menu and tap Apps. A list of all installed apps will be displayed.
-
3Select the Camera app. The App Manager usually lists all apps in alphabetical order, so scroll down to C, locate the Camera app, and tap it.
-
4Tap Storage. This displays how much storage is being used by the Camera app.
-
5Tap Clear Cache. It's at the bottom of the screen on the right. Wait for the process to complete. Depending on the size of the cache, this usually takes a few seconds.
- Clearing the cache will not affect any saved image files; this only removes temporary files created by the app.
-
6Try the camera out. Tap the stock Android camera app, which is usually the plain camera icon, to open the camera. Point it at an object, and press the Capture button on the screen. If it still lags, try another method.


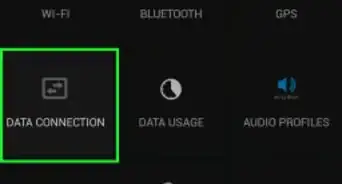
Updating the System Software and Other Updates
-
1
-
2Scroll down and tap Software Update. It's near the bottom of the Settings menu.
- On some models, it may say "System Update."[1]
- It takes some time to check whether the updates are available. The time depends on the speed of your Internet connection.
-
3Tap Download and Install. This will check to see if an update is available. If an update is available, it will download and install automatically. If no update is available, you will be informed that your phone is up-to-date.
- It takes some time to download updates on your phone. The time depends on the speed of your Internet connection and on the size of the update file. A progress bar will appear displaying the status of the update.
-
4Reboot. Once the download has been complete, use the following steps to reboot your phone:
- Press and hold the power button on the right side of your phone.
- Tap Restart
- Tap Restart to confirm.
- Wait for your phone to restart.
-
5Try the camera out. After the device has rebooted, tap the stock Android camera app, which is usually the plain camera icon, to open the camera. Point it at an object, and press the Capture button on the screen.


-on-Samsung-Galaxy-Step-17.webp)

About This Article

1. Open the Camera app.
2. Tap the gear icon in the upper-right corner.
3. Lower the picture resolution for the front and rear-facing cameras.
4. Lower the video resolution for the front and rear-facing cameras.
5. Turn off image and video stabalization.
6. Turn off HDR.
7. Open the Settings menu.
8. Tap Apps and open Camera.
9. Tap Storage.
10. Tap Clear Cache at the bottom.
11. Update your Samsung Galaxy.
12. Reboot your phone.