This article was co-authored by Luigi Oppido. Luigi Oppido is the Owner and Operator of Pleasure Point Computers in Santa Cruz, California. Luigi has over 25 years of experience in general computer repair, data recovery, virus removal, and upgrades. He is also the host of the Computer Man Show! broadcasted on KSQD covering central California for over two years.
wikiHow marks an article as reader-approved once it receives enough positive feedback. In this case, 100% of readers who voted found the article helpful, earning it our reader-approved status.
This article has been viewed 50,694 times.
When doing genealogy research, or even just looking through old photos, there can be a desire to "digitally preserve" old photo albums. Potentially, digital versions can be preserved for longer in different ways and it also allows for sharing with other people and family members. It is no small task to digitize existing photo albums, but this article has some very helpful tips and techniques that will help in scanning, digitizing, and organizing your efforts.
Steps
-
1Gather information about each photo in the album. Do you know all of the people in the photos? Do you know where or when the photos were taken? Is this information clearly shown in the album? Sit down with your relatives and have an "album party" where you go through each photo and record who is who and any other information they know. You will learn more about your family than you ever knew before. You'll want to record those family stories as well. Record the entire session using a tape recorder if you have one. I recommend using small post-it notes to record information about each photo. You can then place the note near the photo in the album. DO NOT write on the actual photos to record the information, it will damage them permanently. And be sure that the stickiness of the post-it note will not damage the photos as well. If you don't have post-it notes or don't want to chance damage to the photos, then record the information on index cards or a legal pad, carefully recording the information for each photo from each page. Make sure you record it in such a way that it will make sense to you later after all of your relatives have gone home.
-
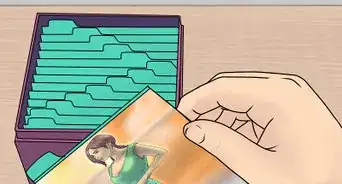
2Closely evaluate the photo album that you are going to digitize. Do the pictures come off or out of the pages easily? Can you replace them when you are done? Does the album come apart so that you can handle each page separately? Once it comes apart, can you put it back together again? Are you going to replace the old photo album with a new one? All of these are important factors in how you handle the processing of the album. If the photos cannot be removed, then you will probably be scanning the photo from the album page itself. If the photos can be removed and replaced, you will probably be scanning them off of the page directly.Advertisement
-
3Try for the best scan quality you can get, but realize it will never be perfect. Accept it now and move on with the scanning. Yes, you want to get the best quality scans from your efforts, but there will always be some degradation from the original. The scans will never be as crisp or exactly the same colors. There are ways to deal with that later. But just having a decent digital version of the photo, especially older photos, is a big step in the right direction, so don't let desired perfection get in the way of your actual work.
- You can download an app that lets you scan photos with your phone, like PhotoScan from Google.
-
4Scan the photos in batches. Scanning each photo individually would be ideal, but it will take much longer. Put as many photos as you can reasonably fit into each scan and call this a "raw" scan. You can go back later and pull out each photo individually.
-
5Include those post-it notes from your "album party" in the scan. Doing this will ensure that the information you recorded will be associated with the photo permanently in the "raw" scan. This will help later when you go to process the raw scan into individual images.
-
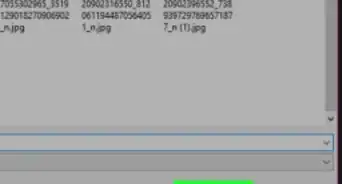
6Use a consistent naming scheme for your "raw" scans. You could just use consecutive numbers for each scan, like "000-raw", "001-raw", "002-raw", etc. Or you could use a description for each page, like "page-01-raw", "page-02-raw", "page-03-raw", etc. Think ahead about this. If you cannot remove the photos from the album pages and the pages are 10" x 12", chances are that you will need to do more than just one scan per page to get all of the photos on the page. How will you name your files then? "page01-1-raw", "page01-2-raw", etc?
-
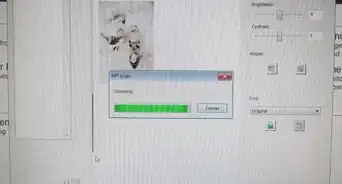
7Scan your photos at 300 dpi resolution and "millions" of colors. Going higher in the resolution or scanning in more colors will take proportionately longer and is probably not worth the effort. 300 dpi and millions of colors is typically sufficient and should match images that you would take with a modern digital camera.
-
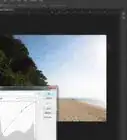
8Store the scanned images in a "lossless" format. If you are using Photoshop store them in Photoshop format (.psd). Otherwise, store them in TIFF (.tif) format with the "no image compression" option. DO NOT store your original scans in JPEG format (.jpg or .jpeg). JPEG is a "lossy" format which means that image information will be thrown away in order to compress the image to a smaller file size. You may not see a big difference when you look at the scanned images immediately, but later when you start to process and modify the images, more and more image information will be lost. So, start with a format that does not remove any image information to start with. Any modern image processing software should at least support TIFF format. The file sizes will be larger, but it will be worth it for long term storage.
-
9Clean your scanner's glass area, keep it clean during the scans, make sure the photos are free of dust and dirt, align your photos as straight as you can for each scan. All of this will mean better scan quality.
-
10Put your photos back in the album once you have finished the scanning of the photos, return the photo album to the family member that so graciously let you borrow it.
-
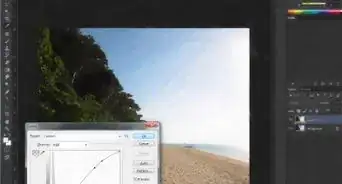
11Post process the batch raw images into individual images. Using your image software crop and copy each photo into its own file. Rotate and adjust the photos so that they are oriented correctly (sometimes when scanning it may be easier to scan a photo sideways or even upside down).
-
12Store each photo in the same "lossless" format as the original raw image.
-
13Use a naming scheme that is similar to the raw naming scheme but shows that this is an individually processed image. For example, "001-1", "001-2" or "page01-01-1", "page01-01-2". When looking at the files in the file system, the files will be "grouped" together by their file names and you will know which raw file the image came from originally.
-
14Many photos, especially older photos, are not of the "modern" dimensions of 4" x 6" or 5" x 7". This means that your images will get expanded to fit if you decide to make your own photos. You may not want this as it may cause the image to be blurry or cause portions to be cropped out. In order to avoid this, use your image software to change the dimensions of your image canvas to 4" x 6" or 5" x 7" (whichever is appropriate for the image) without resizing the existing image. Have the original image centered in the new canvas size. Now when you send the image for photo processing, the image will be the same as the original and it will be surrounded by white space. You can cut off the extra white space and mount the photo into your own photo album.
-
15Store the extra post-it note information as a "text" layer in your image file. Most modern image software, like Photoshop, allows you to add "text layer" to the file. This layer is maintained separate from the image itself, so the image is not modified. But now you can put the information around the image (like in the extra white space you added when you resized the canvas) and you will know the information for the photo.
-
16Store your final images in multiple formats for maximum future compatibility. Different software or services need certain image formats. Image formats come and go. Storing in multiple formats ensures that you have formats you need and formats that will probably be supported in the future. I recommend the following formats: JPEG, TIFF, and Photoshop. Scanned images should not be stored in JPEG, but processed images, when completed, should have a version stored in JPEG format. Most photo processors will only work with JPEG format when you want to print the images, so you will need to have JPEG versions. Just don't use the JPEG version for further image modification, instead use the TIFF or Photoshop versions. TIFF and Photoshop (if using Photoshop) versions are stored to maintain the lossless versions of the image and to allow for different formats to be available. Not all image software can read Photoshop format, but most can read TIFF format. Having them ensures future compatibility.
-
17Store your raw and final images onto a CD or DVD. Include a "README" text file that explains what it is (the photo album history) and what you did (how you organized the images and files).
-
18Send a copy of the final CD/DVD to the family member that let you borrow the original photo album. Tell them to include it in the photo album for future generations.
-
19Send copies of the final CD/DVD to any interested family members.
-
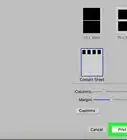
20Print your own versions of the photos, include them in your own photo album. Use the photo information you recorded as labels for the photos in your album.
-
21Make your own copies of the final CD/DVD and store them in a safe location, like a safe deposit box. If your original copy is destroyed, you have a backup.
-
22Keep your data stored in multiple locations and in multiple formats. Remember when floppy disks were 8", then 5 1/4", then 3 1/2" and then hard drives came along, then CD's, and now we have DVD's? What data is stored on changes over time and it can happen quickly. You don't want your data to be "lost" or "trapped" in a format that you can no longer read or access. So, be sure you keep it in a medium that is current and supported. If you can afford to store it in the "internet cloud," that would be great and it makes it easier to share it with others.


Community Q&A
-
QuestionIs it okay to store photos on a flash drive rather than a CD or DVD?
 amber bloomfieldCommunity AnswerThere is no problem with storing photos on a flash drive, but from my experience you should always have another copy somewhere else, because the flash drive can stop working or responding to your computer at any time.
Warnings
- Before doing anything, evaluate the condition of the photo album and the condition of the photos. Do not do anything that can cause permanent, irreparable damage to the photos. That is the worst thing you could possibly do. If you do not think the album or photos can withstand the scanning process, then consider taking digital photos of the pages instead. If you have a good camera, a good tripod, and some decent lighting, you can get some good images this way as well.⧼thumbs_response⧽
Things You'll Need
- Flatbed scanner. Today there are many multi-purpose printer/scanner/copier devices that contain a flatbed scanner that should be fine for basic scanning of photos. If you feel inclined and have a lot of photos to process, you may want to invest in a dedicated flatbed scanner. You will want the scan area to be at least 8.5" x 11", but larger is better if you can.
- Image processing software. This will be the software that you will use to scan the photos into your computer and process them later. Photoshop Elements is a lower end solution that can be used, but consider getting a copy of full Photoshop if you are going to be processing lots of photos.
- Acid-free photo album supplies. Depending on your level of effort you may be transferring the photos from their existing album to a new album as you digitize them. If you are doing this, then be sure to invest in some modern acid-free photo album pages and supplies. Don't just transfer them into some cheap photo album you picked up at the local drugstore. Photo album technology has come a long way in recent years, and the physical photos will be better preserved for the future. Any decent craft store should have acid-free photo albums, pages and protective sleeves, along with modern adhesives that will be acid-free and easier to detach should that be needed later. Think carefully about this level of effort if you are considering it.


-Step-53.webp)


About This Article