X
wikiHow is a “wiki,” similar to Wikipedia, which means that many of our articles are co-written by multiple authors. To create this article, volunteer authors worked to edit and improve it over time.
This article has been viewed 56,929 times.
Learn more...
Connecting Outlook 2010 to your personal email account allows you to read and send emails using Microsoft’s email client. To configure Outlook 2010, you must add an email account and enter your account details and login credentials via the Account Settings menu.
Steps
Part 1
Part 1 of 2:
Adding an Account
-
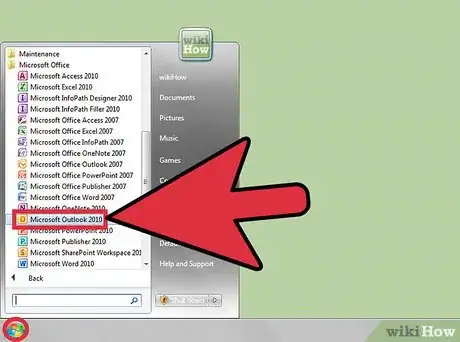
1Launch Outlook 2010 and click on “File” at the top left corner of your session.
-
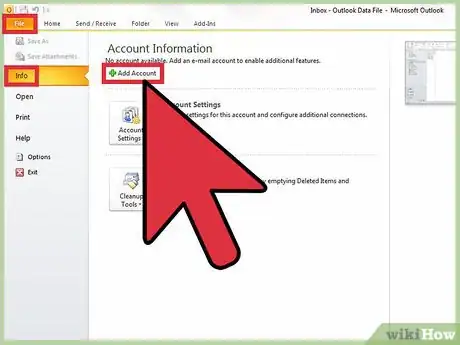
2Select “Info” from the left pane, then select “Add Account.”Advertisement
-
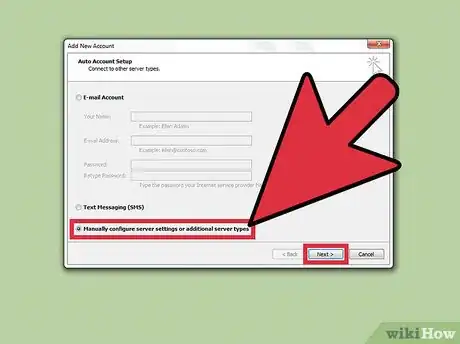
3Select “Manually configure server settings or additional server types,” then click “Next.”
-
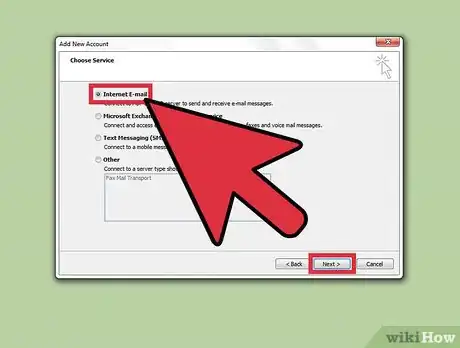
4Select “Internet Email,” then click “Next.” The Account Settings form will display on-screen.
-
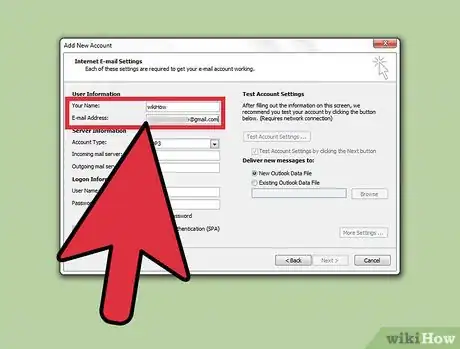
5Enter your name and email address under “User Information.” The name you enter will appear on all outbound email messages.
-
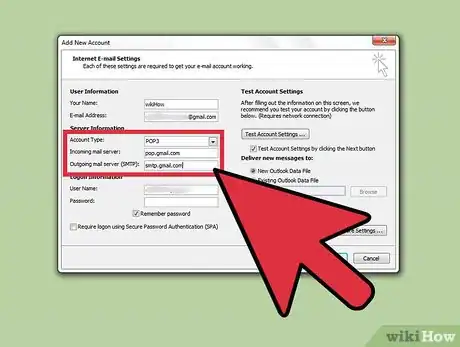
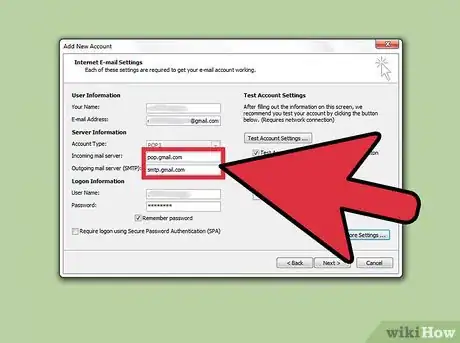
6Enter the server information for your email provider under “Server Information.” You must enter the email account type and addresses for both the incoming and outgoing servers.
- Contact your email provider to obtain the email type and correct server information. This information will vary depending on your email provider. For example, Gmail users will enter “POP3” as the email type, “pop.gmail.com” for the incoming server, and “smtp.gmail.com” for the outgoing server.
- Alternately, go to Microsoft’s website at https://support.microsoft.com/en-us/kb/2028939 to locate server information for your email provider.
-
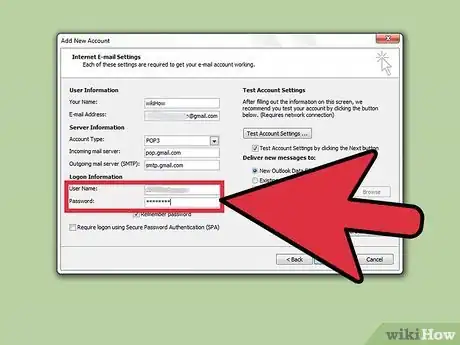
7Enter the username and password for your email account under “Logon Information.” In most cases, your username will be the portion of your email address displayed to the left of the “@” symbol.
- Place a checkmark next to “Remember password” if you want Outlook to automatically enter your email password when launching the Outlook client.
-
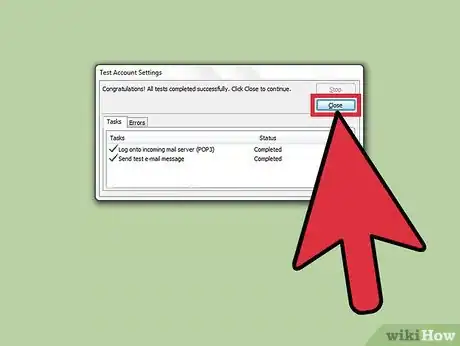
8Click on “Test Account Settings” to the right. Outlook will check to make sure you are properly connected to the incoming and outgoing servers for your email provider, and will send a test message to verify the connection.
-
9Click on “Finish,” then on “Close” when Outlook informs you the account was created successfully. You have now finished configuring Outlook 2010.[1]
Advertisement
Part 2
Part 2 of 2:
Troubleshooting
-
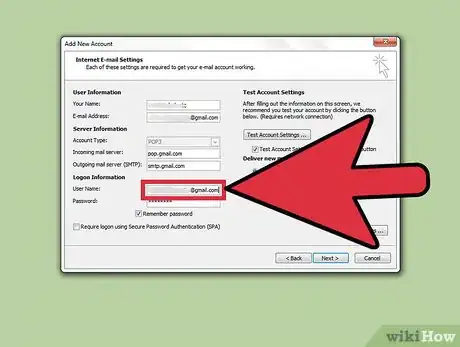
1Try entering the full email address into the “Username” field if Outlook experiences problems configuring your account. Some Internet Service Providers (ISPs) and email providers require the full email address to be entered into this field.
-
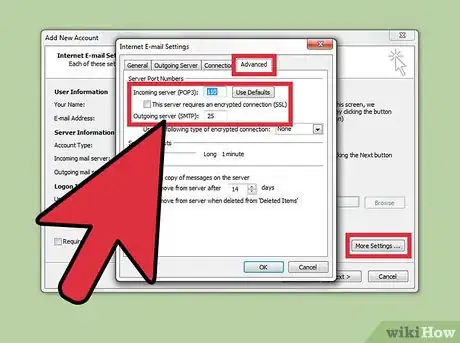
2Try adding the server port numbers for your email provider into Advanced settings if you are still unable to configure your email account. Many ISP mail servers now require secure ports for the incoming and outgoing servers.[2]
- Contact your ISP to obtain the incoming and outgoing server port numbers.
- Click on “More Settings” on the Account Settings screen, then click on the “Advanced” tab.
- Enter the incoming and outgoing port numbers into the “IMAP” and “SMTP” fields, then click “OK.”
-
3Verify you’re using the correct uppercase or lowercase letters when entering the server information for your email provider if you experience problems configuring Outlook 2010. Many Internet addresses and connection settings are case-sensitive, and may not configure properly if using the incorrect case.
-
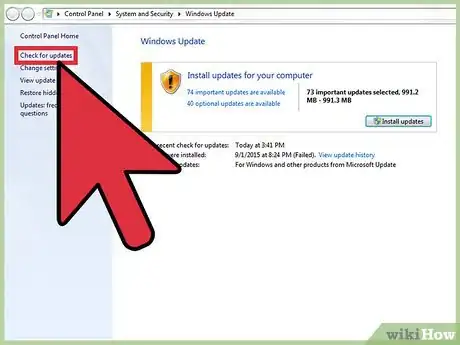
4Check for and install the latest Windows updates for your computer if you experience problems using and configuring Outlook 2010. Installing the latest updates can often help resolve problems with compatibility and known issues related to Outlook 2010.
Advertisement
References
About This Article
Advertisement
