This article was co-authored by Luigi Oppido and by wikiHow staff writer, Jack Lloyd. Luigi Oppido is the Owner and Operator of Pleasure Point Computers in Santa Cruz, California. Luigi has over 25 years of experience in general computer repair, data recovery, virus removal, and upgrades. He is also the host of the Computer Man Show! broadcasted on KSQD covering central California for over two years.
The wikiHow Tech Team also followed the article's instructions and verified that they work.
This article has been viewed 1,388,378 times.
This wikiHow teaches you how to install a new processor in your Windows desktop computer. The processor (or CPU) is responsible in part for your computer's speed.
Steps
Selecting a Processor
-
1Understand how processors and motherboards work. Your computer's motherboard is essentially one large circuit board which provides the base into which you'll plug your computer's other components, including the processor. Since processors' sizes and connectors vary depending on the model, you will need to ensure that your selected processor works with your current motherboard.
Tip: You can also replace the motherboard with one which supports your preferred processor.
-
2Know your computer's limitations. While you can upgrade virtually all Windows desktop processors and motherboards, upgrading a laptop's processor is often impossible; even if your laptop model supports changing the processor, doing so is a tricky process that is more likely to harm your computer than help it.[1]Advertisement
-
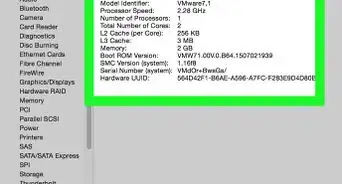
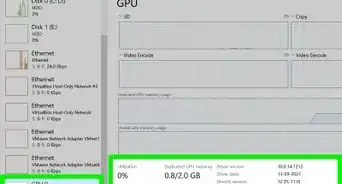
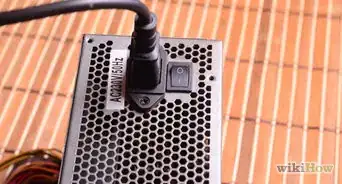
3Find your computer's motherboard model. While you can use Command Prompt to find your motherboard's basic information, using a free service called Speccy will allow you to see vital information about your motherboard (e.g., the processor's socket type).
-
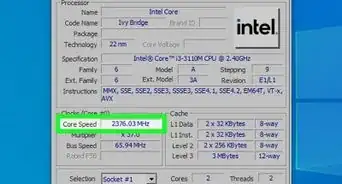
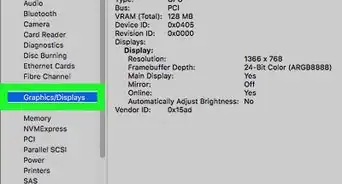
4Determine the type of processor socket used by your motherboard. If you're using Speccy to find your motherboard's information, you'll click the CPU tab and look at the "Package" heading to determine the socket.
- You can click the Motherboard tab and then review the "Chipset" heading to see your processor's chipset, though the service you'll use to check processor compatibility usually determines this for you.
- If you decided not to use Speccy, you can enter your motherboard's name and model number, followed by "socket" and "chipset", into a search engine and search through the results.
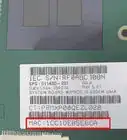
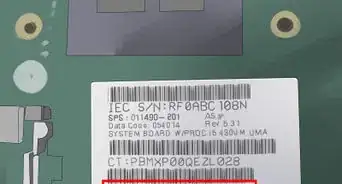
- Alternately, you can almost always find the socket type listed on the motherboard around the CPU socket.
-
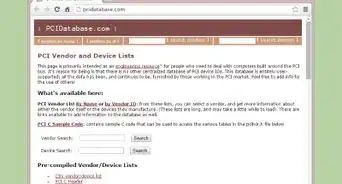
5Find processors which match your motherboard. You'll have to find a processor based on your current motherboard's socket size and chipset:
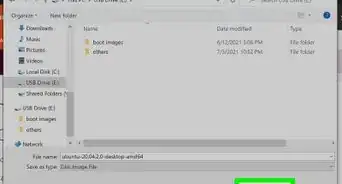
- Go to https://www.gigabyte.com/us/Support/CPU-Support in your computer's web browser.
- Click the Choose Socket drop-down box, then select your motherboard's socket number.
- Click the Choose Chipset drop-down box, then click chipset number (usually, there is only one number here).
- Click the "Search" icon to the right of the chipset number, then review the names of compatible processors in the pop-up window.
-
6Find a new motherboard to match your processor if necessary. While you can easily type your processor's specifications and the phrase "supported motherboards" into a search engine and review the results, using a CPU support site to do the work for you is easier:
- Go back to https://www.gigabyte.com/Support/CPU-Support in your computer's web browser.
- Click the Choose Processor Series drop-down box, then select your processor's name.
- Click the Choose Model drop-down box, then click your processor's model.
- Click the "Search" icon to the right of the model number, then review the list of compatible motherboards in the "Model" column.
-
7Buy your processor. Now that you know which processors will work with your computer's motherboard, you can select the one best-suited to your price range, computational needs, and region.
- Always shop around to find the best deal. You may be able to find the same processor for significantly less online than in a store.
- If you're buying a new motherboard as well, make sure you compare different website and store prices before ordering it.


Installing the Processor
-
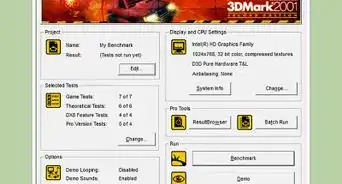
1Turn off and unplug your computer. Before you move or open up your computer, make sure that it is both turned off and unplugged from any power sources.
Note: For simplicity's sake, you may want to unplug any peripherals (e.g., your mouse, speakers, USB hubs, etc.) from your PC as well. This is not optional if you're replacing the motherboard.
-
2Place your computer on its side. Doing so will give you access to the PC's side panel.
-
3Remove the side panel. Some cases will require you to unscrew the side panel, while other cases only need you to unclamp or slide off the side panel.
-
4Ground yourself. This will prevent accidental static electricity discharge. Since static can completely ruin sensitive computer components such as the motherboard, you'll want to make sure you remain grounded throughout the entire installation process.
-
5Locate the motherboard. The motherboard resembles a circuit board with various wires attached to it. In most cases, you'll find the motherboard resting on the bottom of the tower.
- You may find the motherboard perched against the side of the case instead.
-
6Remove the current heat sink. The heat sink is mounted on top of the motherboard, and usually has a large fan on top of it. To remove the heat sink, you may have to unclip it from the motherboard, unscrew it, or slide it out.
- Since each heat sink has a different design—and, thus, a different installation process—you'll need to consult your heat sink's instruction manual for model-specific removal steps.
-
7Check your current processor's fit. You'll have to install your new processor using the same fit as the current one, so knowing which direction the processor is facing will help you install it correctly the first time.
Skip this step and the next one if you're removing your motherboard.
-
8Remove the current processor. Carefully lift the processor, which resembles a square chip, out of its space on the motherboard.
-
9Install your new motherboard if necessary. If you're installing a new motherboard, remove the current one from the housing, then install the new one according to its installation instructions (if necessary). You'll then need to hook up your computer's various components to the motherboard.
-
10Plug in your new processor. Your processor should only fit into the slot one way, so don't force it; just gently place the processor in its slot and check to make sure that it's level.
- If the processor is tilted or won't seat properly, try rotating 90 degrees until it does fit.
- Try not to touch the connectors on the bottom of the processor, as doing so may harm the processor.
-
11Reinstall the heat sink. Place a dot of thermal paste on top of the processor, then reattach the heat sink to its mount on the motherboard. The thermal paste on top of the processor should bridge the gap between your processor and your heat sink.
Tip: The thermal paste dot should be no larger than a grain of rice.
-
12Plug back in any unplugged components. Depending on your computer's orientation, you may have unplugged a cable or two during the installation process. If so, make sure you reconnect them to your motherboard before proceeding.
- This especially applies if you installed a new motherboard.
-
13Reassemble and run your computer. Once your computer's put back together and plugged back in, you can boot up your computer and click through any setup menus which appear.
- Since Windows will need to download and install new drivers for your processor, you will most likely be prompted to restart your computer after it finishes starting up.


Expert Q&A
Did you know you can get premium answers for this article?
Unlock premium answers by supporting wikiHow
-
QuestionCan I upgrade CPU without changing motherboard?
 Luigi OppidoLuigi Oppido is the Owner and Operator of Pleasure Point Computers in Santa Cruz, California. Luigi has over 25 years of experience in general computer repair, data recovery, virus removal, and upgrades. He is also the host of the Computer Man Show! broadcasted on KSQD covering central California for over two years.
Computer & Tech SpecialistLaptop processors are dependent on the motherboard. If your laptop motherboard has a ball and solder system, where small pads on the processor are soldered to a ball system, you can’t upgrade your processor. On some machines, you can easily use a screwdriver to replace the processor, but you’re still limited by the motherboard’s speed capability.
Support wikiHow by unlocking this expert answer.
-
QuestionCan you upgrade the processor in a laptop?
 wikiHow Staff EditorThis answer was written by one of our trained team of researchers who validated it for accuracy and comprehensiveness.
Staff AnswerwikiHow Staff EditorStaff AnswerWhile it is possible to upgrade a laptop processor, it's less straightforward than with a PC; you need to be sure the laptop motherboard has the right socket for the upgraded processor. Depending on the age of your laptop, this might be tricky. Moreover, opening the laptop often voids its warranty, mostly because you’re likely to break things permanently, so you really need to know what you're doing. Finally, it’s usually cheaper to get a new laptop than to upgrade your old one’s processor but this might depend on exactly what you’re trying to get out of the upgrade.Support wikiHow by unlocking this staff-researched answer.
-
QuestionDo I have to change something on BIOS or anything?
 Community AnswerUsually, no. If you have overclocked your older processor, or you would like to overclock the new one, then yes, you will need to change some settings. But in most cases, the BIOS will adjust itself automatically, if there is anything to adjust in the first place.
Warnings
- Attempting to run your computer without the heat sink and thermal paste will eventually cause the processor to malfunction.⧼thumbs_response⧽
- Processors are especially expensive in 2018 due to the high demand for them in cryptocurrency mining operations. As such, you may have to spend significantly more on your processor than on most of the other components of your computer when building one from scratch.⧼thumbs_response⧽


References
About This Article

1. Find out your computer's limitations.
2. Purchase a compatible processor.
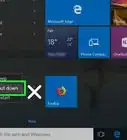
3. Shut down the computer.
4. Remove the case and ground yourself.
5. Remove the heat sink.
6. Replace the current processor with the new one.
7. Replace the heat sink and case.
8. Power on the computer.