This article was co-authored by Lauren Kurtz. Lauren Kurtz is a Naturalist and Horticultural Specialist. Lauren has worked for Aurora, Colorado managing the Water-Wise Garden at Aurora Municipal Center for the Water Conservation Department. She earned a BA in Environmental and Sustainability Studies from Western Michigan University in 2014.
wikiHow marks an article as reader-approved once it receives enough positive feedback. This article received 17 testimonials and 100% of readers who voted found it helpful, earning it our reader-approved status.
This article has been viewed 191,252 times.
Potatoes are a hearty crop that can grow almost year-round in the right conditions. Planting potatoes in pots minimizes the amount of space you need, and it also reduces the risk of pest infestation and disease. You'll need to start by sprouting your seed potatoes. Then, plant them in a container with a mix of potting soil and fertilizer. Give them plenty of sunlight and water and you'll see potato shoots breaking through the soil in no time at all.
Steps
Selecting and Sprouting Your Potatoes
-
1Buy seed potatoes. Unlike the potatoes you purchase at the grocery store, seed potatoes, also known as "tubers," are grown for the purpose of replanting and are not meant for consumption. Some “table stock” potatoes can also be used for planting purposes, but they do not usually produce a strong crop.[1]
- You can buy seed potatoes at your local gardening store. Purchase them 2-4 weeks in advance of when you'd like to plant them. This is the standard amount of time that it'll take for the potatoes to sprout.
- Avoid using the potatoes you buy at the grocery store as seed potatoes. These potatoes are often treated to prevent producing shoots so that they last longer on shelves.
- Take your seed potatoes out of their bag as soon as possible after you've purchased them. Leaving them in the bag can prompt fungal growth.
-
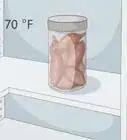
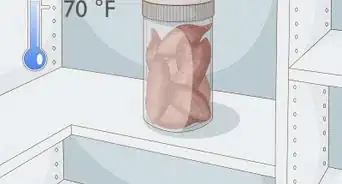
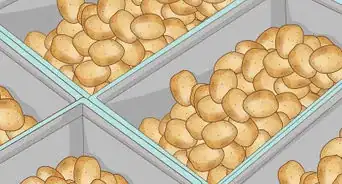
2Place your seed potatoes in an open container in cool, dark place. Position your tubers with any “eyes” facing upwards in an egg carton or other similar container. Then, set the container in a spot with cooler temperatures, such as a kitchen cupboard. Check back each day to see how the “eyes” have grown.[2]
- A potato “eye” is essentially a sprout. You'll see a tiny green or whitish growth coming out of the potato's skin.
- Once your potatoes begin to sprout, don't rotate them. You want the majority of the sprouts to develop on the upward facing side.
- The ideal temperature for sprouting seed potatoes is around 50 °F (10 °C).
Advertisement -
3Trim off all but the 3 largest eyes of each potato. The more eyes you have, the more spuds you can grow. However, the more potatoes you grow off a single tuber, the smaller the potatoes will be. When you are ready to plant, identify the 3 strongest eyes and rub the rest off with your finger or dig them out with a sharp knife.[3]
- If you choose to remove the sprouts with a knife, try to keep the cut as shallow as possible. Just cut away the sprout itself and a thin layer of the potato's skin.
- The eyes should be between .25 to .5 in (0.64 to 1.27 cm) when you begin the trimming and planting process.


Setting up Your Pots
-
1Select a 10 US gal (38 L) pot to plant 4-6 seed potatoes. At a minimum, each of your pots will need to be at least 16 inches (41 cm) high and 16 inches (41 cm) in diameter. If you chose to plant more than 6 potatoes per pot, then you'll need to go even larger.[4]
- The ample space gives your potatoes room to grow and develop roots and tubers. If you choose a pot that is too small, your potatoes may not fully sprout.
- Taller pots or grow bags will give you enough room to repeatedly fill the pot with soil as your potato shoots grow.
- In general, each seed potato will need between 1.5 to 2 US gal (5.7 to 7.6 L) to grow in a container. Consider this if you decide to plant additional potatoes.
-
2Go with plastic pots for easier movement and reusability. The sturdy plastic pots readily available at any garden store are a great option for growing potatoes. They come in black, which holds in the warmth, and usually have built-in drainage holes. You can also consider fabric growing bags, but they may not be as aesthetically pleasing.[5]
- If you go with a heavier plastic pot, make sure to put it on a dolly. The dolly will make it possible for you to move your potatoes around as needed for watering.
- If you live in a warm area, avoid using black or dark colored pots. These can attract too much sunlight and overheat your crop.
- Wash out your pots using warm water and soap before you plant in them. This helps to kill off any harmful bacteria.
- Only select a pot that has drainage holes in the bottom. Otherwise, you can use a drill to create 2-3 holes for drainage.
-
3Position a fiberglass screen at the bottom of each pot. Use heavy-duty scissors or a utility knife to cut out a piece of screen. Make sure that the screen matches the shape of the bottom of the pot, but is just slightly larger in size. Before planting, set the screen inside the pot, where it will be covered with soil.
- A sheet or small roll of fiberglass can be purchased at your local gardening center or hardware store. Plastic window screening also works as a substitute material.
- The screen slows down the drainage process, allowing your potatoes to fully absorb all of the nutrients from the water and soil.
- Be sure to replace your screens every year to prevent clogging the drainage holes.
-
4Fill each pot's saucer with small pebbles or stones. Keeping pouring them in until you've created an even .25 in (0.64 cm) layer covering the bottom of the saucer. Then, place your pot on the pebbles in the center of the saucer. Jiggle your pot a bit to make sure that it is balanced.
- The air gaps between the pot and saucer created by the pebbles allow water to drain more efficiently.
-
5Purchase or create your own container growing medium. The standard container potting soil mix that is available at gardening stores will work fine for growing potatoes. However, you can also create a custom mix by stirring together 1/3 compost, 1/3 perlite, and 1/3 peat moss or coco coir in a large bag or barrel.[6]
- All of these ingredients can be purchased at gardening centers or, in the case of compost, created at home.
- Avoid using soil that was previously used to grow potatoes or any other nightshade crop. Pathogens that could destroy your crop can persist in such soils.


Planting Your Potatoes
-
1Create a planting schedule based upon the variety of potato. There is a wide range of potato varieties to choose from, but they generally fall under five basic categories: first early, second early, early main crop, main crop, and late main crop. Knowing what category your selected potato variety falls under will tell you when to plant and harvest it.[7]
- Plant early varieties as early as March or April. They'll take between 75-90 days to mature for harvest. However, if you plant them too early, they could be damaged by frost.
- Plant mid-season potatoes from May to July. They'll take between 85-110 days to mature for harvest. Mid-season potatoes grow best in warmer climates and temperatures.
- Plant late season potatoes from July to August. They'll take between 120-135 days to mature for harvest. These potatoes usually tolerate winter temperatures and frost better than early varieties.
-
2Fill your pot with 4 to 6 inches (10 to 15 cm) of your growing medium. The entire bottom of the pot should be covered. Lightly pat the soil down with your hands to make sure that it is firmly packed. If the soil is not solid enough, the potatoes will sink to the very bottom of the pot.[8]
- Both the fiberglass screen and the pebble/stone layer should be fully covered and no longer visible after you add the soil.
-
3Mix in organic fertilizer, as directed on the package. Use a scoop or spade to lightly sprinkle granular organic fertilizer on top of the first soil layer in the pot. The amount that you use will depend on the type of fertilizer that you buy and the size of your pot. Read the instructions on the fertilizer's package carefully and follow them directly.[9]
- Choose a fertilizer that is explicitly for container planting. An organic or vegetable-specific blend is even better.
- Once your potatoes are established, you'll want to feed them liquid fertilizer as often as every 2 weeks. Again, reference the fertilizer's package for instructions.
-
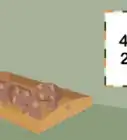
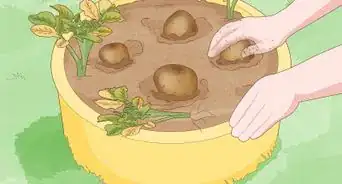
4Place your seed potatoes in the soil with the eyes facing upward. Space the tubers at least 6 inches (15 cm) apart. Ensure that they are not touching one another or the edge of the pot. Do not overcrowd each pot by planting more than the recommended amount of seed potatoes.[10]
- When the potatoes are in position, press them gently into the soil and fertilizer mix.
- It's likely that your seed potatoes will have eyes all over their skin, so just position the side with the most eyes facing upwards.
-
5Cover your tubers with 6 inches (15 cm) of growing medium. Use a spade to gently add more soil into the pot, creating an even layer. When you are finished, your seed potatoes will be completely hidden. Use your hands to gently pat down the soil, being careful not to crush your tubers by pressing too hard.[11]
- Depending on the size of your pot, you may need to add even more growing medium. Use your best judgment and fill it up most of the way, but not all the way to the rim. You will add more soil as the potatoes grow, so account for this as you fill.
-
6Water the soil in the pot until it begins to drain. Use a watering can or hose to slowly add water to the freshly planted pot. Try to cover all of the soil's exposed surface as you are watering. When water starts to flow out of the pot's bottom drainage holes, stop watering.[12]
- Potatoes do best with soil that is moist, but not soggy. Water-logged soil can actually lead to the growth of fungus.
- You can add a layer of straw to the top of your soil to keep it moist and shaded throughout the day.


Caring for Your Potatoes
-
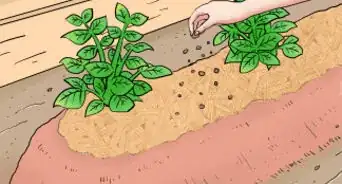
1Add more growing medium as the plant shoots up. As a general rule, you only want a maximum of 1 inch (2.5 cm) of each potato shoot exposed. Check your shoots daily to see if they are starting to emerge too far out of the soil. Then, simply add more growing medium to the pot.[13]
- You'll likely need to repeat this process multiple times during the growing cycle. The process is similar to mounding potatoes that were planted in the ground.
-
2Water your potatoes when the top 2 inches (5.1 cm) of soil is dry. There is a quick and simple way to determine when/if you need to water. Stick a single finger into the soil. If the soil feels dry, then it is time to water again. Add water to the pot until it begins to drain out the bottom.[14]
- If your potatoes do not get enough water, then they will be undersized or more susceptible to diseases and pests.
- In warmer temperatures, this may mean that you'll need to water your potato pots twice a day. Tailor your watering schedule to the needs of your particular potatoes.
-
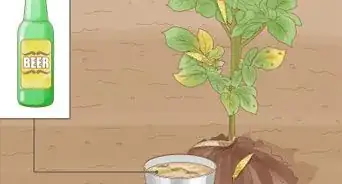
3Expose your potatoes to a maximum of 6-8 hours of sunlight each day. Position your potato pots so that they receive direct sun either in the morning or afternoon. While potatoes need the sunlight, they do not do well in temperatures over 80 °F (27 °C). This is why it is important that they get ample shade as well.[15]
- Your potatoes may be receiving too much sun if the sprouts turn yellow or dry out shortly after shooting out of the dirt.
-
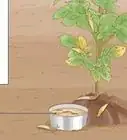
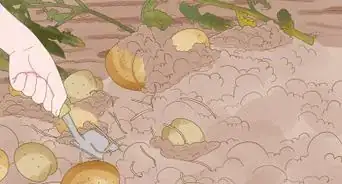
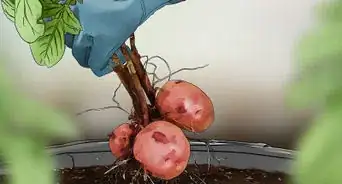
4Harvest your potatoes when their foliage turns yellow. This is the best sign that your potatoes are ready to dig up. You can either sift through the container's dirt by hand or dump it out and dig for the potatoes. Set aside each potato and make sure to wash them carefully before eating or storing.[16]
- It's also a good idea to inspect each potato for fungus or mold. The outer skin should be firm and uniform in color without any white or mushy spots.


Expert Q&A
-
QuestionWhat are the "balls" left after flowering on a potato plant?
 Lauren KurtzLauren Kurtz is a Naturalist and Horticultural Specialist. Lauren has worked for Aurora, Colorado managing the Water-Wise Garden at Aurora Municipal Center for the Water Conservation Department. She earned a BA in Environmental and Sustainability Studies from Western Michigan University in 2014.
Professional GardenerThese balls are seed pods. -
QuestionWhy have only a few pots of potatoes I have planted over a period of years ever bloomed, even though I got potatoes from all of the pots?Lauren KurtzLauren Kurtz is a Naturalist and Horticultural Specialist. Lauren has worked for Aurora, Colorado managing the Water-Wise Garden at Aurora Municipal Center for the Water Conservation Department. She earned a BA in Environmental and Sustainability Studies from Western Michigan University in 2014.
Professional GardenerNot all potato plants bloom in a given season. They require very specific conditions to produce flowers. Flowers are not necessary to get potatoes. -
QuestionWhat is a seed potato and where can I find them?
 Community AnswerBuy some organic potatoes as they will not have any chemicals on them to stop them from sprouting. Place them in a brown paper bag for a few days and the eyes will start to sprout. Then follow the directions for planting. Some garden shops sell seed potatoes but usually in five-pound packages which is too much for pot planting.
Warnings
- Be mindful of any chemicals you use on your potatoes, including fertilizers and pesticides. Many chemicals are not safe for human consumption, so you should always read the label before application.⧼thumbs_response⧽
Things You'll Need
- Seed potatoes (tubers)
- Large pot
- Soil
- Compost
- Fertilizer
- Sharp knife
- Fiberglass screen
- Pebbles
- Watering can


References
- ↑ https://www.growveg.com/guides/how-to-successfully-grow-potatoes-in-containers/
- ↑ https://www.growveg.com/guides/how-to-successfully-grow-potatoes-in-containers/
- ↑ http://balconygardenweb.com/growing-potatoes-in-containers-how-to-grow-potatoes-in-pots/
- ↑ https://growagoodlife.com/grow-potatoes-containers/
- ↑ http://balconygardenweb.com/growing-potatoes-in-containers-how-to-grow-potatoes-in-pots/
- ↑ https://growagoodlife.com/grow-potatoes-containers/
- ↑ http://balconygardenweb.com/growing-potatoes-in-containers-how-to-grow-potatoes-in-pots/
- ↑ https://torontobotanicalgarden.ca/news/growing-potatoes-in-containers-is-kids-play/
- ↑ https://blog.fantasticgardeners.co.uk/how-to-grow-potatoes-in-pots-guide/
- ↑ https://blog.fantasticgardeners.co.uk/how-to-grow-potatoes-in-pots-guide/
- ↑ https://torontobotanicalgarden.ca/news/growing-potatoes-in-containers-is-kids-play/
- ↑ https://torontobotanicalgarden.ca/news/growing-potatoes-in-containers-is-kids-play/
- ↑ https://blog.fantasticgardeners.co.uk/how-to-grow-potatoes-in-pots-guide/
- ↑ http://balconygardenweb.com/growing-potatoes-in-containers-how-to-grow-potatoes-in-pots/
- ↑ http://balconygardenweb.com/growing-potatoes-in-containers-how-to-grow-potatoes-in-pots/
- ↑ https://blog.fantasticgardeners.co.uk/how-to-grow-potatoes-in-pots-guide/
About This Article

Planting potatoes in pots is a great way to save space and reduce the risk of pest infestation and disease. To get started, buy seed potatoes at your gardening store. Put them in an open container in a cool, dark place and watch them daily to see if their “eyes” or sprouts are growing. When the eyes are 1/4 to 1/2 an inch long, the potatoes are ready to plant. Find the 3 thickest sprouts on each potato, then rub the rest off with your finger. Fill your pots with 4 to 6 inches of soil, mix in organic fertilizer, and put your seed potatoes in the soil with their eyes facing up. Cover your potatoes with soil, and water them until the pot begins to drain. Keep your pots in a partially sunny spot. For more tips from our Hortiulturalist co-author, including how to care for your potatoes, keep reading!