This article was co-authored by Maggie Moran. Maggie Moran is a Professional Gardener in Pennsylvania.
wikiHow marks an article as reader-approved once it receives enough positive feedback. This article received 28 testimonials and 91% of readers who voted found it helpful, earning it our reader-approved status.
This article has been viewed 436,606 times.
If you have a sunny window or some grow lights, you can grow potatoes indoors year-round! If you have a bucket, a glass of water, some toothpicks, and soil, you've got everything you need to grow potatoes indoors. Potatoes are a wonderful source of nutrients and can be stored for long periods of time after harvesting.
Steps
Sprouting Your Potatoes
-
1Buy seed potatoes that have a lot of eyes. The eyes of potatoes are small spots on the skin; this is the part that germinates. One potato with 6 or 7 eyes can yield up to 2 lb (910 g) of potatoes.[1]
- Alternatively, buy potatoes and leave them near a window for a few days until they start sprouting eyes.
-
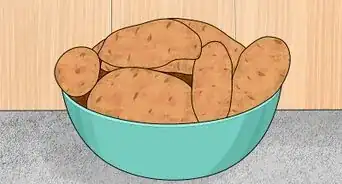
2Scrub each potato to remove the dirt. Use a vegetable brush and scrub each potato under running water until it is completely free of dirt. Be sure to scrub gently around the eyes, as you don't want to harm them before growing. [2]
- This will also remove pesticide residue and growth retardant if you aren't using organic potatoes.
Advertisement -
3Cut the potato in half on the long side. Place your potato on its long side on the cutting board; you should be able to roll it like a rolling pin. Cut down through the middle of the potato, as if you were going to make circular potato chips. Be careful not to cut through an eye, because that is what will be germinating. [3]
-
4Place 4 toothpicks one-fourth of the way into the potato's skin. Place the toothpicks between the cut end and the top of the potato. They should face out in 4 different directions like a compass.[4]
- The goal is to have them far enough into the potato, and spaced evenly enough, that they will hold up the potato when you place it into a glass of water.
-
5Submerge the cut side of the potato in a full glass of water. Allow the toothpicks to rest on the lip of the glass. Readjust the toothpicks if the potato doesn't rest evenly on the lip of the glass. Make sure the potato is partly submerged in the water, or else it won't sprout.[5]
-
6Put the potato in 5-6 hours of sun a day until it starts growing roots. Place the potato and water glass in a south-facing windowsill, or underneath grow lights. Roots should sprout after a week; they'll be long, spindly, and off-white.[6]
- Change the water in the jar if it gets cloudy. Add water if necessary to keep the potato submerged.


Planting Your Sprouted Potatoes
-
1Find a 2.5 US gal (9.5 L) pot with a drainage hole. Use a container with at least a capacity of 2.5 US gal (9.5 L). This will ensure that you get a high yield of large potatoes.
- Be sure to thoroughly wash and rinse your pot before you begin the planting process.
-
2Cover the bottom of the pot with 1–2 in (2.5–5.1 cm) of small stones. Your potatoes will need proper drainage to grow. Place around 1–2 in (2.5–5.1 cm) of rocks into the bottom of the container, so that the bottom is covered.[7]
- Placing small stones or pebbles in the bottom of the pot will ensure that water can get out of the soil and not cause mildew or rot.
- Alternatively, use a pot with drainage holes in the bottom.
-
3Fill the pot about one-third of the way to the top with potting soil. Use a loose, grainy, loamy potting soil to fill your container about one-third full. You will need to keep adding soil as the plant grows, so don’t overfill the pot at this point.
- Acidic sulfur helps potatoes feed, so test your soil and make sure the pH is around 5.5. Add elemental sulfur (sometimes called soil acidifier) to the soil if the pH is above 5.5.
-
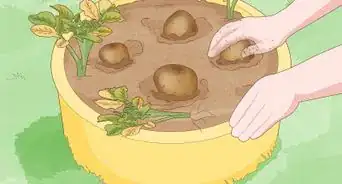
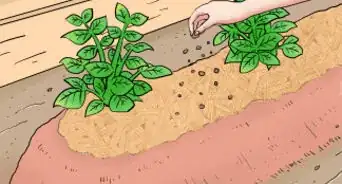
4Plant your potatoes root side down, 6 in (15 cm) apart. Place the potatoes with the roots facing down into the soil. Make sure the longest sprout is pointing towards the sky.
- Don’t place any of the potatoes next to the edge of the pot.
-
5Cover the potatoes with 2–3 in (5.1–7.6 cm) of soil. Potatoes need to avoid exposure to light in order to grow. To accomplish this, cover them with plenty of soil.
-
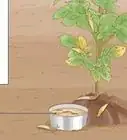
6Position the pot so it gets 6-10 hours of sunlight per day. Keep your container in an area that gets plenty of sunlight, such as near a window. Alternatively, you can use grow lights. Keep them on for at least 10 hours a day to duplicate outdoor conditions.[8]
-
7Keep the soil consistently moist. Potatoes need moist soil in order to grow, so check the soil every 2-3 days. If it's beginning to dry out, water it until it's moist but not soggy.
- Your soil should be as wet as a wrung-out sponge.
-
8Add more soil when the plant grows 6 in (15 cm) above the soil. When the potato vine reaches the top of your pot, mound the soil around the plant. As the plant grows upward, potatoes will start to grow on the vine. Potatoes need sunlight on the foliage, but not on the potatoes themselves. Thus, you should keep "hilling" (the process of mounding dirt as the plant grows) until the plant reaches the top of the container.
- Potatoes should be ready for harvesting in 10-12 weeks, or when the foliage begins to die.[9]


Harvesting Your Crop
-
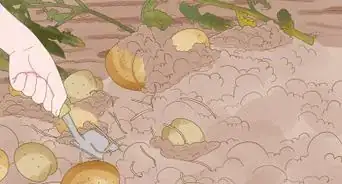
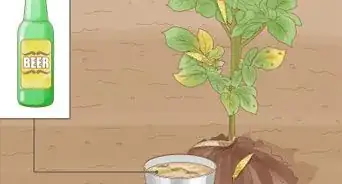
1Harvest when the leaves of the plant turn yellow for small new potatoes. Once your plants turn yellow or start to die off, your potatoes are ready to harvest. Harvest small new potatoes as soon as the plant turns yellow or dies.
- For more mature and larger potatoes, wait 1-2 weeks before harvesting.
-
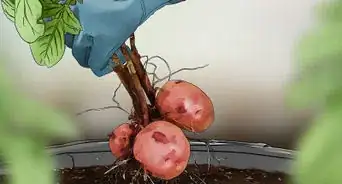
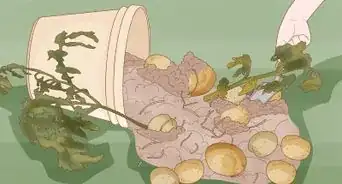
2Pull the plant from the container and pick off each potato. Gently dip into the soil with a small gardening tool or your hands, and pull the entire plant out of the container. Pull off each potato with your hands and brush the soil off of each one.
- Be careful to not cut or bruise the potatoes at this point, as the skin will be tender and easy to tear.
-
3Let your potatoes dry for 2-3 hours, then rinse them off. Place your potatoes in a sunny spot and allow them to dry out. Then, scrub them with a vegetable brush under running water to remove the soil and clean them off.
-
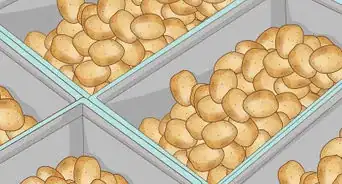
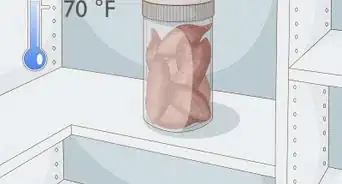
4Store your harvested potatoes in a cool, dark place for up to 5 months. Store your potatoes somewhere dark and cool, between 45–55 °F (7–13 °C), to avoid deterioration.[10] Keeping potatoes for at least 2 weeks in this state will help them "cure," which hardens the skin and helps them to last longer.[11]


Expert Q&A
Did you know you can get expert answers for this article?
Unlock expert answers by supporting wikiHow
-
QuestionCan you grow potatoes all year round?
 Maggie MoranMaggie Moran is a Professional Gardener in Pennsylvania.
Home & Garden SpecialistYes, potatoes are a common year-round crop. Depending on the climate, you can either choose to grow potatoes inside or if you are in a temperate climate, they can be outdoors throughout the seasons.
Support wikiHow by unlocking this expert answer.
-
QuestionCan you grow potatoes without sunlight?Maggie MoranMaggie Moran is a Professional Gardener in Pennsylvania.
Home & Garden SpecialistIt is advisable to avoid the sun while in the potato tuber growing stage, however, the rest of the growth process definitely requires lots of sun.Support wikiHow by unlocking this expert answer.
-
QuestionCan you grow potatoes in the house?Maggie MoranMaggie Moran is a Professional Gardener in Pennsylvania.
Home & Garden SpecialistYes, simply place potato sprouts in a wide container filled with a blend of pebbles, sand, and soil. Place the sprouts face down around 6 inches down.Support wikiHow by unlocking this expert answer.
Warnings
- If you plant a potato you have purchased from a grocery store, you must be sure to wash it thoroughly before planting. Potatoes shipped to stores have growth retardant on them; if you don’t wash all of the retardant off, your potato will not sprout.⧼thumbs_response⧽
Things You’ll Need
- Seed potato
- Deep pot
- Potting soil
- Compost
- Small gardening spade
- Wide-mouthed glass jar (optional)
- Toothpicks (optional)

References
- ↑ https://www.growveg.com/guides/a-simple-way-to-get-high-yields-of-potatoes/
- ↑ https://www.gardenguides.com/94261-grow-potato-plant-inside.html
- ↑ https://www.gardenguides.com/94261-grow-potato-plant-inside.html
- ↑ https://www.gardenguides.com/94261-grow-potato-plant-inside.html
- ↑ https://www.gardenguides.com/94261-grow-potato-plant-inside.html
- ↑ https://www.gardenguides.com/94261-grow-potato-plant-inside.html
- ↑ https://www.growveg.com/guides/how-to-successfully-grow-potatoes-in-containers/
- ↑ https://www.almanac.com/plant/potatoes
- ↑ https://www.almanac.com/plant/potatoes
About This Article

To grow potatoes indoors, purchase seed potatoes, and cut each cleaned potato in half widthwise. Then, poke 4 toothpicks around the top of the potato, and submerge the cut side of the potato in a full glass of water so the toothpicks are resting around the rim. Leave the potato in the sun until it begins to sprout roots, and then plant the sprouted potatoes root-side down in a container of loamy soil. Keep the soil moist and leave the container in the sun. When the leaves begin to turn yellow, harvest the potatoes! For tips from our Horticulturist reviewer on storing your newly harvested potatoes, read on!