This article was co-authored by Lauren Kurtz. Lauren Kurtz is a Naturalist and Horticultural Specialist. Lauren has worked for Aurora, Colorado managing the Water-Wise Garden at Aurora Municipal Center for the Water Conservation Department. She earned a BA in Environmental and Sustainability Studies from Western Michigan University in 2014.
There are 12 references cited in this article, which can be found at the bottom of the page.
wikiHow marks an article as reader-approved once it receives enough positive feedback. In this case, 95% of readers who voted found the article helpful, earning it our reader-approved status.
This article has been viewed 81,404 times.
Potatoes are tasty and fun to grow, but they can take up a lot of space in the garden. Fortunately, there’s an easy alternative -- growing potatoes in a regular trash can. Just plant the seed potatoes in the soil, cover them lightly with soil, and continue adding compost or soil as the vines grow. Growing potatoes in a trash can allows you to grow a lot of food in a small space.
Steps
Selecting and Readying the Can
-
1Use a 20 to 32-gallon can. You can use a plastic or metal trash can. An empty wooden or metal barrel would also work well.[1]
- Don’t use galvanized steel cans, which will rust.[2]
- A black can will provide added warmth to the soil. If you live in a hot area where the potatoes will get full sun, don't use a black can or the soil could get too hot.
-
2Drill holes in the bottom of the trash can with a power drill. If your can does not allow water to drain, it will fill with water and the potatoes will rot.[3] To allow the water to drain out, drill about 10-15 holes in the bottom of the can. Leave about 5 inches (13 cm) between each hole. Your holes should be about .25 inches (0.64 cm) to 1 inch (2.5 cm) in diameter.
- Depending on the thickness of your trash can, you might be able to create these holes by jabbing a screwdriver or pitchfork through the bottom.
Advertisement -
3Place the trash can in a sunny location. If your potatoes are to grow, they need about six to eight hours of sunlight daily. To ensure your potatoes get the necessary amount of sunlight, you could place the trash can on a rooftop, in an open field, or in a sunny backyard location.[4]
-
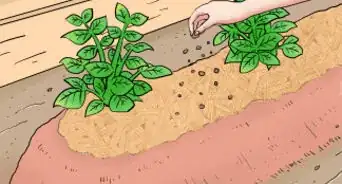
4Fill the can with 10 inches (25 cm) of soil. Use soil that contains slow-release fertilizer. If you wish to use unfertilized soil, add an organic, soluble houseplant fertilizer every 2 weeks until late summer.[5]
- If you’re adding your own fertilizer, the amount you’ll need to use varies depending on the specific product you’re using. Consult manufacturer directions for more information.


Planting the Potatoes
-
1Cut and dry your seed potatoes. Seed potatoes are small potatoes that you can use to grow larger, regular potatoes. Cut the seed potatoes in half or into quarters if there's more than one eye on each piece. Do not cut them into less than a quarter of their original size.[6]
- You can obtain seed potatoes from your local garden supply shop.
-
2Plant potatoes about two weeks before your last freeze date. This date will vary depending on the local climate and the location where you live. Contact your national climate date center for more information about when you can anticipate the last freeze of the cold season.[7]
-
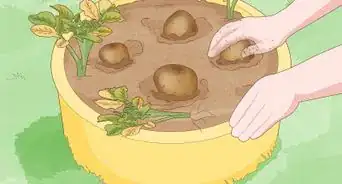
3Place the seed potatoes in the soil with the cut side down. Dig a small depression in the soil and place the seed potato in it. Cover each seed potato piece lightly with about 3 inches (7.6 cm) of soil.[8] Place the seed potatoes about 5 inches (13 cm) apart.[9]
- Don’t plant more than one variety of potato in your trash can.
- Cut your seed potatoes in such a way that each piece has three dimples (or “eyes”).[10] These small divots or indentations are about 1 to 2 millimetres (0.039 to 0.079 in) deep.

Caring for Your Potatoes
-
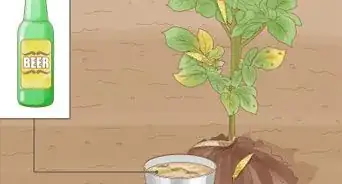
1Keep the soil moist. You can keep the soil moist by touching it daily, then adding water if the soil feels dry. Some days (like on days when it rains), you won’t need to add any water. Other days, you will need to water your potatoes.[11]
- The best time to water your potatoes is in the evening and in the morning. This will prevent the water from simply evaporating in the daytime heat.
- The soil should be damp, not soggy.
-
2Cover the vines with compost when they grow to at least 4 inches (10 cm). Fill the can to the point where only the top 1 inch (2.5 cm) of the shortest vine is visible. Repeat this process for every 4 inches (10 cm) of vine growth.
-
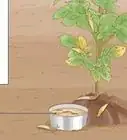
3Stop watering the potatoes when the leaves wilt. When the leaves of your potato plants turn yellow or brown, they are ready for harvesting. If you planted in April or May, the leaves will wilt in mid-summer.[14]

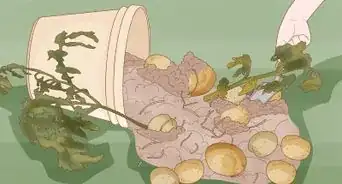
Harvesting and Storing Your Potatoes
-
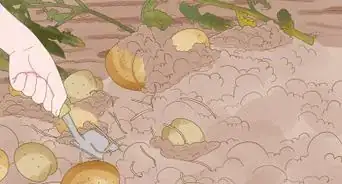
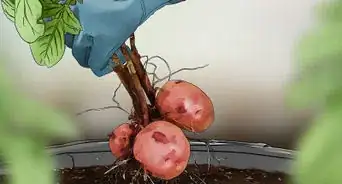
1
-
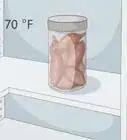
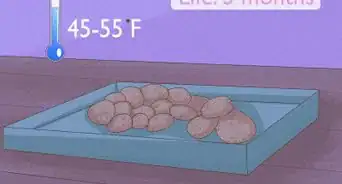
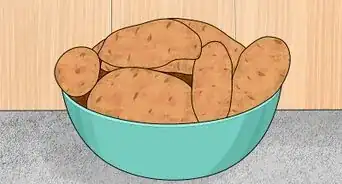
2Cure your potatoes. After you’ve harvested the potatoes, place them in a dark place with a temperature of 55 to 60 °F (31 to 33 °C) and a relative humidity of about 80 to 95 percent. This allows bruises and cuts that might have been inflicted on the potatoes during the harvesting process to “heal.”[17]
- Cure the potatoes for about two weeks.
-
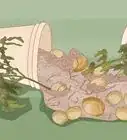
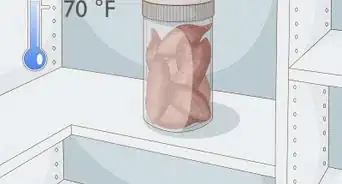
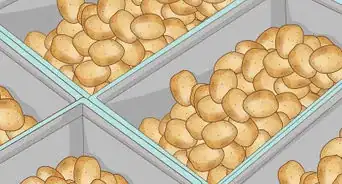
3Store your potatoes in a dark, cool place. Potatoes stay best when stored at about 40 °F (22 °C). The storage location should be dry and well-ventilated.[18]
- Don’t store your potatoes more than 6 to 8 inches (15 to 20 cm) high or they might bruise.
- Check your stored potatoes regularly and remove any that are rotten.


Community Q&A
-
QuestionI don't have potatoes that aren't store bought, can I use potatoes seeds?
 Community AnswerYou can probably find seed potatoes at a local nursery or order them online. Store-bought potatoes may not work as well and also may not be organic.
 -
QuestionCan I use just one seed potato?Community AnswerSure, but if you use more, you'll get more potatoes in your final harvest. Remember to plant the seed potatoes (or seed potato pieces) about five inches apart.
-
QuestionHow long is the growing season?Community AnswerThe length of your growing season depends on where in the world you are. Different localities have growing seasons of differing length. Consult a local horticultural society to determine how long your potato growing season is.
Warnings
- Do not attempt to plant store-bought potatoes. These are often treated with a chemical that prevents sprouting.⧼thumbs_response⧽

References
- ↑ http://www.mamashomestead.com/grow-potatoes-trash-can/
- ↑ http://www.seattletimes.com/pacific-nw-magazine/yes-its-possible-to-grow-potatoes-in-a-garbage-can-heres-how/
- ↑ http://heavenlyhomemakers.com/gardening-101-planting-potatoes-in-a-container
- ↑ http://www.mamashomestead.com/grow-potatoes-trash-can/
- ↑ http://www.seattletimes.com/pacific-nw-magazine/yes-its-possible-to-grow-potatoes-in-a-garbage-can-heres-how/
- ↑ http://www.mamashomestead.com/grow-potatoes-trash-can/
- ↑ http://www.mamashomestead.com/grow-potatoes-trash-can/
- ↑ https://www.almanac.com/video/growing-potatoes-trash-can
- ↑ http://www.seattletimes.com/pacific-nw-magazine/yes-its-possible-to-grow-potatoes-in-a-garbage-can-heres-how/
- ↑ http://www.cityroots.org/blog/2017/3/2/how-to-grow-potatoes-in-a-trash-can
- ↑ http://www.cityroots.org/blog/2017/3/2/how-to-grow-potatoes-in-a-trash-can
- ↑ http://www.cityroots.org/blog/2017/3/2/how-to-grow-potatoes-in-a-trash-can
- ↑ https://www.almanac.com/video/growing-potatoes-trash-can
- ↑ https://www.almanac.com/video/growing-potatoes-trash-can
- ↑ https://www.almanac.com/video/growing-potatoes-trash-can
- ↑ http://www.cityroots.org/blog/2017/3/2/how-to-grow-potatoes-in-a-trash-can
- ↑ http://www.mamashomestead.com/grow-potatoes-trash-can/
- ↑ http://www.mamashomestead.com/grow-potatoes-trash-can/
- ↑ http://heavenlyhomemakers.com/gardening-101-planting-potatoes-in-a-container
About This Article