X
wikiHow is a “wiki,” similar to Wikipedia, which means that many of our articles are co-written by multiple authors. To create this article, 15 people, some anonymous, worked to edit and improve it over time.
This article has been viewed 55,882 times.
Learn more...
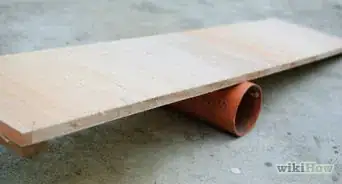
You can build a skateboarding quarter pipe from wood and Masonite in a few hours. You can purchase plans from a skateboarding shop or find them online. Quarter pipes are easier and less expensive to build than half pipes, and they are more mobile. Read the article below on how to make a quarter pipe.
Steps
Method 1
Method 1 of 5:
Cut the Sides.
-
1Lay a 4-foot by 8-foot (1200 by 2400 mm) piece of 3/4-inch (18 mm) plywood flat on the work surface, drawing a line down the middle. You should have 4 feet (120 cm) on each side of the line.
-
2Measure 6.5 feet (198 cm) from the top of the line to the other side of the plywood and beyond. You will mark a point 2.5 feet (76 cm) beyond the edge of the plywood sheet.Advertisement
-
3Attach a 6.5 foot (198 cm) length string to the marked spot using a small nail or screw.
-
4Tie a pencil to the string. Make adjustments to the string so it measures 6.5 feet (198 cm) after the pencil is attached.
-
5Keep the string tight and use the pencil to draw a long arc on the plywood from edge to edge.
-
6Cut the sides with a Jigsaw along the drawn lines, first cutting out a semicircle along the arc you drew with the string and pencil, then cutting along the center line so you have two identical pieces.


Advertisement
Method 2
Method 2 of 5:
Assemble the Sides and Transition.
-
1Cut 8 lengths of 2x4 (50x100 mm) lumber 94.5 inches (240 cm) in length. The lumber and the two pieces of plywood will equal 8 feet (240 cm) across when assembled.
-
2Cut 3 lengths of 2x6 (50x150 mm) lumber 94.5 inches (240 cm) in length.
-
3Place a 2x4 (50x100 mm) about every 10 inches (25 cm) along the transition (curved side) of the ramp between the 2 sides and screw the ends into the plywood.
- The top board will be flush with the top edges of the sides and perpendicular to the ground. The bottom board will be parallel to the ground. The remaining boards will be angled so they are perpendicular to the curve of the transition.
-
4Place the 2x6 (50x150 mm) boards between the backs of the cut sides at the bottom, middle, and top. Screw them into place.


Advertisement
Method 3
Method 3 of 5:
Install the Coping.
-
1Drill 4 holes evenly spaced along an 8-foot (240 cm) by 1.5-inch (38 mm) length of metal pipe with a 21/64-inch (8 mm) metal drill bit. Do not drill through to the other side of the pipe.[
-
2Drill 4 smaller holes into the other side of the pipe using an 11/64-inch (4 mm) metal drill bit.
- Place the drill bit into each of the larger holes previously drilled and drill the smaller hole into the other side of the pipe.
-
3Place the coping at the top of the quarter pipe on the frame of the transition with the large drilled holes facing out.
-
4Drill 4 screws through the coping through the large and small holes into the wood to secure it. The screw heads should be large enough to catch on the smaller drilled hole on the other side.

Advertisement
Method 4
Method 4 of 5:
Assemble the Surface Transitions.
-
1Start at the top and the far left of the quarter pipe frame that you have built and screw a 4-foot by 8-foot (1200 by 2400 mm) sheet of 3/8-inch (9 mm) plywood onto each of the 2x4 (50x100 mm) pieces of lumber as you work your way towards the bottom of the pipe.
-
2Screw down another sheet 4-foot by 8-foot sheet (1200 by 2400 mm) of 3/8-inch (9 mm) plywood next to the piece you just laid, screwing it into each piece of 2x4 (50x150 mm).
-
3Cut a piece of 4-foot by 8-foot (1200 by 2400 mm) 3/8-inch (9 mm) plywood down the middle so you have 2 sheets of plywood 2 feet (600 mm) wide.
-
4Screw the 2-foot by 8-foot (600 by 2400 mm) piece of plywood you just cut on top of the first layer of plywood at the left edge of the quarter pipe.\
- The second layer of plywood will make your quarter pipe last longer and make it stronger. You don't want to line up the seams of the first and second layer.
-
5Screw a 4-foot by 8-foot (1200 by 2400 mm)sheet of 3/8-inch (9 mm) plywood next to the 2-foot by 8-foot (600 by 2400 mm) piece.
-
6Screw the second piece of 2-foot by 8-foot (600 by 2400 mm) sheet of plywood next to the full piece to complete the surface.
-
7Screw the first sheet of 1/4-inch (5.2 mm) 4-foot by 8-foot (1200 by 2400 mm) masonite onto the second layer of plywood.
-
8Screw a second 4-foot by 8-foot (1200 by 2400 mm) sheet of masonite next to the first layer.
-
9Make the transition from your quarter pipe to the ground smoother by buying a piece of sheet metal 6 inches by 8 feet (150 by 2400 mm) to screw into the Masonite at the bottom of the ramp. This is optional.


Advertisement
Method 5
Method 5 of 5:
Build a Platform.
-
1Measure and cut 12 pieces of 2x6 (50x150 mm) lumber 4 feet (120 cm) long.
-
2Screw one of the 4-foot (120 cm) boards you just cut into the side and to the 2x6 (50x150 mm) at the top and end of the transition.
-
3Take another 4-foot (120 cm) board and do the same at the other end of the quarter-pipe, completing the side frame for the platform.
-
4Cut a 2x8 (50x200 mm) length of lumber to 8 feet (240 cm). Screw it onto the two 4-foot (120 cm) attached boards of 2x6 (50x150 mm). This will complete the back of the platform frame.
-
5Cut 2 4-foot (120 cm) pieces from an 8-foot (240 cm) long 4x4 (100x100 mm). Screw the 2 pieces into place inside the 2 back corners of the platform, attaching them to the 2x8 (50x200 mm) and 2x6 (50x150 mm) boards for support.
-
6Measure and mark 1-foot (30 cm) increments along the entire back 2x8 (50x200 mm) frame of the platform.
-
7Screw in 7 of the 4-foot (120 cm) 2x6 (50x150 mm) boards at the 1-foot (30 cm) measurements you just made on the 2x8 (50x200 mm) to form the support for the platform.
-
8Cut a 2x8-inch (50x200 mm) length of lumber to 8-feet (240 cm) and screw it in place at the bottom of the 2 4x4 (100x100 mm) pieces, connecting them. This will add stability.
-
9Take 2 4-foot (120 cm) 2x6 (50x150 mm) boards and screw them to the bottom of the 4x4 (100x100 mm) and to bottom of the sides. This further stabilizes the platform.
-
10Screw 4-foot by 8-foot (1200x2400 mm) 3/4-inch (18 mm) plywood onto the platform frame you just assembled.


Advertisement
Things You'll Need
- 2 8-foot (240 cm) 2x8 (50x200 mm) lengths of lumber
- 1 8-foot (240 cm) 4x4 (100x100 mm) lengths of lumber
- 6.5 feet (198 cm) of string
- Pencil
- 1 sheet of 4-foot by 8-foot (1200x2400 mm) 1/4-inch (5.2 mm) Masonite
- 4 sheets of 4-foot by 8-foot (1200x2400 mm) 3/8-inch (9 mm) plywood.
- 2 sheets of 4-foot by 8-foot (1200x2400 mm) 3/4-inch (18 mm) plywood
- 11 8-foot (240 cm) 2x6 (50x150 mm) lengths of lumber
- 8 8-foot (240 cm) 2x4 (50x100 mm) lengths of lumber
- Tape measure
- 1 8-foot (240 cm)length of 1.5-inch (38 mm) metal pipe
- Electric Drill
- Electric Jigsaw
- Box of 2 1/4-inch (31 mm) screws
- 11/64-inch (4 mm) metal drill bit
- 21/64-inch (8 mm) metal drill bit
- 1 piece of 6-inch by 8-foot (150 mm by 2400 mm) sheet metal (optional)


References
About This Article
Advertisement