wikiHow is a “wiki,” similar to Wikipedia, which means that many of our articles are co-written by multiple authors. To create this article, 24 people, some anonymous, worked to edit and improve it over time.
The wikiHow Video Team also followed the article's instructions and verified that they work.
This article has been viewed 383,287 times.
Learn more...
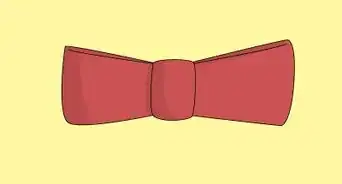
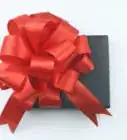
A floral bow (also known as a bow) is an elaborate, pretty-looking bow which is defined by its many loops. It can be used to embellish things like flower arrangements, vases, wreaths, table centerpieces, garlands and gift wrapping. Floral bows are available for purchase at your local florist's, but it is significantly cheaper (and more fun!) to make your own. This article will show you the easiest method of making both large floral bows and small floral bows. It also includes a method on how to make cute flower-shaped bows (which can be used to decorate little girls' headbands and barrettes) if that's what you are looking for. Just see Step 1 below to get started.
Steps
Making Large Floral Bows
-
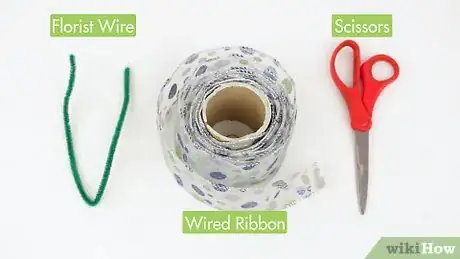
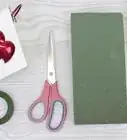
1Gather your supplies. To make a large floral bow you will need a piece of wired ribbon, approximately 4 inches (10.2 cm) wide and 3 yards (2.7 m) long.
- Wired ribbon is much easier to work with than soft ribbon as it holds its shape better, making a fuller bow.
- You will also need a 9 or 10 inch (22.9 or 25.4 cm) length of florist wire (although pipe cleaner will do in a push) bent into a U-shape, and a pair of scissors.
-
2Make your center loop. Take one end of the ribbon and form a loop, making sure that the "right" side of the ribbon is facing out.
- Hold the bottom of the loop tightly between your thumb and fingers. Keep in mind that the size of the loops you make will determine the size of your finished bow.
- At the bottom of this first loop, give the ribbon a tight twist to ensure the correct side of the ribbon is facing out. This is the secret to a pretty-looking bow.
Advertisement -
3Make your next two loops. Form a second loop on one side of your original center loop.
- Secure it between the thumb and fingers holding the first loop and give the ribbon another good twist to ensure that the right side is facing out.
- Make a third loop on the other side of the center loop, again securing it between your fingers and twisting the ribbon.
-
4Continue making loops. Continue using the same technique of looping, securing and twisting until you have four or five loops on each side of the original central loop.[1]
- Depending on how you want your finished bow to look, you can make all of the loops the same size or you can make them progressively bigger as you go.
- When you've finished making loops, pick up the tail end of the ribbon up and secure it between your thumb and fingers (do not twist this piece of ribbon - keep it straight). This will create a large circular loop hanging beneath your bow.
-
5Secure with the florist wire. Take the U-shaped piece of florist wire and pass one leg through the center loop, so there is a leg sitting on either side of the bow.
- Twist the legs of the wire tightly to secure the underside of the bow and hold all of the loops in place.
- Alternatively, some people recommend twisting the bow itself (rather than the wire) as they claim this produces a tighter bow which will not fall apart.
-
6Fluff out the bow. Take a couple of moments to pull out all of the loops (some to the left, some to the right) to create a rounded, flower shape.
- This may require some firm tugging, but the wire ribbon should eventually do as its told!
- Also be sure to round out each loop, so it looks full and circular rather than flat.
-
7Cut the tails. Cut the large hanging loop beneath the bow in half to form the tails. Cut the tails as short as you like and give them a slanted or swallow-tailed ending, whichever you prefer.[2]
Making Small Floral Bows Using Cardboard or Foam
-
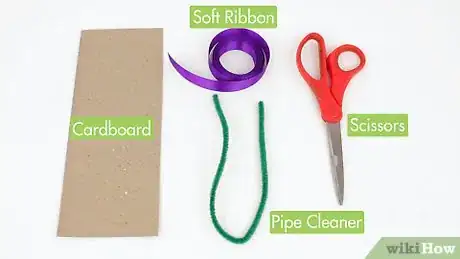
1Gather your materials. To make a small floral bow you will need a length of 3⁄8 inch (1.0 cm) soft ribbon, a piece of cardboard or foam, a scissors and a piece of floral wire or a pipe cleaner.
-
2Make a slit in the foam or cardboard. Cut a thin, V-shaped slit into a piece of foam or cardboard with a sharp knife or scissors.
- The slit should be wide enough to insert the ribbon but small enough to hold the ribbon in place.
- If you're using a ribbon that is shiny on one side and dull on the other, make sure that the shiny side faces down so that as you make your bow, the shiny side will form the outside of your loops.
-
3Start making loops. Fold the ribbon to make a loop on one side of the slit, then slide the ribbon into the slit. As you push the ribbon into the slit, twist it so that the shiny side faces down again.
-
4Continue to make loops. Continue to make loops, alternating between one side of the cardboard and the other. If you want your bow to have smaller loops in the middle, just make each loop smaller as you slip it between the cardboard.
-
5Cut the ribbon. When your bow is full enough, cut the ribbon at an angle.
-
6Carefully slide out the bow. Slide the bow out from between the cardboard, making sure to firmly grab the center of the bow between your thumb and forefinger.
-
7Secure with the piece of wire. Take the piece of wire or pipe cleaner and wrap it around the center of the bow. Twist the two ends of the wire tightly to secure.
-
8Fluff out the bow. After you have secured the bow, take a minute or two to readjust the loops to fluff out the bow and make it look even.
Making Flower-Shaped Bows
-
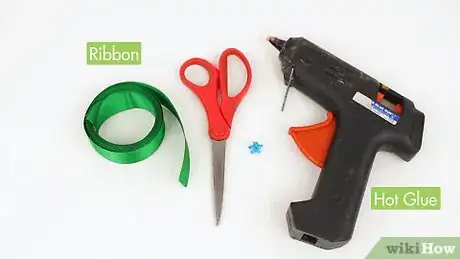
1Gather your materials. For this project you will need 3 pieces of 3⁄8 inch (1.0 cm) ribbon, each 8 inches (20.3 cm) in length along with another 3 pieces of 3⁄8 inch (1.0 cm) ribbon, each 7.25 inches (18.4 cm) in length.
- You will also need a hot glue gun and a rhinestone, button or pearl.
- Using different colored ribbon for the longer and shorter pieces creates a pretty finished product.
-
2Start making figure-of-eights. Lay all six pieces of ribbon out in front of you, with the shiny or patterned side facing down.
- Take your first piece of ribbon and fold it in half to form a crease down the middle. Lay the ribbon out flat again.
- Place a small dot of glue along the crease line, then the bottom end of the ribbon and make a sideways loop. Glue the end of the ribbon onto the crease line, making sure the shiny or patterned side is glued facing down.
- Repeat with the top end of the ribbon, making the loop in the opposite direction to form a figure of eight.
- Now do the same thing with the five remaining pieces of ribbon, until you have six figures-of-eight.
-
3Assemble the flower. Take the three slightly larger figures-of-eight (these are the ones you made with the longer lengths of ribbon) and place a dot of glue in the center of one of them.
- Take the second figure-of-eight and stick it to the first one horizontally, so they form an "X" or a cross shape. Take the third figure-of-eight and stick it on top of the other two, to form a flower.
- Repeat this process with the three remaining figures-of-eight to form a second flower. Then place a dot of glue in the center of the larger flower and stick the smaller one on top.
-
4Stick the rhinestone, pearl or button in the center. Place a dot of hot glue in the middle of the smaller flower and attach the rhinestone, pearl or button to form the center of the flower.[3]
Community Q&A
-
QuestionCan I use the heads of old dolls instead of flowers?
 Community AnswerYou could, but your bow would not be floral.
Warnings
- The wire used to secure your floral bow must be twisted very tight or the loops will move. Use pliers if needed to help you to twist the wire extremely tight.⧼thumbs_response⧽
References
About This Article
To make a floral bow, start by taking 1 end of a ribbon and forming a loop. Continue making loops until you have 4 or 5 on each side, and then secure them in place with a U-shaped piece of florist wire. Finally, fluff out your bow and trim off any tails. To learn how to make a small floral bow, keep reading!
