This article was co-authored by wikiHow staff writer, Hannah Madden. Hannah Madden is a writer, editor, and artist currently living in Portland, Oregon. In 2018, she graduated from Portland State University with a B.S. in Environmental Studies. Hannah enjoys writing articles about conservation, sustainability, and eco-friendly products. When she isn’t writing, you can find Hannah working on hand embroidery projects and listening to music.
There are 16 references cited in this article, which can be found at the bottom of the page.
The wikiHow Video Team also followed the article's instructions and verified that they work.
This article has been viewed 1,432,028 times.
Learn more...
Roses are beautiful flowers, but they don’t last forever. Roses made from ribbon, satin, or silk are great for decorating, enhancing clothing on special occasions, and making craft projects. You can make roses on your own by folding it into a square and then tightening it, or by using hot glue as you twist it into a rose shape.
Steps
Folding a Rose
-
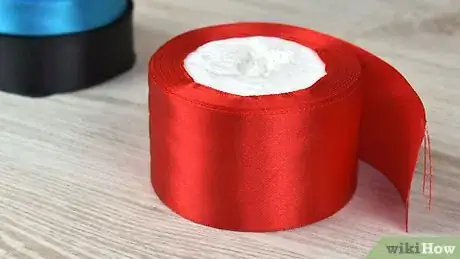
1Choose a material without wires that is 1⁄8 inch (0.32 cm) wide. You can make roses out of silk, satin, or ribbon, as long as they don’t have any wires or framing inside of them. Pick a material that is pink or red for a traditional color, or use white, blue, or even green for a festive look.[1]
- You can find satin, silk, and ribbon at most party supply stores.
-
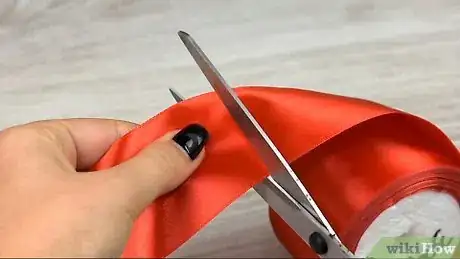
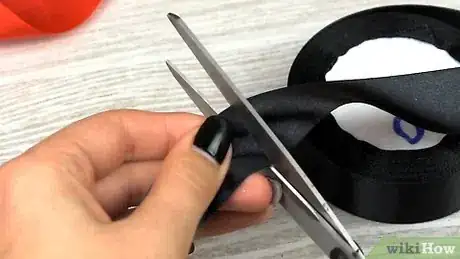
2Cut your material to about 8 inches (20 cm). Materials like ribbon or silk usually come in long strands that are hard to work with. Use a pair of sharp scissors to cut your material into a manageable size. Cut the material at an angle to avoid fraying.[2]
- The cut you make doesn’t have to look perfect, since it will be hidden inside of your finished rose.
- If you want a larger rose, use more material.
Advertisement -
3Fold the ribbon over itself about halfway to make a corner edge. Take one side of your material and fold it over on top of itself to create a 90-degree angle. Create a loose “L” shape with the material to achieve this sharp angle. Press down on the fold with your fingers so that it stays in place.[3]
- You don’t have to make this fold directly in the middle, but the closer it is to the center the more even your rose will be.
-
4Fold 1 side of the ribbon over the center fold. Set up your material on a flat surface so that your fold is in the middle and the loose ends are hanging down toward you. Grab 1 loose end of your material and fold it over the center part of the ribbon. Keep one hand on the center fold of your ribbon so it doesn’t come loose.[4]
-
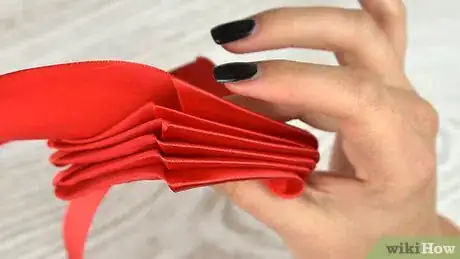
5Fold the ribbon over the center creating a square with right angles. Grab the other side of the loose ribbon and fold it over the center. Then, fold it backward to create a right angle in a square shape. Keep doing this in an alternating pattern until you run out of material. Crease each fold that you make so that it stays in place.[5]
Tip: Keep the center of your ribbon in a square shape as you make right angles. This keeps them together easily.
-
6Pinch the stack of folds together with your fingers. Pick up the folds that you made in your material and keep them pinched together with your thumb and pointer finger. If the material comes loose, it will fold out into an accordion that you can simply fold back up into a square.[6]
-
7Pull 1 loose end of the ribbon through the small hole in the center. Grab 1 of the loose pieces of ribbon that is sticking out of your square. Pull it through the small hole that is in the center of your square. If you have trouble getting it through, use a pair of small tweezers to grab the ribbon and pull it.[7]
Tip: If the square comes undone, pull the loose end of the ribbon through to tighten them.
-
8Twist the layers together until they form a rose shape. Grab the back center of your rose where the excess material is sticking out and twist it clockwise until the center squeezes together and forms a rose petal shape. Twist these as much or as little as you want to until your silk, satin, or ribbon rose looks like a real flower.[8]
- Depending on how tight you want your rose shape, twist your material up to 5 times.
-
9Tie a knot in your loose ribbon ends at the back of the rose and cut the excess. Grab the ends of the ribbon that are sticking out and tie them in a knot so they don’t come loose. Use sharp scissors to cut the ends of the ribbon off so you don’t have loose material hanging off of your flower.[9]
- You can also use a small ribbon to tie your loose ends together if you want an added decoration.
Using Hot Glue
-
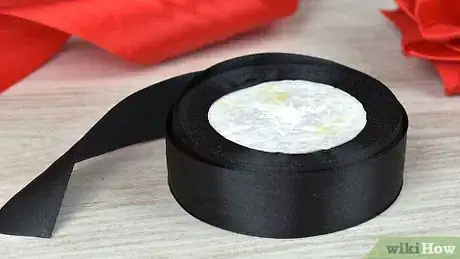
1Use a material that is 1⁄8 inch (0.32 cm) wide and has no wires. Choose either silk, satin, or ribbon, but make sure that it doesn’t have any type of wire framing inside of it. Make sure your material is wide enough to create a rose out of. Choose red or pink material for a classic rose design, or be bold with cream, yellow, and orange.[10]
- You can find silk, satin, and ribbon at most craft stores.
-
2Cut your material to about 8 inches (20 cm). Depending on the size of the rose you want to make, use sharp scissors to cut your ribbon into a workable length. The longer your material is, the larger your rose will be. Cut the edge in a straight line to make it easier to work with.[11]
- If you are worried about your material fraying, apply a liquid fray stopper to the cut edge and let it dry before you make your rose.
-
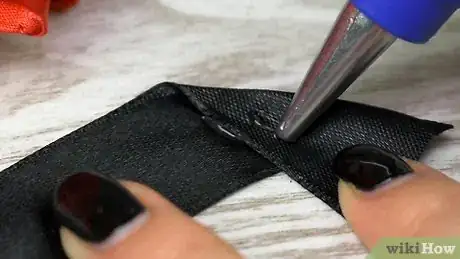
3Put a dot of hot glue about 1 inch (2.5 cm) away from the edge. Put a clear hot glue stick into your glue gun and wait for it to warm up. Place a pea-sized dot of hot glue slightly away from the edge of your material. Let it dry slightly before you handle it so you don’t burn your hands.[12]
Warning: Use caution with hot glue. Try not to get it on your hands as it can burn your fingers.
-
4Fold 1 end of the ribbon onto the glue in a right angle. Take the edge of the ribbon nearest the hot glue and fold it in once toward the rest of the ribbon. Make a right angle with the point of the triangle at the top of your material. Press down slightly on the material to make sure the glue bonds with it.[13]
-
5Apply another dot of hot glue on the fold of the ribbon. Use your hot glue gun to apply a pea-sized amount of hot glue on the fold that you just made. Make sure it is mostly centered to ensure that your rose will be even.[14]
- Place the tip of your glue gun directly onto your material to make sure the glue doesn’t create strings.
-
6Crease the ribbon onto the hot glue creating another triangle. Hold the ribbon horizontally. Take the folded part of the ribbon and fold it in half on top of the hot glue. Press down on the glue slightly so that it sticks together. Create a rolled top part of the ribbon that looks like the center of a rose.[15]
-
7Roll the folds in toward the rest of the ribbon and add hot glue. Keep using the same technique of rolling the ribbon inward while making it stick with pea-sized dots of hot glue every 2 inches (5.1 cm). Hold the ribbon horizontally the entire time. Keep the folds tight so that they combine to look like a rose.[16]
- Keep the top part of the ribbon folded over so that there are no edges showing in your rose.
-
8Glue the excess ribbon to the base of the flower. Take the tail of the ribbon that is hanging out from behind your rose and glue it to the bottom of your rose. Put a dot of hot glue on the inside of the tail so that you can’t see it.[17]
- You can twist the tail around itself once if you don’t want the frayed edge to show.
Community Q&A
Did you know you can get answers researched by wikiHow Staff?
Unlock staff-researched answers by supporting wikiHow
-
QuestionCan we stick it on a bag?
 wikiHow Staff EditorThis answer was written by one of our trained team of researchers who validated it for accuracy and comprehensiveness.
Staff Answer wikiHow Staff EditorStaff Answer
 -
QuestionHow do I attach a rose to an elastic band?
 wikiHow Staff EditorThis answer was written by one of our trained team of researchers who validated it for accuracy and comprehensiveness.
Staff Answer wikiHow Staff EditorStaff Answer
 -
QuestionHow do I attach a wire for the stem to a rose, and when should I do it?
 Community AnswerAttach the wire right before you tie the knot at the end. Do this by inserting the wire.
Things You’ll Need
Folding a Rose
- 8 inches (20 cm) of ribbon, silk, or satin
- Scissors
Using Hot Glue
- Glue gun
- Hot glue stick
- 8 inches (20 cm) of ribbon, silk, or satin
- Scissors
References
- ↑ https://www.youtube.com/watch?v=qVKYLq9mQ8E&feature=youtu.be&t=8
- ↑ https://www.youtube.com/watch?v=qVKYLq9mQ8E&feature=youtu.be&t=8
- ↑ https://www.youtube.com/watch?v=lw56TnrUpn0&feature=youtu.be&t=38
- ↑ https://www.youtube.com/watch?v=qVKYLq9mQ8E&feature=youtu.be&t=11
- ↑ https://www.youtube.com/watch?v=lw56TnrUpn0&feature=youtu.be&t=84
- ↑ https://www.youtube.com/watch?v=qVKYLq9mQ8E&feature=youtu.be&t=44
- ↑ https://www.youtube.com/watch?v=lw56TnrUpn0&feature=youtu.be&t=141
- ↑ https://www.youtube.com/watch?v=qVKYLq9mQ8E&feature=youtu.be&t=123
- ↑ https://www.youtube.com/watch?v=lw56TnrUpn0&feature=youtu.be&t=291
- ↑ https://www.youtube.com/watch?v=3ZBSGe7HFIw&feature=youtu.be&t=10
- ↑ https://www.youtube.com/watch?v=3ZBSGe7HFIw&feature=youtu.be&t=17
- ↑ https://www.youtube.com/watch?v=MDae6ygIn4s&feature=youtu.be&t=3
- ↑ https://www.youtube.com/watch?v=3ZBSGe7HFIw&feature=youtu.be&t=44
- ↑ https://www.youtube.com/watch?v=MDae6ygIn4s&feature=youtu.be&t=10
- ↑ https://www.youtube.com/watch?v=3ZBSGe7HFIw&feature=youtu.be&t=59
- ↑ https://www.youtube.com/watch?v=3ZBSGe7HFIw&feature=youtu.be&t=119
- ↑ https://www.youtube.com/watch?v=3ZBSGe7HFIw&feature=youtu.be&t=333
About This Article
To make a ribbon rose, start by cutting a piece of ribbon that's about 8 inches long. Then, fold the ribbon in half. Next, bring the end on the bottom up over the fold you made, and then do the same thing with the other end. Continue to fold the ends over the fold in the center of the ribbon, alternating ends each time. Once you've used most of the ribbon, pinch the 2 loose ribbon ends together so the folds don't unravel. Finally, pull on one of the loose ends of the ribbon to bunch the folds together so they look like petals, and tie a knot on the back of the rose to hold everything in place. To learn how to make roses of different sizes and materials, scroll down!
