This article was co-authored by wikiHow Staff. Our trained team of editors and researchers validate articles for accuracy and comprehensiveness. wikiHow's Content Management Team carefully monitors the work from our editorial staff to ensure that each article is backed by trusted research and meets our high quality standards.
There are 9 references cited in this article, which can be found at the bottom of the page.
The wikiHow Video Team also followed the article's instructions and verified that they work.
This article has been viewed 46,032 times.
Learn more...
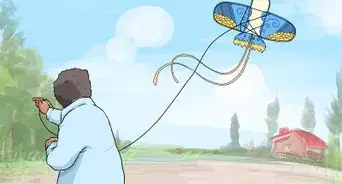
Japanese people have been creating beautiful kites for hundreds of years. Each region in Japan has its own traditional kite design, and many holidays have kites associated with them, too. Want to learn how to create your own beautiful Japanese-style kite? There are a number of different methods you can use, but these two kite designs are a fun way to start out with Japanese kite-making. The carp windsock is traditionally flown on Children’s Day, so it’s a great one for kids to make. The diamond kite is harder to make, so if you’re a kid, ask an adult for help.
Steps
Making a Japanese Carp Windsock
-
1Fold your construction paper in half lengthwise and draw the outline of a fish. On the edge of the paper opposite the fold, draw a long curve for the body of the fish and some triangles at the bottom for flippers. You can also just use the whole rectangle of paper to create your fish, which is a good option for younger children. Your fish will end looking like a simple tube of rolled paper, but you won’t have to draw the outline of a fish or cut it out.[1]
- If you don’t know how to draw your own fish, you can print out a template online.
-
2Cut out your outline and hole punch the top of the paper where the mouth is. Keep the fish folded in half so your hole punch will leave two holes in the paper. Later, you will use this hole to hang your carp windsock up.[2]
- When you're finished, unfold the carp so you can decorate it.
Advertisement -
3Draw eyes and scales using pastels or markers. The eyes are two circles near the top of the fish. Draw a line underneath the eyes for the gills, then draw overlapping "u" shapes going down from that line to make the fish's scales.[3]
- Use lots of fun colors and get creative! This is yours, so you can decorate it how you want.
-
4Roll the carp windsock lengthwise into a rounded shape and staple it closed. The two edges of the fish should touch each other. Try rolling the kite a few times until it can stay in a tube position. Staple on the edge of the carp windsock, not where the mouth or tail is. You want to leave those spaces open for air to flow through.[4]
- You can also use glue or tape to connect the edges of the carp.
-
5Staple streamers to the bottom and tie string to the top. For streamers you can use party streamers, colorful ribbon, or cut strips of construction paper. Hang your carp up with string using the hole-punched spot. You can use plain string if that's what you have on hand, or use colorful yarn to add a colorful touch.[5]
- If you hang the carp outside, it can act as a windsock, filling with air as the wind blows.
- You can also hang the carp inside your home or classroom.


Making a Diamond Kite
-
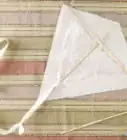
1Cut your washi paper into a diamond shape. Make the top angle of your kite approximately 150 degrees. Cut the top sides to be about 16 inches (41 cm) long, and the bottom sides to be about 20 inches (51 cm) long.
- Use sharp scissors or a rotary blade to cut the paper.
- Ask an adult for help with this step and be careful with the scissors.[6]
- Make sure not to buy origami washi squares, because they will be too small for kite-making.
-
2Decorate the smooth side and let it dry. Washi paper has two sides, a smooth side and a rough side, so make sure you paint or draw with colorful pens on the smooth side of the paper. You can decorate the kite however you want, but if you need inspiration, look up images of traditional Japanese kites. They mostly have more complicated structures than a diamond, but you can try to copy their designs.[7]
- Erasing doesn’t work well on washi paper.
- Allow the ink to dry before you continue.
-
3Fold the kite to create crease lines between the corners. Fold the top of the kite toward you 2 inches (5.1 cm), and then unfold it. Then fold the kite in half the long way and unfold it. At this point you should have two crease lines, one connecting the top and bottom corners, and one connecting the side corners.
- You don’t need to fold the kite too tightly, just lightly crease it.
-
4Cut 3 bamboo spars. The vertical spar should be approximately 25 inches (64 cm). The two diagonal spars should be approximately 20 inches (51 cm). You can cut the spars using a sharp knife and a cutting board. If you are a kid, ask an adult for help with this step![8]
- Be careful when working with the knife.
- If you can’t find bamboo spars, you can use wooden doweling instead.
-
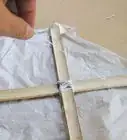
5Glue the spars to the kite. Make sure to attach them to the side of your washi paper that is undecorated. The center spar should go on the faintly folded middle line. Place the first diagonal spar so that it crosses the center spar 2 inches (5.1 cm) from the top. It should extend past the center spar about halfway to the right. The diagonal spar should hang over the left edge about 1 inch (2.5 cm). Do the same for the other diagonal spar but on the other side.[9]
- The two diagonal spars should meet at the same point in the center.
-
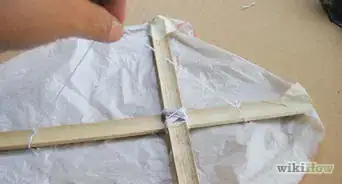
6Secure the spars by folding over the top and adding washi squares. Fold the top two sides in over the spars about 1⁄4 inch (0.64 cm). Glue the top fold over the spar joints for stability. Secure the spars by gluing a square inch piece of washi paper on the center of each line. Press firmly with your fingers until the glue dries.
-
7Punch out holes with a toothpick for the bridle. Punch out two small holes with a toothpick on either side of the center spar one-third of the way down the kite. Create another two holes parallel to the first two on either side of the center spar one-third of the way up from the bottom of the kite.[10]
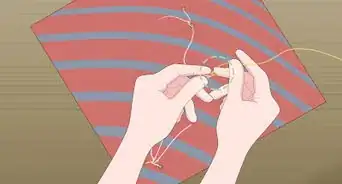
-
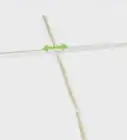
8Make the bridle out of string. Thread the kite string into the top left hole, starting from the back. Thread that same string through the top right hole, starting from the front. Repeat this process with the bottom two holes using the other end of the kite string. Tie a new piece of string to the top of the center spar to the bottom. This is the bow line.[11]
- Wrap the bow line tightly until the kite begins to bend in the middle.
- Collect the lines of string together and knot them.
-
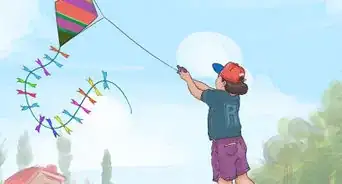
9Make a tail for your kite by cutting strips from a plastic bag. Cut across the top of the bag (avoiding the handles) to make a loop of plastic about 1 inch (2.5 cm) wide. Cut similar loops all the way down the bag, and then tie them together. Your tail should be about 5 times as long as your kite, so you might need to use more than one plastic bag.
- The longer your tail is, the more stable your kite will be. But if it’s too long, the kite won’t go very high.
-
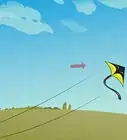
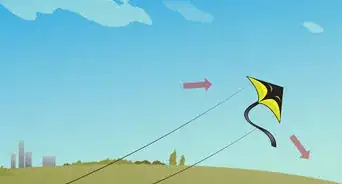
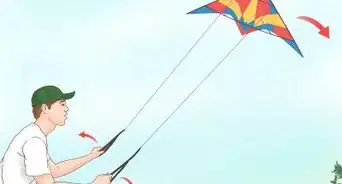
10Glue the tail the bottom of the kite and tie the kite string to the bridle. Take the free end of your ball of string and attach it to the bridle. Your kite string can be in a roll or on a plastic holder.[12]
- Wait for a breezy day, and then enjoy flying your kite!


Things You’ll Need
Carp Windsock
- Construction paper
- Hole punch
- String
- Streamers
- Markers or pastels
Diamond Kite
- Washi paper
- Paints or markers
- Bamboo spars
- Glue
- Thread
- Toothpicks
- Plastic bag
References
- ↑ https://amhistory.si.edu/ourstory/pdf/internment/internment_kite.pdf
- ↑ https://amhistory.si.edu/ourstory/pdf/internment/internment_kite.pdf
- ↑ https://www.cantonart.org/sites/default/files/kimono_carpkites.pdf
- ↑ https://www.cantonart.org/sites/default/files/kimono_carpkites.pdf
- ↑ https://thecraftyclassroom.com/crafts/japan-crafts-for-kids/japanese-carp-kite-craft/
- ↑ https://stayathomeeducator.com/tips-for-teaching-scissor-cutting-2/
- ↑ https://allthingsencaustic.com/japanese-paper-monoprinting/
- ↑ http://miniatures.kitingusa.com/plan_cocktail.htm
- ↑ http://www.dublinkitefestival.ie/build-a-kite/
About This Article