wikiHow is a “wiki,” similar to Wikipedia, which means that many of our articles are co-written by multiple authors. To create this article, 12 people, some anonymous, worked to edit and improve it over time.
This article has been viewed 164,559 times.
Learn more...
Are you battling a nasty computer virus, or a program that refuses to uninstall itself? Safe Mode is a way to load Windows with only the basic files that it needs to run. This mode will allow you to perform lots of troubleshooting tasks that would be difficult or impossible to do in a normal Windows session. Loading Safe Mode is a straightforward process, and you can do it even if you can't load Windows normally. See Step 1 below to learn how.
Steps
-
1Determine if you need to run Safe Mode. Safe Mode works by only allowing the most essential files and drivers to load. Anything which is not required to boot the operating system (like start-up software) is not loaded. If you are having trouble booting your computer or something is acting fishy shortly after starting up your machine, reboot in Safe Mode to start troubleshooting.
-
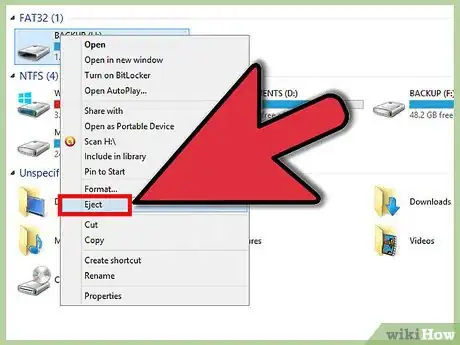
2Remove all disks from the computer. This includes CDs, DVDs, floppy disks and USB drives. This will prevent any of them from attempting to boot when you restart your computer.Advertisement
-
3Reboot the computer into Safe Mode. You have two different options when it comes to booting into Safe Mode. You can reboot your computer and rapidly strike the F8 key to load the Advanced Startup menu, or you can set Windows to boot directly into Safe Mode. The first option is useful when you can't load Windows, while the second is useful if you can access Windows normally already.
- For the first option, rapidly press the "F8" key while your computer restarts. Make sure you do this before the Windows splash screen appears (this is the black screen with the Windows logo). If the splash screen appears, you will need to restart the computer again and try again.[1]
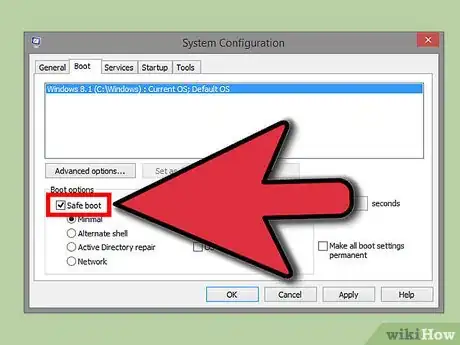
- For the second option, set your computer to boot into Safe Mode from Windows. To do this, open the Run dialog (Windows key + R) and type “msconfig”. This will open the System Configuration box. Click the Boot tab, and then check the “Safe boot” box. This will allow you to select what kind of Safe Mode you would like to use. The most common choices will be Minimal and Networking (see next step).[2]
-
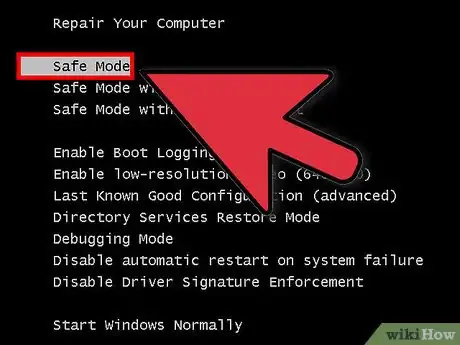
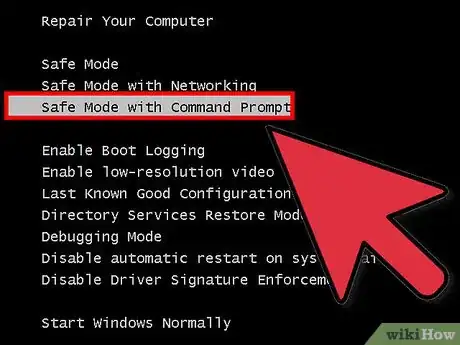
4Choose the type of Safe Mode you want to run. After hitting F8, you will be taken to the "Advanced Boot Options" screen. At the top of the list will be three different ways to load Safe Mode. If you set Windows to boot directly to Safe Mode, you won't see this menu.
- Safe Mode - This is the best option if you aren't sure what you should choose. This option will load the fewest drivers necessary to boot Windows 7. You will not be able to connect to the internet. This is the “Minimal” option when setting Windows to boot to Safe Mode.
- Safe Mode with Networking - This option loads all the drivers and files that the first option does, but also loads any processes that are needed to allow networking. Choose this option if you think you'll need to get on the internet or your local network while troubleshooting.
- Safe Mode with Command Prompt - This mode loads the same processes as the first option but gives you immediate access to the command prompt. This option is suited for advanced users who need to do troubleshooting from the command line. The Windows graphical environment will not be loaded.
-
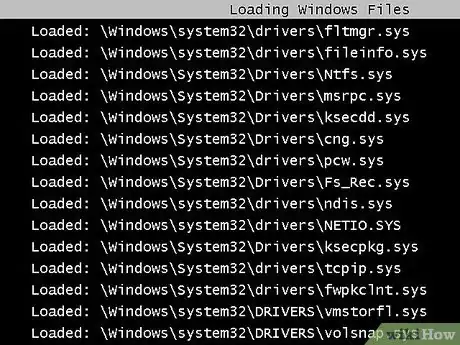
5Wait for the necessary files to load. The next screen will show every file that is being loaded. You don't need to do anything while this is happening unless the files do not all load correctly. If the screen freezes at this point, make a note of the last file that successfully loaded and then search the internet for troubleshooting tips based on that information.
-
6Log into Windows 7. When the login screen appears, log in to an account with administrator privileges. If you only have 1 user account on your computer, it is likely that it has administrator privileges. If you only have one account and no password, you will most likely be logged in automatically.
-
7Start troubleshooting. You will know if your computer is in Safe Mode because "Safe Mode" will be written in all four corners of the screen. Safe Mode is a great place to run virus and malware scans, uninstall troublesome programs, and edit the registry.
- When you are finished in Safe Mode, reboot your computer to return to a normal Windows 7 session.
- If you set your computer to boot into Safe Mode through the System Configuration box, you will need to open it again while you are in Safe Mode and uncheck the “Safe boot” option in the Boot tab. If you don't, your computer will continue booting into Safe Mode when it restarts.
Community Q&A
-
QuestionHow to fix sound system in Windows 7 safe mode?
 WikiHowUser20180704181044Community AnswerSound is a full system function. Safe mode and system sound are mutually exclusive.
 -
QuestionMy HP laptop stated two days ago I needed to update it. However, for the past two days, my laptop has the error message "We couldn't compete the updates. Undoing changes. Don't turn off your computer." I can't get it into safe mode to eliminate the updates. What do I do?
 Community AnswerThe update may be corrupted. Do not restart or turn off your computer during updates. To fix this, you may need to get a new hard drive, or to go to an IT service to get your current HD wiped.


-Step-55-Version-2.webp)


