This article was co-authored by wikiHow staff writer, Travis Boylls. Travis Boylls is a Technology Writer and Editor for wikiHow. Travis has experience writing technology-related articles, providing software customer service, and in graphic design. He specializes in Windows, macOS, Android, iOS, and Linux platforms. He studied graphic design at Pikes Peak Community College.
wikiHow marks an article as reader-approved once it receives enough positive feedback. This article received 24 testimonials and 80% of readers who voted found it helpful, earning it our reader-approved status.
This article has been viewed 4,489,706 times.
Learn more...
NOTE: Microsoft is no longer supporting Windows 7, which means it will no longer receive essential security fixes. It is highly recommended that you consider upgrading to a newer version of Windows, such as Windows 8.1, Windows 10, or Windows 11, as they actually run well even on old machines.
Are you installing Windows 7? You don't need to be a professional or refer to a confusing manual in order to do so. You can install Windows 7 from a disc or flash drive. You can also upgrade to Windows 7 from an older version of Windows. Doing a clean install will wipe all the data off your computer and install Windows 7 as if it's a new computer. Doing an upgrade will keep all your data and replace an older version of Windows with Windows 7. You will need a Windows 7 product key, or purchase Windows 7 within 30 days.
Steps
Using a Windows 7 installation Disk
-
1Backup your files. The installation process will delete all data on your hard drive. It is recommended that you back up all files you want to keep before installing a new operating system. You can backup your files to another hard drive, an external hard drive, a flash drive, or a cloud-based service like Google Drive, or Dropbox.
-
2Restart your computer. Press the power button on your computer and then click Restart in the power options menu.Advertisement
-
3Immediately press Del, Esc, F2, F10, or F9 when it restarts. Depending on the make and model of your computer, pressing one of these buttons immediately after you power on your computer will enter the system BIOS.
- Some computers tell you which button to press to enter the BIOS as the computer starts up.
-
4Find your BIOS's boot options menu. The boot options menu of your BIOS may vary in location or name from the illustration, but you may eventually find it if you search around.
- If you can't find the boot options menu, search the name of your BIOS (most likely located in the BIOS menu) online for help.
-
5Select the optical disk drive as the first boot device of your computer. Although this method may vary among computers, the boot options menu is typically a menu of movable device names where you should set your CD, DVD or Blu-ray drive as the first boot device. It can also be a list of devices that you can set the order of their boot on. Consult a manual or the internet for help if you're stuck.
-
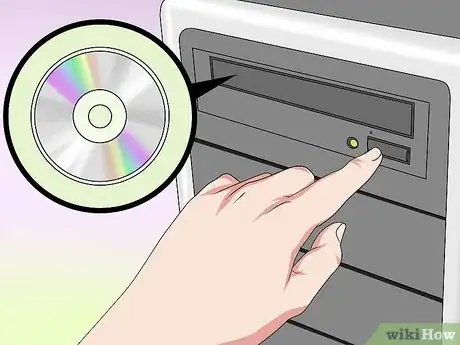
6Place the Windows 7 Installation disc in the disc drive. Press the button on your CD, DVD, or Blu-ray drive. Then place the Windows 7 installation disc in the disk tray and push it back in the drive.
-
7Save the changes in the settings. Press the button indicated on the screen or select the save option from the BIOS menu to save your configuration.
-
8Shut off your computer. Either turn off the computer by choosing the shut-down option in your current operating system, or hold the power button until the computer powers off.
-
9Start your computer from the disc. After you have placed the disc into the disc drive, start your computer. When the computer starts, press a key if you are asked if you would like to boot from the disc by pressing any key. After you choose to start from the disc. Windows Setup will begin loading.
- If you are not asked to boot from the disc, you may have done something wrong. Retry the previous steps and make sure you have selected the correct drive in the BIOS boot menu.
-
10Choose your Windows Setup options. Once Windows Setup loads, you'll be presented with a window. Use the drop-down menus to select your preferred language, keyboard type, and time/currency format, then click Next in the lower-right corner.
-
11Click the Install Now button. It's the blue button in the center of the screen.
-
12Accept the License Terms. Read over the Microsoft Software License Terms. Then click the checkbox next to I accept the license terms, and click Next in the lower-right corner.
-
13Select the Custom installation. This option allows you to do a clean install of Windows 7. This will erase all your files on the installation drive.
- If you do not want to erase all your files, select Upgrade instead. This option requires an existing Windows installation. You can only upgrade from one Windows edition to another. For example, if you have Windows Vista Home Basic Edition, you can only upgrade to Windows 7 Home Basic Edition. You would not be able to upgrade to Windows 7 Home Premium.
-
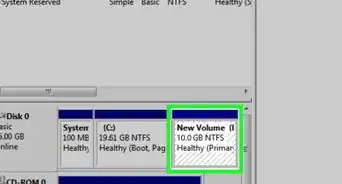
14Select a hard drive and partition you want to install Windows on. A hard drive is a physical part of your computer that stores data, and partitions "divide" hard drives into separate sections. Click the hard drive or partition you want to install Windows 7 on.
- If the hard drive has data on it, You'll need to use the following steps to Delete or Format the drive. Be aware that this will permanently erase all data from the disk.
- Select the hard drive from the list of hard drives.
- Click Drive options (advanced).
- Click Delete or Format from Drive options.
- If your computer doesn't have any partitions yet, create one to install Windows on it.
- Select the hard drive from the list of hard drives.
- Click Drive options (advanced).
- Select New from Drive options.
- Select the size, and click OK.
- If the hard drive has data on it, You'll need to use the following steps to Delete or Format the drive. Be aware that this will permanently erase all data from the disk.
-
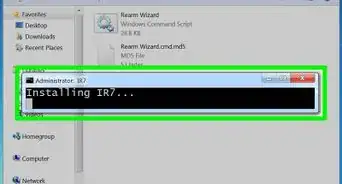
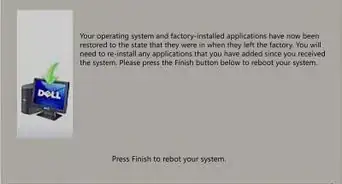
15Install Windows on your preferred hard drive and partition. Once you've decided on where to install Windows, select it and click Next. Windows will begin installing. Your computer may start and restart several times during the installation process.[1]
Upgrading to Windows 7
-
1Start your computer. Boot up your computer as normally into your current operating system.
-
2Check to see if your computer is compatible with Windows 7. The Windows 7 Upgrade Advisor scans your computer to see if you can upgrade it to Windows 7.
- In order to upgrade to Windows 7, you must upgrade to the same version of Windows you already have. For example, if you have Windows Vista Home Premium Edition, you can only upgrade to Windows 7 Home Premium Edition. You cannot upgrade from Windows Vista Home to Windows 7 Professional.
-
3Prepare your computer to install Windows. Use the following steps to prepare your computer for a Windows installation:
- Back up your files. It's a good idea to back up any files you want to keep in case there is a problem during the upgrade. You can back up for your files using another hard drive, an external hard drive, a flash drive, or a cloud service such as Google Drive or Dropbox.
- Scan your computer for malware. Malware can prevent Windows from installing correctly.
- Disable or uninstall any antivirus software because they may interfere with the Windows installation.
- Uninstall some unnecessary programs to speed up the upgrade. You can install them after Windows 7 has finished.
- Update Windows with Windows Update.
- Delete some unnecessary files to speed up the upgrade.
- Back up your hard drive in case the installation fails and you lose your files. (optional).
-
4Insert your Windows 7 installation disc. Eject the tray of your CD/DVD drive and place the Windows installation disk into the disk drive and then close it.
-
5Click the Windows Start menu. By default, it's the icon with the Windows logo in the lower-left corner.
- Alternatively, you can boot your computer from the disc as outlined in Method 1 and select Update from the installation screen.
-
6Click My Computer. This is displays all drives on your computer.
- If you are using a newer version of Windows, click Windows Explorer. It has an icon that resembles a folder with a blue clip. Then click This PC or your computer name.
-
7Double-click the disc drive with the installation disk. This displays the contents of the disk. Allow Setup to start.
-
8Click Setup.exe. This launches the Windows 7 installation program.
-
9Click Install Now. It's the blue button in the center of the screen.
-
10Decide whether to install updates for Windows Setup. The updates are intended to fix known problems with Windows Setup and installing updates makes your installation smoother and more stable. To get updates, click Go Online to get the latest updates for installation (recommended). To skip updates, click Do not get the latest updates for installation.
-
11Accept the License Terms. Read over the Microsoft Software License Terms, and click the checkbox next to "I accept the license terms". Then click Next.
-
12Select the Upgrade option. It's the first option in the menu. This checks your compatibility and installs Windows 7.[2]
Installing Using a Flash Drive or External Drive
-
1Connect a USB flash drive to your computer. Use a free USB port to connect a USB flash drive to your computer. The USB flash drive needs to have a minimum of 4 gigabytes of disc space.
-
2Move any personal files off of the drive. Make sure the flash drive has no other files on it before copying the Windows ISO file.
-
3Download the Windows 7 Setup ISO. An ISO file is the raw data from a CD, DVD, or Blu-ray drive. It is also known as a disk image. Note: This download may take a while, depending on your internet speed.
-
4Download and install the Windows 7 USB/DVD Download Tool from this link. This tool will be used to copy the Windows 7 ISO file to the USB flash drive.
-
5Install the Windows 7 USB/DVD Download Tool". Double-click the "en-US.exe" file after it finishes downloading. Then click Install to install the program. Follow the on-screen instructions in the Installation Wizard.
-
6Open the Windows 7 USB/DVD Download Tool. Once the Windows 7 USB/DVD Download Tool is finished downloading and installing, open the program from the Windows Start menu.[3]
-
7Select the Windows 7 ISO file. On the Choose ISO file screen of the Windows 7 USB/DVD Download Tool, click Browse, and then navigate to the save location of the Windows 7 ISO file and click it to select it. Then click Next to continue.
-
8Click USB device. It's the blue button in the lower-right corner the "Choose Media type:" screen.
-
9Select the USB flash drive and click Begin Copying. Use the drop-down menu on the "Step 3 of 4" screen to select the USB drive you want to copy the ISO file to and then click the green button that says "Begin Copying".
- If you receive an error that says Not Enough Free Space, click the Erase USB Device button, which will erase all of the files on the drive. Be aware that this will erase all files on the flash drive.
-
10Restart your computer. Press the power button on your computer and then click Restart in the power options menu.
-
11Immediately press Del, Esc, F2, F10, or F9 when it restarts. Depending on the make and model of your computer, press one of these buttons immediately after you power on your computer will enter the system BIOS.
- Some computers tell you which button to press to enter the BIOS as the computer starts up.
-
12Find your BIOS's boot options menu. The boot options menu of your BIOS may vary in location or name from the illustration, but you may eventually find it if you search around.
- If you can't find the boot options menu, search the name of your BIOS (most likely located in the BIOS menu) online for help.
-
13Select "USB Drive" or "Removable drives" as the first boot device of your computer. Although this method may vary among computers, the boot options menu is typically a menu of movable device names where you should set your USB drive as the first boot device. It can also be a list of devices that you can set the order of their boot on. Consult a manual or the internet for help if you're stuck.
-
14Start your computer from the USB drive. With the USB drive connected to your computer via a free USB port, start your computer. When the computer starts, press a key if you are asked if you would like to boot from the USB drive by pressing any key. After you choose to start from the USB drive. Windows Setup will begin loading.
-
15Choose your Windows Setup options. Once Windows Setup loads, you'll be presented with a window. Use the drop-down menus to select your preferred language, keyboard type, and time/currency format, then click Next in the lower-right corner.
-
16Click the Install Now button. It's the blue button in the center of the screen.
-
17Accept the License Terms. Read over the Microsoft Software License Terms, and click the checkbox next to "I accept the license terms". Then click Next in the lower-right corner.
-
18Select the 'Custom installation. This option allows you to do a clean install of Windows 7. This will erase all your files on the installation drive.
- If you do not want to erase all your files, select Upgrade instead. This option requires an existing Windows installation.
-
19Decide on which hard drive and partition you want to install Windows on. A hard drive is a physical part of your computer that stores data, and partitions "divide" hard drives into separate parts.
- If the hard drive has data on it, delete the data off of it, or format it Be aware that this will permanently erase all data from the disk.
- Select the hard drive from the list of hard drives.
- Click Drive options (advanced).
- Click Format from Drive options.
- If your computer doesn't have any partitions yet, create one to install Windows on it.
- Select the hard drive from the list of hard drives.
- Click Drive options (advanced).
- Select New from Drive options.
- Select the size, and click OK.
- If the hard drive has data on it, delete the data off of it, or format it Be aware that this will permanently erase all data from the disk.
-
20Install Windows on your preferred hard drive and partition. Once you've decided on where to install Windows, select it and click Next. Windows will begin installing. Your computer may start and restart several times during the installation process.
-
21Remove the USB drive. After Windows is finished installing, remove the USB drive.
-
22Reboot your computer. After you have finished installing Windows 7 and have removed the USB drive, reboot your computer and allow it to boot up as normal.
Setting Up Windows Post-Installation
-
1Type your username and computer's name and click Next. The first time you start your computer after installing Windows 7, you will need to go through a setup process.
-
2Type your password and click Next. If you don't want a password, leave the text boxes blank and then click Next. This is the password you will need to sign in to Windows using your account.
-
3Enter your product key then click Next. Your product key is located on the case of your Windows 7 disc if you purchased the disc. To skip entering your product key, just click Next, but Windows will run on a 30-day trial, and you'll have to enter a key once the 30 day trial time is up.
-
4Choose your Windows Update settings. You can select "Use recommended settings", "Install important updates only", or "Ask me later".
- Use recommended settings automatically sets update and security settings recommended by Microsoft.
- Install important updates only configures your computer only to install necessary updates.
- Ask me later disables your security until you have made a decision.
-
5Set your time and time zone. Use the drop-down menu to select your time zone, and then use the calendar and clock to select today's date and the current time.
-
6Set your network type. Once the computer connects to your network, Windows will go through the process of setting up your desktop.
- If the computer is connected to your own personal network, choose Home network.
- If you are connected to the network at your workplace, choose Work network.
- If you're connected to a public network from places such as restaurants and shops,
Community Q&A
-
QuestionIn booting from disk, once the "Windows is loading files" progress bar finishes, I get the "starting Windows" screen, then I get the blue screen of death saying "iqrl not less or equal." What does this mean, and how can I get Win 7 to install on this PC?
 Community AnswerMake sure the files on the disk are not corrupted and retry the installation.
 -
QuestionMy laptop is not playing CD/DVDs, and the CD-ROM drive does not appear in my PC. What can I do?
 Community AnswerYou can use your flash drive, make it bootable and install your OS, or you can follow Part 2 for further details.
 -
QuestionIf I have a bunch of programs and files on my Local C: drive, will they all be erased?
 Community AnswerYes, because formatting erases all content from a hard drive. Back up your data to a USB drive or the cloud before beginning.
Things You'll Need
Windows 7 System Requirements
- 1 gigahertz (GHz) or faster 32-bit (x86) or 64-bit (x64) processor
- 1 gigabyte (GB) RAM (32-bit) or 2 GB RAM (64-bit)
- 16 GB available hard disk space (32-bit) or 20 GB (64-bit)
- DirectX 9 graphics device with WDDM 1.0 or higher driver
Resources Needed
Disc Installation
- Windows 7 Setup Disc
- Disc Drive
- Compatible Computer
USB Installation
Clean Installation
- USB Drive (4 GB minimum size)
- Internet Connection (to download the ISO and USB extraction software)
- A computer to extract the files to the USB drive on.
- USB ports
- Compatible Computer
Upgrade Installation
- An existing installation of Windows (Windows XP or Vista recommended)
- USB Drive (4 GB minimum size)
- Internet Connection (to download the ISO and USB extraction software)
- A computer to extract the files to the USB drive on.
- USB ports
- Compatible Computer
References
About This Article
To install Windows 7, first restart your computer and enter the code on the screen to access your computer’s BIOS, which is usually Delete, Escape, F10. Once you’re in the BIOS, select the “Boot options” menu and choose the CD rom drive as your computer’s first boot device. Then, click on the save button to save your settings and turn off your computer. Next, turn the computer on and insert the Windows CD into the CD drive. When you are prompted to do so, press any key to allow the system to boot from the disk. After the system has loaded, follow the on-screen instructions to choose your preferred settings, like language and keyboard type. You should also read and accept the license agreement and select “Custom installation.” On the following screen, choose the hard drive where you want to save Windows before clicking “Next” to begin the installation. For tips on how to install Windows 7 as an update, read on!
-Step-1-Version-2.webp)
-Step-2-Version-2.webp)
-Step-3-Version-2.webp)
-Step-4-Version-2.webp)
-Step-5-Version-2.webp)
-Step-7-Version-2.webp)
-Step-8-Version-2.webp)
-Step-9-Version-2.webp)
-Step-10-Version-2.webp)
-Step-11-Version-2.webp)
-Step-12-Version-2.webp)
-Step-13-Version-2.webp)
-Step-14-Version-2.webp)
-Step-15-Version-2.webp)
-Step-16-Version-2.webp)
-Step-17-Version-2.webp)
-Step-18-Version-2.webp)
-Step-19-Version-2.webp)
-Step-20-Version-2.webp)
-Step-21-Version-2.webp)
-Step-22-Version-2.webp)
-Step-23-Version-2.webp)
-Step-24-Version-2.webp)
-Step-25-Version-2.webp)
-Step-26-Version-2.webp)
-Step-27-Version-2.webp)
-Step-28-Version-2.webp)
-Step-29-Version-2.webp)
-Step-30-Version-2.webp)
-Step-31-Version-2.webp)
-Step-32-Version-2.webp)
-Step-33-Version-2.webp)
-Step-34-Version-2.webp)
-Step-35-Version-2.webp)
-Step-36-Version-2.webp)
-Step-37-Version-2.webp)
-Step-38-Version-2.webp)
-Step-39-Version-2.webp)
-Step-40-Version-2.webp)
-Step-41-Version-2.webp)
-Step-42-Version-2.webp)
-Step-43-Version-2.webp)
-Step-44-Version-2.webp)
-Step-45-Version-2.webp)
-Step-46-Version-2.webp)
-Step-47-Version-2.webp)

-Step-49-Version-2.webp)
-Step-50-Version-2.webp)
-Step-51-Version-2.webp)
-Step-52-Version-2.webp)
-Step-53-Version-2.webp)
-Step-54-Version-2.webp)
-Step-55-Version-2.webp)
