This article was co-authored by wikiHow Staff. Our trained team of editors and researchers validate articles for accuracy and comprehensiveness. wikiHow's Content Management Team carefully monitors the work from our editorial staff to ensure that each article is backed by trusted research and meets our high quality standards.
This article has been viewed 27,743 times.
Learn more...
Electronics are difficult to store; their cables tend to unravel and tangle up with the cords of other electronics. If you own a MacBook or MacBook Pro, you might be wondering about the best way to wrap up the charger without damaging the cord. It’s important to follow the directions provided by Apple—and to stop using the charger if the cord becomes frayed or damaged—to maximize the lifespan of your charger.
Steps
Wrapping Your Charger
-
1Fold out the two collapsible clips on the upper corners of your charger. Look closely between the corners on either side of the spot where your MacBook charger meets the cord. You should see a pair of small clips, or wings. Use your fingernail to open these so that they stand out at a 90-degree angle from the body of the charger.[1]
- When you’re using the charger, fold these two clips back down so that they don’t snap off.
-
2Loop the thick cord around the charger from top to bottom. Find the spot where the small cord plugs into the charger. Think of this as the “top” of the MacBook charger. Take your large MacBook cord (the one that plugs into the wall) and plug one end of the large cord into the base of your charger. Route the cable on one side of the spot where the small cord meets the charger. Then wrap the cord around the charger from top to bottom.[2]
- Until you’ve finished the wrapping process, just hold the wrapped large cord in place with one hand.
Advertisement -
3Wrap the small cord around the two collapsible clips. Take the loose end of the smaller MacBook cord and wrap it loosely around the clips that you unfolded earlier. Continue wrapping until you’ve looped the entire cord. Make sure that the cord is looped tight enough to stay wrapped around the clips but loose enough that there aren’t any spots where the cord is under strain.[3]
- Make sure to also wrap the small cord around the already-looped thick cord. The small cord holds the larger one in place.
-
4Make sure there is slack in the cord where it meets the charger. The cord meets the charger in the center of the charger’s top. There’s rubber casing around the cord to prevent it from being damaged in this location. When you wrap up your charger, make sure that the cord is slightly slack here to prevent strain.[4]
- If there’s tension on the cord in this location, the cord could split or pull away from the charger.
-
5Clip the loose end of the small cord onto one of the cord’s loops. If you look closely along the length of your small cable, you’ll see a small clip that’s about 1⁄2 inch (1.3 cm) long. Clip this onto one of the loops of cord that’s wrapped around the two collapsible clips. This will hold the cord in place and prevent the whole thing from unraveling.[5]
- At this point, your MacBook charger is completely wrapped up and ready to be stored


Packing for Travel
-
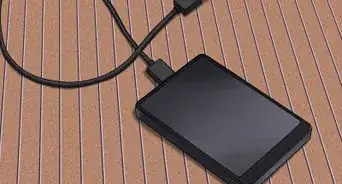
1Remove the large power cord and plug in the duckhead. If you’re trying to travel light, the large power cord that plugs into the wall will only take up extra space in your luggage. Pull it out from the base of the charger. In its place, plug in the MacBook duckhead: the small 1 inch (2.5 cm) long plug unit.[6]
- To use the duckhead, just bend down the two electrical prongs. Plug it into any outlet, and place the end of the small cord into your MacBook to charge it.
- You should have received a duckhead when you purchased your MacBook. If you misplaced it, replacement duckheads can be found online or at an Apple store.
-
2Support the body of the charger when you unwrap the cords. When you unpack your MacBook charger to plug it in to your computer, hold the body of the charger in one hand and unwrap the cables with your other hand. Doing this will prevent the cord from being damaged.[7]
- If you hold on to one end of the cord and allow the weight of the charger to unravel the cord, you’ll place a lot of strain on the cable.
-
3Inspect your charger after every trip for signs of damage to the cords. Any time that the MacBook cord is wrapped around the base of the charger, Make sure that there aren’t any kinks, breaks, or sharp bends in the cords once they’re wrapped up. If you do see a kink in the cord, unwrap it and wrap it again before packing it up.[8]
- MacBook chargers aren’t cheap; they usually cost about $70 USD. Keeping your charger in good condition will maximize the charger’s life and keep you from having to buy a replacement.


References
- ↑ https://www.travelandleisure.com/articles/how-to-pack-a-macbook-charger
- ↑ https://lifehacker.com/the-best-way-to-wrap-your-macbooks-power-cord-1481120226
- ↑ https://gizmodo.com/youve-been-wrapping-your-macbook-charger-wrong-this-wh-1481066698
- ↑ https://support.apple.com/en-us/HT201600
- ↑ https://gizmodo.com/youve-been-wrapping-your-macbook-charger-wrong-this-wh-1481066698
- ↑ https://youtu.be/YpcrlbmWgb8?t=53
- ↑ https://support.apple.com/en-us/HT201600
- ↑ https://support.apple.com/en-us/HT201600
About This Article