This article was co-authored by wikiHow Staff. Our trained team of editors and researchers validate articles for accuracy and comprehensiveness. wikiHow's Content Management Team carefully monitors the work from our editorial staff to ensure that each article is backed by trusted research and meets our high quality standards.
This article has been viewed 14,371 times.
Learn more...
Shirring is an effect that you can create using elastic thread and non-elastic thread together. The result is a stretchy finish that is great for sundresses, skirt waistbands, and cuffs on sleeves. Using shirring is easier than it might seem, but it does require some basic knowledge of sewing, such as how to thread, set, and use your sewing machine. Learn how to shirr and then try it out on your next sewing project.
Steps
Threading and Setting Your Machine for Shirring
-
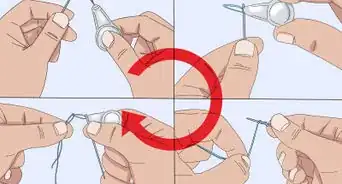
1Wind elastic thread onto the bobbin by hand. You cannot wind a bobbin with elastic thread using your sewing machine’s winder because there will be too much tension on the thread and the bobbin will be wound too tightly as a result. Instead, hold the bobbin in one hand and use the other hand to wind the elastic thread around the bobbin. You should stretch the thread slightly as you wind it, but do not stretch it too much.[1]
- Wind the bobbin until the elastic thread is even with the edge of the bobbin, but not sticking out past the edge. If there is too much thread on the bobbin, then it may be hard for your machine to use it.
- After you finish winding the bobbin, place the bobbin into your machine as you normally do with regular thread.[2] The bobbin goes in the compartment below the needle with the thread going in the direction indicated by the arrow on the compartment.
-
2Use regular thread in the top part of your machine. Non-elastic thread in the top part of your machine works with the elastic thread in the bottom part of your machine to create the shirring effect in your garment. Thread the top of your machine with non-elastic thread as you normally would.[3]
- Most sewing machines have guides right on the machine that shows you what direction the thread needs to go. Follow these directions if you are not sure how to thread the top part of a sewing machine.
Advertisement -
3Set your machine to the straight stitch setting. When you finish threading your machine, then you can set your machine to the straight stitch setting. This is the best stitch for using shirring elastic. The straight stitch setting is usually setting number one on sewing machines, but check your machine to be sure.
- If desired, you can adjust the stitch length on your machine. Some sewers prefer a longer stitch length for using shirring elastic, such as 3.5 to 4. See what works best with your machine.[4]


Sewing with Elastic Thread
-
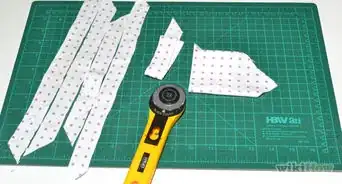
1Mark your fabric to indicate the first line of shirring. You only need to mark your fabric where you want your shirring to begin. After that, you will use the presser foot as a guide to sew additional lines of shirring. Use a ruler and a piece of chalk to indicate where you want the first line to be.
- Keep in mind that you will need to start sewing ½” (1.3 cm) from the seam allowance on your work. Do not start sewing the elastic right at the edge.[5]
-
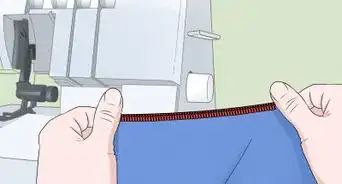
2Sew along your first line. After you have marked your fabric, place the fabric under the presser foot so that the needle is directly over the beginning of your line. Then, begin to sew down the line. After the first few stitches, reverse the direction of your machine to backstitch a few stitches, and then continue moving forward. This will help to secure the elastic in place at the edge.
- Make sure that you maintain even pressure on the fabric while you sew, but do not pull on it for the first row.[6] However, you will need to pull the fabric slightly to flatten it out for each row after the first one.
-
3Backstitch to finish the first line. When you reach the end of the first line of elastic, press the lever on the side of your machine to backstitch a few stitches. This will secure the other end of your elastic. Then, sew forward again and stop the machine when it reaches the end.[7]
- Remember that you do not want to sew all the way to the end of the elastic. Sew only to the end of your line, which should stop ½” (1.3 cm) away from the seam allowance.
- Cut the thread and elastic a few inches away from the fabric.
-
4Use the presser foot as a guide for other rows of elastic. When you are ready to start your next line of shirring, take the fabric out from under the presser foot. Place the fabric back under the presser foot so that the edge of the presser foot is lined up with your first row of shirring. This first row (and any subsequent rows) will serve as your guide for sewing.[8]
- Make sure that the edges of the presser foot are completely even with the edges of your first row.
-
5Continue sewing lines of elastic across your fabric. Sew along the edge of the presser foot just as you did with the first line of elastic. However, make sure to pull the fabric for each row after the first to ensure that it is flat and straight. Also, remember to backstitch a few stitches at the beginning and at the end of the line. Then, cut the thread and elastic and return to your start position to sew a new row.[9]
- Keep going until you have the desired number of shirred elastic rows.
- Be aware that the elastic may look loose at first, but it will become tighter as you add more rows of elastic thread.


Getting the Best Results
-
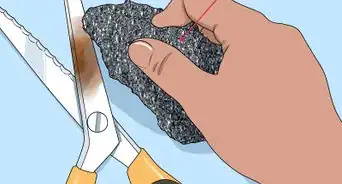
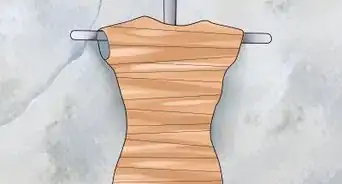
1Experiment with different types of fabric. Shirring works better on some fabrics than others, so experimenting with a fabric you want to shirr before actually shirring a project is a good strategy.[10] Some fabrics are also known to shirr well or poorly. For example, lighter fabrics like cotton tends to shirr well, while heavier fabrics like wool and corduroy will not shirr at all.[11]
-
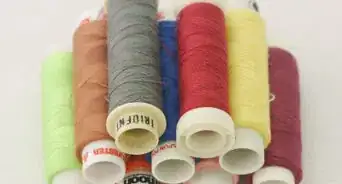
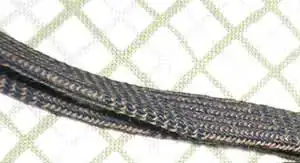
2Choose an elastic thread color that works with your fabric. Just like non-elastic thread, elastic thread comes in different colors.[12] Although the elastic thread will be hidden on the wrong side of your work, you may want to choose a thread color that is a close match to the type of thread you are using.
- For example, if you are using black thread, then you may also want to use black elastic thread.
-
3Iron your work after you finish. Ironing your work after you finish sewing will help to make the fabric bunch up more. You do not need to run the iron over the fabric, just turn on the steam on your iron and hold the iron lightly over each part of the fabric that you sewed shirring elastic onto. The steam from the iron will tighten up the elastic.[13]


Community Q&A
-
QuestionMy shirring gathers, but will not stretch. What am I doing wrong?
 ZackTop AnswererIt is likely that the fabric is gather as you stitch and the non-elastic thread is pulling taut. The sewing tension may be pulling it taut with each stitch. If the non-elastic thread is taut, the gathered fabric will not stretch without breaking the thread. Make sure the non-elastic thread gathers as loosely as the fabric gathers. You may need to pull the gathered fabric out to full length before backstitching at the end of the row.
Things You’ll Need
- Sewing machine
- Empty bobbin
- Elastic thread
- Non-elastic thread
- Scissors
- Fabric to sew
- Iron

References
- ↑ https://www.youtube.com/watch?v=n9PfSK0aTW0
- ↑ https://www.craftsy.com/blog/2014/11/shirring-tips/
- ↑ https://www.craftsy.com/blog/2014/11/shirring-tips/
- ↑ https://www.craftsy.com/blog/2014/11/shirring-tips/
- ↑ https://www.youtube.com/watch?v=n9PfSK0aTW0
- ↑ http://www.made-by-rae.com/2013/08/tutorial-shirring-with-elastic-thread/
- ↑ https://www.youtube.com/watch?v=n9PfSK0aTW0
- ↑ https://www.youtube.com/watch?v=n9PfSK0aTW0
- ↑ https://www.youtube.com/watch?v=n9PfSK0aTW0
About This Article