This article was co-authored by wikiHow Staff. Our trained team of editors and researchers validate articles for accuracy and comprehensiveness. wikiHow's Content Management Team carefully monitors the work from our editorial staff to ensure that each article is backed by trusted research and meets our high quality standards.
This article has been viewed 62,424 times.
Learn more...
There are lots of buttons available online and in the fabric store, but nothing beats handmade buttons. From basic fabric covered buttons to elaborate Singleton buttons to rustic wooden buttons, the possibilities are endless. Best of all, you can design them to fit the needs of your project and get the exact look you want!
Steps
Making Fabric Covered Buttons
-
1Purchase a cover button kit from a fabric store or a craft store. They come with metal button covers and metal button shanks. They also come with two cap-shaped tools: a large rubbery one, and a smaller plastic one.
-
2Find the template in your kit. Some kits include a plastic disk inside the package. Other kits have a disk printed on the back of the packaging. If your kit is the latter of the two, cut the disk out.
- Some templates have a hole in the middle. This is for printed fabrics to ensure that the design is centered.[1]
- Some kits have a semi-circle printed on the back. You will need to trace this on a piece of folded fabric, with the flat part along the folded edge.[2]
- If you lost the template, cut a square out of cardstock or thin cardboard that is twice the size of the button cover, then round the corners.[3]
Advertisement -
3Use the template to trace a circle onto your fabric. Choose a lightweight fabric, such as cotton. Spread it out on a flat surface, wrong side up. Place the template on top of the fabric. Trace around the template using a pen or chalk. It would be best to use a washable tailor's chalk or pen for this.
- If your fabric is very thin, use two layers of fabric. You can also iron some interfacing to the wrong side of the fabric instead.[4]
-
4Cut the circle out with fabric scissors. If you need to make more covered buttons, trace and cut more circles. Depending on how thin your fabric is, you may be able to cut several circles out at once by folding the fabric a few times.
-
5Place the fabric center into the bottom part of the tool. Find the rubbery, cup-shaped piece in your button cover kit. Set it down on a flat surface with the cupped part facing up. Place the fabric circle on top of it, right-side-down.
-
6Press the button cover into the rubber cup, right over the fabric. Find one of the dome-shaped metal pieces in your kit. Place it rounded-side-down into the rubber cup until it hits the bottom. The hollow part of the button cover should be facing up. The fabric will wrinkle around the button cover as you sink it into the rubber cup.
- The fabric circle may get dislodged during the step. You want an even amount of fabric sticking out all around the button. If it gets dislodged, gently tug on the edges to adjust it.
-
7Tuck the fabric into the button cover. Hold it in place with your finger. You can also sew around the edges of the fabric circle, then pull on the threads to gather the fabric. This is not really necessary, however.
-
8Place the back of the button cover on top. Find one of the pieces in your kit that looks like a flat, metal disk with a looped wire sticking out of it. Place it into the rubber cup, on top of the fabric and button cover. Make sure that the fabric is tucked inside the button cover. Hold the backing in place with your finger.
- Some kits include two different types of backings: a shanked type and a flat type. The shanked type are if you want to sew the button onto a garment. The flat type are if you want to glue the button onto something (such as an earring post).[5]
-
9Place the plastic cap on top of the shank. Find the other part of your kit: the one that looks like a plastic cup. Place it cupped/hollow side down over the shank. The smooth side should be sticking up. Make sure that everything is even and tucked in.
-
10Push down on the cap with your thumbs. You will feel a slight click as the metal backing sinks into the button cover. You may even hear a light click. If you are having trouble pushing the cap down, you can tap it gently with a hammer or mallet.[6] Be very careful, however; too much pressure may crack the plastic cap.
-
11Remove the finished button from the kit. Pull the plastic cap away. Gently turn the rubber cup upside down. If the button doesn't fall out, gently pull on the sides or press on the back, then pry the button out. Avoid pulling it by the shank, as it could come apart.[7]


Making Singleton Buttons
-
1Get a small, plastic ring. They are often called "bone rings." You can find them in the drapery section or crochet section in a fabric store. A well-stocked craft store may also carry them.
- Aim for something around 1 inch (2.54 centimeters) in diameter.
-
2Make your template. Measure the diameter of the ring. Multiply it by 21/2. Draw a circle on a sheet of cardstock with the new measurement as the diameter. Cut the circle out.[8]
- If your fabric is a pattern on it, cut a circle out of the middle of your template. The circle needs to be the same size as your ring.
-
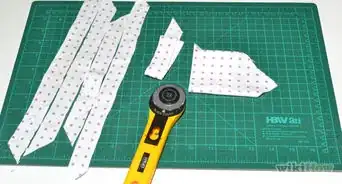
3Trace the circle onto cotton fabric, then cut it out. Spread your fabric on a flat surface, right-side-down. Place the template on top of the fabric. Trace around the circle using a tailor's chalk or pen. Cut the circle out when you are done.[9]
- If your fabric has a pattern on it, make sure that the template is centered. Use the hole in the middle as a guide.
-
4Sketch out your stitching guidelines. Place your fabric circle wrong-side-up on the table. Set your plastic ring down in the center. Trace around the plastic ring using a tailor's chalk or pen. Keep your line halfway between the ring and the edge of the fabric.[10]
-
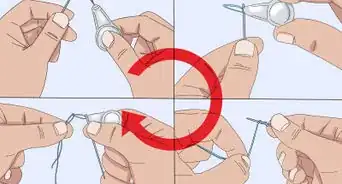
5Sew a simple straight stitch around the edge of your fabric. Thread your needle and tie both ends of the thread into a knot. Start sewing on the wrong side of your fabric. Finish sewing on the right side of the fabric. Do not knot the thread when you are done.[11]
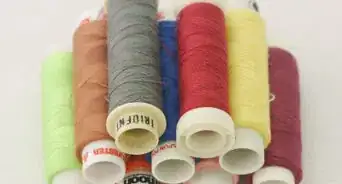
- Make sure that the thread you are using is strong, preferably nylon or polyester.[12]
-
6Gather the fabric around the ring. Place the ring on the wrong side of the fabric. Make sure that it is centered. Gently pull on the thread until the fabric gathers around the ring. Don't cut the thread yet.[13]
- If your fabric has a pattern on it, check the front to make sure that it is centered. Adjust it, if needed.
-
7Tack the gathers into place. Using the same needle and thread, pass the needle back through some of the gathers, anchoring them in place. Be careful not to pierce through the front of the button. Tie the thread into a knot when you are done. Don't cut it yet.[14]
-
8Fold the raw edges of the fabric inside. Use a knitting needle or small crochet hook to tuck the raw edges of the fabric under itself and into the covered button.[15]
-
9Sew the gap shut. Make two small stitches across the back of the button. Pull on the thread to close the gap. Make two more stitches right across the first two, forming an X. Tug on them gently to further close the gap. Knot the thread, then snip it off.[16]
-
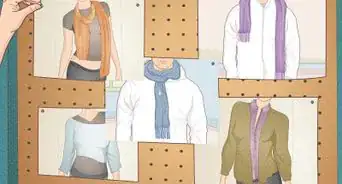
10Sew around the button, just inside the ring. Thread a needle with some embroidery floss. Knot the end of the floss, then sew around the button using a straight stitch or a backstitch. Keep your stitches against the inside edge of the ring. When you are back where you started, knot the floss on the back of the button, then cut it.[17]
- You can use matching or contrasting embroidery floss.
-
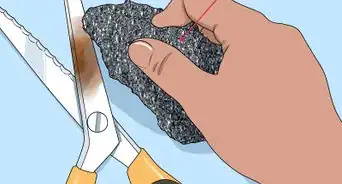
11Cut a circle out of felt. Place your button on a sheet of felt. Trace around it using a tailor's chalk or pen. Cut the circle out.[18] The felt can be the same color as your button, or a contrasting one.
-
12Stitch the felt to the back of the button. Use a small whipstitch to secure the felt to the back of the button. When you are back where you started, pull the needle under the felt and out through the center-back of the button. Be careful not to pierce through the front of the button.[19]
- You can use a matching thread color or a contrasting one.
-
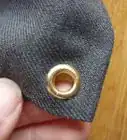
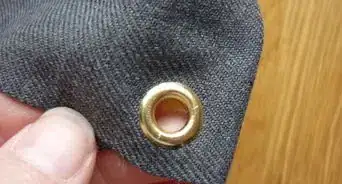
13Make the shank. Place a pen over the back of the button. Make two stitches over the pen and through the felt. Make sure that the stitches are coming out of the same spot. When you are done, slide the pen out. You should now have a loop made out of thread.[20]
- You can also use a pencil, crochet hook, knitting needle, or paintbrush.
-
14Reinforce the shank. Wind the thread around the shank to make it thicker. When you are done, knot the thread to the bottom of the shank. Pull the needle and thread through the felt, and out on the other side of the shank. Snip off the excess thread. Your button is now complete![21]


Making Wooden Buttons
-
1Get a thick branch. How thick the branch is depends on how wide you want your buttons to be. The bark will give your button a nice texture. If you want a simpler button, choose a wooden dowel instead.
-
2Cut off jagged the ends of the branch. You can use a hacksaw or an electric table saw for this step.[22] This will get rid of the jagged, spiky ends of the branch, and ensure that your first and last buttons are smooth.
- Wear safety glasses and gloves for this step.
-
3Mark off on the branch where you want to cut your buttons. Use a pencil to sketch lines across the branch. They should be ⅛ to ¼ inch (0.32 to 0.64 centimeter) apart.[23] If you make them too thin, they may end up breaking or cracking.[24]
- If the pencil doesn't show up, lightly score lines using a craft blade instead.
- You do not have to draw the lines across the entire branch. It really depends on how many buttons you want to make.
-
4Saw across the branch, using the lines you made as a guide. Once again, use a hacksaw or an electric table saw for this step. If the branch wobbles around too much, consider setting it down into a miter box, and then using the grooves as a cutting guide.
-
5Draw the button holes on the flat side of the button. Pick up one of the wood disks. Choose a side to be the back. Draw 2 or 4 dots in the center with a pen or pencil. These will be the guides for your holes.
-
6Drill the holes in the button using your dots as a guide. Set the button down on a piece of scrap wood. Use a 1/16-inch (1.6-millimeter) drill bit to make holes through the top of the button; use the dots you made as a guide.[25]
- You can use a larger or smaller drill bit, depending on the size of the button and the project.
- The scrap piece of wood is there to protect your work surface.
- Wear safety glasses and gloves for this step.
- If you need to, flip the button over, and drill the holes through the other side. This will help make them more even.[26]
-
7Buff the front and back of each button with a piece of sandpaper. This will help soften the edges around the button and the button holes, and prevent snagging.[27]
-
8Paint or decorate the buttons, if desired. You can leave the buttons plain, if you'd like, or you can decorate them. For example, you can etch designs into the buttons using a wood burning tool, or you can paint them with acrylic paint. You can also dye them with watercolor paint or fabric dye.
- If you painted or stained the buttons, be sure to let them dry.
-
9Polish and seal the buttons. This is not absolutely necessary, but it is highly recommended. Not only will it bring out the natural color and pattern of the wood, but it will also help the buttons last longer. Here are some options for you:
- For something quick and simple, polish the buttons using furniture polish and a soft cloth.[28]
- If you painted the buttons, seal them with an acrylic sealer. Apply two coats, allowing each coat to dry in between.
- Consider staining the buttons by rubbing some linseed oil, tung oil, or beeswax over them.[29]


Making Plastic Buttons
-
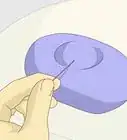
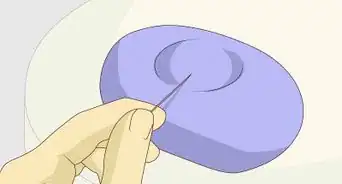
1Purchase a silicon button mold and a resin kit. You can find them online and in well-stocked craft stores. Resin typically needs a catalyst to set. Some resin kits include this catalyst; the bottles are usually labeled "Part A" and "Part B." If you bought the resin just by itself, check the label to see if it needs a catalyst. If it does you will need to purchase it separately.
- You can find basic, clear resin in an arts and crafts store.
- Read up on the type of resin you are buying. Some types of resin turn opaque after they cure. Others turn a different color.
-
2Prepare your work surface. Resin sets quickly, so have everything laid out and ready to go. Choose an area with adequate ventilation. Next, cover your work surface with newspaper or a cheap tablecloth. Put on a pair of gloves. Set out you stir sticks, button mold, and any additives. This includes things like resin dyes, glitter, and confetti.
- High-humidity levels can sometimes affect curing times or cause resin to cure improperly. Plan on making your buttons on a dry day.
-
3Mix your resin according to the package. Most resins come in two parts, and need to be mixed in a 1:1 ratio. Some resins are different however, so be sure that you read the mixing instructions carefully. If you don't use the correct amounts, the resin may not cure properly.[30] Typically, however, you will need to pour Part A and Part B into separate mixing cups, then pour Part A into Part B, then stir it together with a stick
- If you wish to dye the resin, do so during this step. Follow the instructions on the dye package, as each brand may be different.
- If you plan on making a lot of buttons, consider mixing only small amounts of resin at a time. Resin sets quickly, and it may harden before you finish filling all of the molds.
-
4Pour the resin into the mold. Hold the cup close to the mold, and pour the resin in slowly. This will help prevent splatters and air bubbles. Do not overfill the mold. If you do, you will end up covering the button holes.
-
5Wait for the resin to cure. Leave the buttons undisturbed during this time. How long the resin takes to cure depends on the type of resin you are using. Some take only a few minutes to cure while others take a few hours. Read the label to specific curing times.[33]
- Just because the resin is hard does not necessarily mean that it is cured and ready to go. Follow the curing times exactly.
-
6Pop the resin button out of the mold. Once the curing time is up, you button is ready to go! Turn the mold upside down, and gently pop the button out.


Warnings
- While beautiful, homemade buttons are often more fragile. You will need to take extra care with garments containing these buttons.⧼thumbs_response⧽
- Wood buttons are not washable.⧼thumbs_response⧽
Things You'll Need
Making Fabric Covered Buttons
- Cover button kit
- Lightweight fabric
- Tailor's chalk or pen
- Fabric scissors
- Iron-on interfacing (optional)
Making Singleton Buttons
- Cotton fabric
- Plastic ring
- Cardstock or thin cardboard
- Tailor's chalk or pen
- Fabric scissors
- Needle
- Strong thread
- Embroidery floss (optional)
- Wool felt
Making Wooden Buttons
- Hardwood branch
- Small hacksaw or table saw
- Fine-grit sandpaper
- Safety glasses
- Work gloves
- Drill
- 1/16-inch (1.6-millimeter) drill bit
- Wood polish
Making Plastic Buttons
- Silicon button mold
- Newspaper or cheap tablecloth
- Gloves
- Mixing cups
- Craft stick
- Resin dye, glitter, or confetti (optional)
References
- ↑ http://www.sew4home.com/tips-resources/sewing-tips-tricks/how-make-covered-button-button-kit
- ↑ http://www.sew4home.com/tips-resources/sewing-tips-tricks/how-make-covered-button-button-kit
- ↑ https://www.youtube.com/watch?v=v_XltEJuPGI
- ↑ http://www.sew4home.com/tips-resources/sewing-tips-tricks/how-make-covered-button-button-kit
- ↑ http://www.sew4home.com/tips-resources/sewing-tips-tricks/how-make-covered-button-button-kit
- ↑ https://www.youtube.com/watch?v=v_XltEJuPGI
- ↑ http://www.sew4home.com/tips-resources/sewing-tips-tricks/how-make-covered-button-button-kit
- ↑ http://www.craftstylish.com/item/42746/how-to-make-singleton-buttons/page/all
- ↑ http://www.craftstylish.com/item/42746/how-to-make-singleton-buttons/page/all
- ↑ http://www.craftstylish.com/item/42746/how-to-make-singleton-buttons/page/all
- ↑ http://www.craftstylish.com/item/42746/how-to-make-singleton-buttons/page/all
- ↑ http://www.craftstylish.com/item/42746/how-to-make-singleton-buttons/page/all
- ↑ http://www.craftstylish.com/item/42746/how-to-make-singleton-buttons/page/all
- ↑ http://www.craftstylish.com/item/42746/how-to-make-singleton-buttons/page/all
- ↑ http://www.craftstylish.com/item/42746/how-to-make-singleton-buttons/page/all
- ↑ http://www.craftstylish.com/item/42746/how-to-make-singleton-buttons/page/all
- ↑ http://www.craftstylish.com/item/42746/how-to-make-singleton-buttons/page/all
- ↑ http://www.craftstylish.com/item/42746/how-to-make-singleton-buttons/page/all
- ↑ http://www.craftstylish.com/item/42746/how-to-make-singleton-buttons/page/all
- ↑ http://www.craftstylish.com/item/42746/how-to-make-singleton-buttons/page/all
- ↑ http://www.craftstylish.com/item/42746/how-to-make-singleton-buttons/page/all
- ↑ http://www.shrimpsaladcircus.com/how-to-sday-wooden-branch-buttons/
- ↑ http://www.repeatcrafterme.com/2013/06/diy-wood-buttons.html
- ↑ http://www.shrimpsaladcircus.com/how-to-sday-wooden-branch-buttons/
- ↑ http://www.repeatcrafterme.com/2013/06/diy-wood-buttons.html
- ↑ http://www.shrimpsaladcircus.com/how-to-sday-wooden-branch-buttons/
- ↑ http://www.shrimpsaladcircus.com/how-to-sday-wooden-branch-buttons/
- ↑ http://www.shrimpsaladcircus.com/how-to-sday-wooden-branch-buttons/
- ↑ http://www.repeatcrafterme.com/2013/06/diy-wood-buttons.html
- ↑ http://www.craftychica.com/2016/02/diy-resin-buttons/
- ↑ http://www.craftychica.com/2016/02/diy-resin-buttons/
- ↑ http://www.craftychica.com/2016/02/diy-resin-buttons/
- ↑ http://www.craftychica.com/2016/02/diy-resin-buttons/
About This Article

To make a fabric button, start by buying a cover button kit and using the included template to trace a circle onto fabric and cut it out. Next, set a cup-shaped piece tool facing up and place the fabric circle on top of it. Then, press a button cover over the fabric into the cup, tuck in the fabric, and place the back of the cover on top. After that, place a plastic cap on top of the shank and push down. Finally, pull the cap away and turn the cup upside down to remove the button. For more guidance, like how to make plastic buttons, read on!