X
wikiHow is a “wiki,” similar to Wikipedia, which means that many of our articles are co-written by multiple authors. To create this article, 11 people, some anonymous, worked to edit and improve it over time.
The wikiHow Tech Team also followed the article's instructions and verified that they work.
This article has been viewed 33,684 times.
Learn more...
In Adobe Photoshop, the Transform tools offer some of the most basic, fundamental ways to modify your images. Using these tools, you can stretch your image, bend it, flip it, manipulate it, and much more. The majority of the Transform tools are beginner-friendly — only a little explanation is necessary to start using them with confidence.
Steps
Part 1
Part 1 of 3:
Selecting an Image for Transforming
-
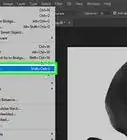
1Open an image in Photoshop. Choose an image that you would like to transform. Any image of a reasonable size should work well.
-
2Change the Background to a Layer. Opening most types of images in Photoshop will cause them to load into the background layer. The background layer can't be transformed or modified in any way, so you need to make a new layer before you begin. This is easy:[1]
- Double-click the background layer in the Layers panel.
- Name the new layer or leave it with the default name. Click OK and your background will be converted to a new layer.
Advertisement -
3Optionally, select part of the layer. At this point, if you only want to transform part of the layer (as opposed to the whole thing), select the portion you want. You can use the Lasso, Marquee or the other selection tools just as you normally would.
- If you don't make a subselection, the entire layer will be transformed by default in the next few steps.
-
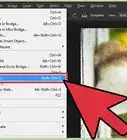
4Press Ctrl+T (⌘ Command+T on Macs). This opens the Transform tools for the selection. You're now ready to start manipulating your image.
- In the section below, you'll learn how to use the different Transform options to get your image just how you want it.


Advertisement
Part 2
Part 2 of 3:
Using Transformation Features
-
1Use the Warp tool to manipulate the image's shape. The Warp tool lets you bend, twist, and distort the image just how you wish. To use it, click the button in the Options bar that looks like a curved grid above a curved arrow. This will switch you into Warp mode and lay a reference grid on the layer or selection.
- To warp your image, click any point in the grid and drag your cursor. The underlying image will curve and warp as it adjusts to your mouse.
- There is a lot more you can do with the Warp tool. See our main article for more on this tool.
-
2Use the Scale tool to change the image's size. To use this tool, in the menu bar, select Edit > Transform > Scale. A bounding box should appear around the layer or selection. Click and drag one of the "handles" on the bounding box to make the image larger or smaller.[2]
-
3Use the Rotate tool to turn the image. To use this tool, in the menu bar, select Edit > Transform > Rotate. A bounding box should appear around the selection. Move your cursor outside of this box and it should turn into a curved, double-pointed arrow. Click and drag to rotate the image.[3]
- Note that you can also use the Rotate 180, Rotate 90 CW, and Rotate 90 CCW options in the Transform menu to turn the image the specified number of degrees. The Flip option will reverse the object vertically or horizontally.
-
4Use the Skew tool to slant the image. To use this tool, in the menu bar, select Edit > Transform > Skew. A bounding box should appear around the selection. Click and drag one of the side handles to adjust the selection. It will stretch and distort diagonally depending on how far you skew it.[4]
-
5Use the Distort tool to stretch the image freehand. This tool is similar to the Skew tool, but it allows movement in any direction. To use it, in the menu bar, select Edit > Transform > Distort. Click and drag any of the handles in the bounding box that appears to distort the image.[5]
-
6Use the Perspective tool to give the image one-point perspective. This tool allows you to simulate a 3-D perspective for your selection. To use it, in the menu bar, select Edit > Transform > Perspective. Click and drag any of the corner handles and move it horizontally or vertically. The corner across from it will move in the opposite direction automatically.
-
7Optionally, adjust the reference point manually. Certain transformations occur relative to a reference point. By default, this is the center of the image or selection. However, you can click the button at the far left end of the Options bar that looks like a black square surrounded by white squares to change the reference point.
- This will affect the way certain transformations work. For example, by default, the Rotate transformation turns the image around its central point. However, if you move the reference point, Rotate will turn the image around this point instead.
-
8Use the Options bar to transform the image manually. For very precise transformations, consider using the manual transformation features in the Options bar (to the right of the reference point button). You can type in numerical values here to fine-tune your transformations. The options are:
- X/Y: Your image's width and height in pixels. Changing these stretches or compresses the image.
- W/H: Your image's width and height as percentages. These work similarly to the X/Y options. For example, changing W to 50 will make the image half (50%) as wide. The chain link icon between the two options keeps the image's dimensions proportional.
- Angle icon: Rotates the image by the number of degrees you input.
- H/V: Skews the image horizontally or vertically. You can use both positive and negative values here to skew in either direction.
-
9Finalize the transformation. When you're satisfied, confirm your changes one of two ways:
- Press ↵ Enter (⏎ Return for Macs).
- Click the check mark button at the end of the Options bar.
- Note that pressing Esc or clicking the cancel button next to the check mark will cancel all of your work.


Advertisement
Part 3
Part 3 of 3:
Using Free Transform Options
-
1Turn on Free Transform. Once you get used to using the basic Transform tools, the Free Transform tools allow you to make the same sorts of changes with quick keyboard shortcuts and mouse commands. To turn on Free Transform, select Edit > Free Transform from the menu bar.
-
2Click and hold the cursor on a handle. The layer or selection should be bordered by a boundary box. Click and hold one of the "handle" dots on the edge.
- In the next few steps, you'll learn how to use keyboard commands to make streamlined transformations.
-
3Hold ⇧ Shift and drag to scale. Moving the corner out will make the image bigger, while moving it in will make it smaller. It will automatically scale proportionately. In other words, it will keep its original height/width proportions no matter how big or small you make it.
-
4Move the cursor outside the border and drag to rotate. This works exactly like normal. The cursor will turn into a curved arrow once it's outside the boundary box, signifying that you can rotate by clicking and dragging.
- Hold ⇧ Shift and drag to rotate in set 15 degree increments.
-
5Hold Alt (⌥ Option for Macs) and drag to distort. The opposite corner will automatically distort in the same way relative to the reference point. As a reminder, this is the center of the image by default. However, you can change it with the appropriate button on the Options bar (see above).
- Hold Ctrl and move the handle to distort freely (with no symmetry to the reference point).
-
6Hold Ctrl+⇧ Shift (⌘ Command+⇧ Shift on Macs) and drag to skew. The cursor will become a white arrowhead with a small double arrow. Skewing to either side causes the image to bend diagonally.
-
7Hold Ctrl+Alt+⇧ Shift (⌘ Command+⌥ Option+⇧ Shift on Macs) and drag to change perspective. The corner across from the one you select will automatically move in the opposite direction to give a perspective effect.


Advertisement


References
- ↑ http://www.dummies.com/how-to/content/how-to-convert-a-background-into-a-layer-in-photos.html
- ↑ https://helpx.adobe.com/photoshop/using/transforming-objects.html#scale_rotate_skew_distort_apply_perspective_or_warp
- ↑ https://helpx.adobe.com/photoshop/using/transforming-objects.html#scale_rotate_skew_distort_apply_perspective_or_warp
- ↑ https://helpx.adobe.com/photoshop/using/transforming-objects.html#scale_rotate_skew_distort_apply_perspective_or_warp
- ↑ http://www.photoshopessentials.com/basics/free-transform/
About This Article
Advertisement