wikiHow is a “wiki,” similar to Wikipedia, which means that many of our articles are co-written by multiple authors. To create this article, volunteer authors worked to edit and improve it over time.
This article has been viewed 255,852 times.
Learn more...
Learning to make your own baby clothes can save you money, since many children only get a few month's use out of them. You can also reduce clothing cost and waste if you learn to make baby clothes out of your existing t-shirts and leftover fabric. In order to complete this project, you will need to have basic sewing machine skills. You can use this baby dress pattern to make several dresses with different styles and looks. Add buttons, bows and other embellishments to create a more stylish look. Learn how to sew a baby dress.
Steps
Making a Dress Pattern
-
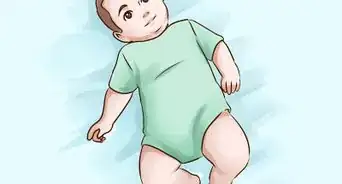
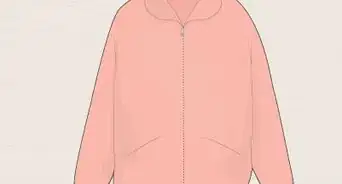
1Find a dress that currently fits your baby.
-
2Save some adult jersey knit shirts that no longer fit. You can also look for shirts at a local thrift store or buy them on clearance from a store like Walmart or Target.Advertisement
-
3Lay out your shirt on a craft table. Smooth it so that it doesn't have any wrinkles on either side. Make sure the bottom edges match up.
-
4Lay your child's dress on the top of the shirt. You can align it so that you can use the bottom hem to save time when you sew.
-
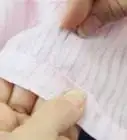
5Trace the right side of the dress with your fabric pen. Using a plastic ruler, mark a line on the top and bottom of your shirt material to show the center of the dress pattern. Use this opportunity to change the pattern slightly if you choose.
- If you want the dress to fit your baby as she grows larger, you can add an inch or 2 (2.5 to 5 cm) to the pattern on the right side. Fabric pen is washable.
- Use this opportunity to change the silhouette if you would like. Dresses can be changed to be a-line or include a wider skirt.
- Mark the points on the sides of the dress material where the arm holes will go, if it does not have a large indentation. This will help you to measure your bias tape later on.
-
6Cut out the right side of the pattern along with your fabric scissors. Take into account any adjusted pattern lines.
-
7Fold the right side of the dress vertically. Check that it is folded across the center line on the top and bottom.
-
8Trace the left side of the pattern according to the folded edge, so that your pattern will be symmetrical.
-
9Cut out the left portion of the pattern with your fabric scissors.


Sewing the Dress
-
1Place the 2 pieces of fabric together, with the outside fabric facing inward. Align them and smooth them out to remove wrinkles. Press it flat with an iron, if it is wrinkled.
-
2Pin the top of the pattern together where the neck hole will be. You may want to cut a slight curve in the middle, but remember baby clothes tend to have a very small scoop compared to older children and adult clothes.
-
3Sew the top of the dress together on either side, leaving a 1/4-inch (0.6-cm) seam allowance. Leave the space open in the middle. You can add button closures to give more space for your baby's head at the end.
-
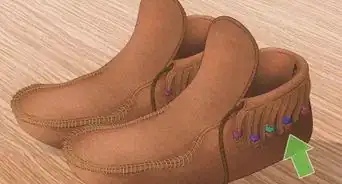
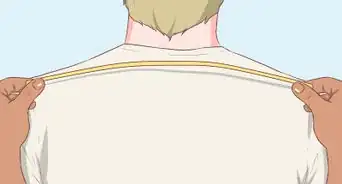
4Purchase some bias tape for the arm and neck holes or make your own. Choose a complimentary or contrasting color, depending upon the look you prefer.
- To make your own bias tape cut inch-long (2.5 cm) strips of material from a t-shirt or other soft fabric. Make sure that the cloth stretches lengthwise along the strip before you cut it with fabric scissors. You may want to make the tape fabric slightly wider and longer for the neck hole.
- Iron the fabric in half lengthwise. You can cut off any excess length after you have pinned it in place.
-
5Lay your baby dress fabric on the craft table, so that the 2 sides are apart, held together by the pins at the neckline. Place the outside of the fabric down on the table.
-
6Align your bias tape with the arm holes. Use 1 piece that extends from the bottom of 1 armhole across the neckline to the base of the second armhole. You will sew the 2 sides together later on.
-
7Pin the bias tape on the inside of the arm holes. Allow the dress fabric to bunch very slightly at regular intervals, creating a gathered look at the arm holes.
-
8Sew the bias tape onto the dress from the base of 1 armhole to the base on the other side. Repeat on the opposite arm. Leave a 1/4-inch (0.6-cm) seam allowance.
-
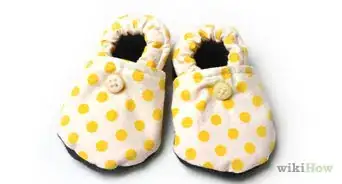
9Opt to create a button closure on the back of your dress, if the neck hole is not big enough to fit over your baby's head.
- Use a straight edge to mark a line down the back where you will create the closure. Cut down that line.
- Fold and iron the fabric toward the inside of your dress at approximately 1/4 inch (0.6 cm) on both sides. Sew a square seam around the folded fabric on each side.
- Attach several small elastic loops on 1 side and sew on several buttons at the same level on the other. You may choose to do this after you have completed the rest of your sewing so that your dress will pass easily through the sewing machine.
-
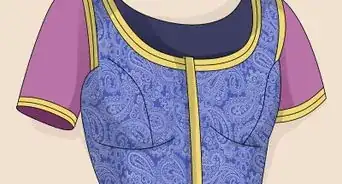
10Keep the dress inside out. Pin the bias tape at the top of the neck, so that it curves around the neck opening. If you have a button closure, make sure there is a gap in the bias tape so that it can open and close.
-
11Sew around the bias tape on the inside of the fabric, leaving a 1/4-inch (0.6-cm) seam allowance.
-
12Place the dress inside out. Pin the sides together.
-
13Sew them together with a 1/4-inch (0.6-cm) seam allowance. Take care to attach the pieces of bias tape at the arm holes together.
-
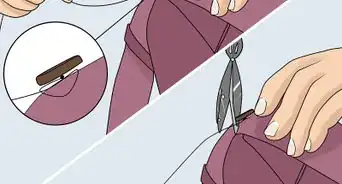
14Attach your buttons by hand-sewing, if you are using a button closure. You can attach the elastic loops by hand or with a seam on your sewing machine.


Community Q&A
-
QuestionHow was the square material at the top of the button closure sewn?That’s the bias tape. To get a clean edge, fold the tape around the edge and then under. Sew it down, and you’ve got a clean edge.
-
QuestionWhat if I want to make a dress for a friend's baby and don't have a dress to trace?
 Community AnswerBuy a cutout online, or buy a dress and use it as a reference.

Things You'll Need
- Jersey shirt
- Sewing machine
- Pins
- Fabric scissors
- Thread
- Buttons
- Work table
- Fabric pen
- Plastic ruler
- Bias tape/t-shirt fabric
- Iron
- Ironing board
- Buttons
- Elastic loops
- Needle
-Step-24-Version-5.webp)

References
About This Article
You can sew a pretty dress for your baby with just dress fabric and bias tape. First, find a dress that already fits your baby so you can use it as a template. Fold your new fabric in half and trace the shape of the dress onto it with a fabric pen. Cut out the fabric so you have 2 pieces for the front and back of the dress. Once you've cut your fabric, place the 2 halves together so the outside material faces inwards. Then, pin the fabric together and sew it together, leaving a ¼-inch allowance for the seams. Once you’ve sewn the dress together, sew strips of bias tape around the arm and neck holes. If the neck hole isn’t big enough to fit over your baby’s head, you’ll need to cut a line down the back and sew on buttons or clasps to fasten the dress. For more tips, including how to make your own bias tape, read on!