X
wikiHow is a “wiki,” similar to Wikipedia, which means that many of our articles are co-written by multiple authors. To create this article, 13 people, some anonymous, worked to edit and improve it over time.
This article has been viewed 42,359 times.
Learn more...
Babies grow out of shoes so quickly, almost as fast as you can buy them. Instead of investing a ton of money on little shoes that your baby never actually walks on, consider making simple shoes yourself. Making simple shoes for your baby can be a fun, easy, and cute sewing project that will result in custom shoes for your baby, and may even save you a bit of money in the long run.
Steps
Method 1
Method 1 of 2:
Making Simple Felt Baby Booties
-
1Pick out a soft and pliable felt. There are many types of felt out there, so be sure that you purchase one that is soft enough to come in contact with your baby's skin. Avoid synthetic fibers, instead opting for a high-quality thick natural felt.
- You will need very little felt for this project. A piece that is 6 inches by 15 inches should be more than enough to make a pair of standard baby booties.
- You may want to purchase a few colors of felt. The shoes you are making each have several pattern pieces, so you could easily make them multi-colored.
- If you prefer, you could make the bottoms of the booties out of leather instead of felt. This may be a good idea if your baby is actually walking on them, as leather will hold up much better than felt.
-
2Make your own pattern. Making simple booties only requires two pattern pieces, the upper and the sole. The upper pattern piece will be a rounded "v" shape and the sole will simply be the shape of the outline of your babies foot with quarter inch of seam allowance added all the way around the outside.
- The upper pattern piece is the most difficult to make yourself but can be done rather easily. The general shape of the piece is a "v," but with the bottom very round, as it will be the toe of your shoe, and the sides as tall as you want the shoe. The two tops of the "v" will be very flat, as you will sew them together to make the back of the shoe.
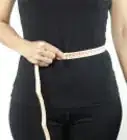
- Begin by measuring around the outside of your babies foot. This length, plus an inch for seam allowance, will be the length of the outside of the "v," from the top, down to the bottom, and up to the other side of the top. The opening of the "v" does not need to be very wide, only a few inches at its widest. Remember that the width of each side of the "v" will determine the height of the sides of your shoe, so that measurement is up to you.
Advertisement -
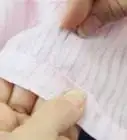
3Cut the pattern pieces out. Once you have cut them out, position them so they both fit on your felt. Then pin each pattern piece onto the felt before cutting each piece out.
- Remember that you will need two of each pattern piece to make a pair of booties. However, they each need to be the opposite of the other, so that you have a left and right bootie. To avoid confusion, cut out one set of felt pieces (the upper and the sole) and then flip both pattern pieces over and cut out a second, opposite, set. Keep the sets together at all times, or mark them lightly, so the pieces don't get swapped.
- Felt can be a hard fabric to cut cleanly. Make sure you are using good sewing shears to cut out your pattern pieces, so that the edges of the booties look nice and neat.
-
4Pin the upper to the sole of your booties along the front edge. You basically want to attach the two pieces together only at the toe of the bootie. Once you have it pinned, sew the two pieces together.
- Remember to line up your upper and your sole piece well. The top and the bottom of the toe section of each piece should be the same shape, so they should match up nicely. If their shapes are slightly off, trim one to match the other.
- You can either sew your shoes with a sewing machine or by hand. However, because the shoes are so small, you might consider sewing them by hand with a decorative stitch. Consider using a buttonhole stitch around the outside with a contrasting color of thread.[1]
-
5Sew the back of each bootie together, forming the heel. Take the two flat edges that were the top of the "v" of your upper and overlap them slightly, but keep them parallel. Pin them together and then sew along the overlap, so the outside edge is contained inside your stitches. This will round the back of your shoe and open up the middle of the shoe where your babies foot will be inserted.
- The easiest way to contain the exposed edge on the back of the shoe is to use a wide zig-zag stitch on your sewing machine or to sew the back by hand. Either way, you should make sure that your stitches are neat and sturdy.
-
6Attach the rest of the upper and sole. Pin the pieces together all around the edge, except around the front, where you have already sewed them together. Once pinned, sew around the edge using the same stitch as you used on the front, making sure that your stitches are kept as close to the edge as possible.
-
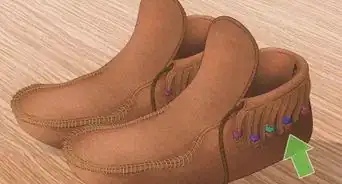
7Finish up your little booties by adding any decorations or reinforcements you like. It may be nice to reinforce the upper edge of the sides of the shoes with a simple blanket stitch, or you could add a few stitches to the center point of the "v," in order to reinforce a spot that might split due to pressure.
- There are endless ways to decorate these little shoes. Add some embroidery or other types of embellishment, anything that will give your little baby shoes a little decorative interest.
-
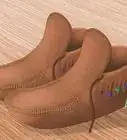
8Put the booties on your baby! They should fit your babies feet perfectly, as they were made specifically for him or her.


Advertisement
Method 2
Method 2 of 2:
Making Cloth Baby Shoes
-
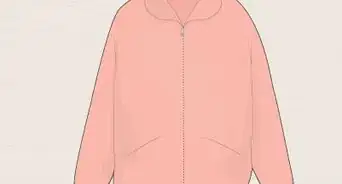
1Pick out fabric for your baby shoes. Purchase fabrics that will hold up to the demands of being on their feet. However, avoid synthetic fibers, as they will not let your baby's feet breathe.
- It is a good idea to get several types of fabric for this project. The soles can be made from a bonded fleece, soft leather, or other heavy material, while the uppers can be made from any light weight fabric. You can also get a several colors of fabric if you like.
-
2Purchase other materials. In addition to fabric, you will need fusible interfacing (about a square foot) and 1/8 inch wide elastic (18 inches long).
- You will also need to use scissors and a sewing machine, or a needle and thread, as well as an iron, to finish this project.
-
3Make a shoe pattern. Making cloth baby shoes requires three pattern pieces, the top, the heel, and the sole. Begin by making the pattern piece for the sole. Trace your babies foot but then round out the front half, around the toes, so that the pattern piece is symmetrical from side to side. Then add a 1/4 inch all around the outside, for seam allowance.
- For the top piece, copy the front half of your sole piece, making a straight line across what would be you babies arch.
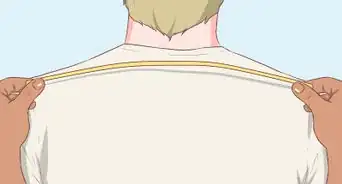
- The heel is the hardest piece to make. The heel is basically a rectangle, with one of the long sides slightly curved out and one end of the short sides pulled in a bit because of the curve. Measure around the back of the sole pattern piece, from where the arch starts, around the back, and around to where the arch starts on the other side. This will be the measurement of both long sides, although you will need to give a slight curve to one of them. The width of the piece will be determined by how high you want the side of the shoe, so that's up to you.
- It may be easiest to find an existing pattern online, download it, and then print it out. This is especially true if you have had no experience making sewing patterns in the past.
-
4Cut out the pattern pieces, then pin them onto your fabric. For each shoe you will need one sole piece, two top pieces, and two heal pieces. The second top and heel pieces will form the lining the lining of the shoes.
- Because the pattern pieces are symmetrical, you will not need to flip over the pattern pieces to make the lining fabric pieces.[2]
- Consider using a contrasting color for the lining of your baby shoes. This will add interest and color to your little shoes.
- Once you have fit and pinned all the pattern pieces onto your fabric, cut them out.
-
5Sew the right sides together of the matching top and heel pieces. Only sew them along the straight edge of both. Make sure to line them up exactly.
- For the heel piece, once sewn, iron the seam open. Then iron the edges of the short edges in toward the wrong side of the fabric. This will make sure that you have finished edges instead of frayed ones. Once the short edges are folded in, fold along the first seam you sewed, but so that the wrong sides are facing each other. Once ironed into place, you will need to sew along both of the short edges, top stitching 1/4 inch from the edge.
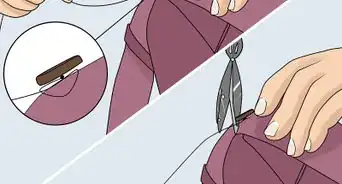
- For the top piece, once sewn, iron the seam open. Then fold over at the same seam, so the wrong sides are now facing. Iron and then top sew 1/4 inch below the seam. Finally, make two small slits on the lining side of the fabric, right below the last seam you sewed. The slits should run perpendicular to the seam, as they will create an opening to run your elastic through. Be sure not to cut through both layers of fabric. Use a seam ripper to accomplish this.
- You can either sew your shoes with a sewing machine or by hand. However, it may be easier and quicker to complete this project with a sewing machine.
-
6Insert half the elastic into each shoe. Fold the top seam of the heel piece, the straight long edge, over onto the lining side of the piece, so that it creates a casing for the elastic. Stick the elastic into the casing and then sew along the bottom, making sure not to sew into the elastic.[3]
-
7Attach the top piece to the sole. With right sides facing, line up the top piece and the sole piece and then pin them together. Sew around the edge, making sure to stay close to the edge.
-
8Attach the heel piece. You will need to pin the curved long side of the heel piece to the sole piece. Line up the center point of the heel piece edge to the center point of the back of the sole piece. Pin it there and then pin around both sides, making sure that they line up all along the edge, before sewing all around the edge.
- Remember to have the wrong side of the heel piece facing the wrong side of the sole piece.
-
9Pull the ends of the elastic through the holes you made in the top piece. Run each piece into the hole, cutting off any excess after you have pulled it tight. To secure it, put in a few stitches across both ends of elastic.
- The top of your heel pieces should be slightly scrunched once the elastic is tightened.
- Be sure that the opening for your baby's foot is big enough but will not allow the shoe to slip off easily. It may be a good idea to slip your baby's foot in the shoe to check the fit before you secure the elastic permanently.
-
10Turn your baby shoes right-side out. Push out all the edges from the inside, making sure that all seams are sitting as they should.
-
11Finish up your little shoes by adding any decorations. There are endless ways to decorate these little shoes. Add some embroidery or other types of embellishment, anything that will give your little baby shoes a little decorative interest.
-
12Put the shoes on your baby! They should fit snugly but not too tight.


Advertisement
Community Q&A
-
QuestionWhat is the material for the sole of the baby shoes?
 T. ChinsenTop AnswererThe method shows matching fabric for the soles, which is fine if the baby is not yet walking. Fabric stores sell a non-skid dotted fabric specifically for soles. It can also be made by applying puffy fabric paint on the sole after the shoes are made. You have more color options and you can draw lines instead of dots. Follow instructions on the fabric paint bottle.
Advertisement
Things You'll Need
- Fabric
- Sewing thread
- Sewing machine or needle
- Scissors
- Pins
- Paper and pen, or a printed pattern
-Step-24-Version-5.webp)

References
About This Article
Advertisement