This article was co-authored by Mia Danilowicz. Mia Danilowicz is a Master Tailor who works onset and on the red carpet in Los Angeles, California. With over a decade of experience, Mia specializes in bridal and gown couturier fittings, garment reconstruction, and custom design. Mia has worked at the Oscars, Grammys, SAG Awards, and Golden Globes. Her clients include a long list of entertainment and fashion industry headliners, major fashion magazines, luxury consumer brands, and popular media. Mia was trained at the Fashion Institute of Design and Merchandising and received her AA in Fashion Design and BS in Business Management.
This article has been viewed 41,936 times.
Whether it's your best work slacks or a pair of old, well-fitting trousers, a pants button can fall off on even the best-made pair with enough use. Rather than tossing them and getting new pants, or going to an expensive tailor for a simple fix, you can sew the button back on at home. The fabric of most pants is thicker than many shirts, and there are a few techniques that differ from sewing a shirt button back on. It's also worth noting that there are special techniques you may want to try if you're replacing a button on a pair of jeans instead of trousers or slacks. Regardless, soon you will have the sewing skills you need to put those pants back on before you even miss them.
Things You Should Know
- Thread a needle with 1-2 feet (0.3-0.6 m) of thread and knot the end.
- Sew the button onto your pants, using an X pattern to stitch through the 4 button holes.
- Skip your last upward stitch and wrap the thread around the button before stitching back down through it to make it more secure.
- Tie a knot below the button and cut off the excess thread.
Steps
Threading the Needle
-
1Remove the old button and thread. In order to attach a new button or replace the thread on a pair of pants, you must clear the way. If any of the old material is still attached, take it off, with scissors if necessary, in order to begin.[1]
- If you will be reusing the button, be sure to keep it on hand.
-
2Find a thread that matches the color of the pants. Since you can see the thread above the button, you should pick thread that matches the fabric of your pants, or else the stitching will stick out.[2]
- Going with simple solid color that is close to the fabric is sufficient. It does not have to be a perfect match.
Advertisement -
3Thread the needle with 1 foot (0.30 m) to 2 feet (0.61 m) of thread. Threading a needle can be a challenge on its own, but once you succeed, focus on getting an even amount of thread sticking out each end of the needle's eye by holding it out in front of you and eyeballing the distance.[3]
-
4
-
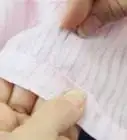
5Mark the fabric on hard-to-find holes. If the pants have difficult-to-see stitch holes, use bright lighting to track them down and mark them with a fabric pencil or other sturdy writing tool. This will make aligning the button on the pants much easier.[5]
- The marks belong on both sides of the fabric, where the button will sit.
- You can also stitch an 'X' in the spot where the button will be if you feel confident about your sewing abilities.


Sewing a 2-Hole Button
-
1Choose a 2-hole button to match other buttons. A 2-hole button will not be the sturdiest, and for a pair of pants, which centers a great deal of pressure on the pants, a 4-hole button is preferable, particularly if there is only one. However, if the rest of the buttons are 2-hole buttons, it will do the job!
-
2Pierce the fabric below the button holes and pull through. To begin stitching the button, you just pierce through the underside and pull the needle upward through the button hole.[6]
- Pant fabric is often thick and sturdy. Be careful not to puncture your skin, as you may have to use a great deal of force to break through the fabric. You can use a thimble on your thumb to keep the needle from hurting you.
-
3Insert the needle downward into the opposite buttonhole. A stitch is continued by piercing into the fabric from above through the buttonhole that the needle did not come up through.[7]
-
4Repeat the stitching process 4 to 5 times. Continue to thread the needle upward through one button hole and downward through the other hole.[8]
-
5Pull the needle upward below the button. In order to strengthen the button in place, you must create a “shank” out of the thread by missing the button holes on your last repetition of the up-down cycle you did 4 to 5 times. Try to avoid moving to the side of the button, as this will reveal the shank.[9]
-
6Wrap the thread around the button. To reinforce the stitch, you should make at least as many loops around the button as you stitched through the fabric. Keep the loops tight so that you are successfully reinforcing the button.[10]
-
7Pull the needle downward below to the button. Once again missing the button holes, pull the needle through the fabric below the button on the opposite side as where the needle came through.[11]
-
8Tie off the button on the underside by making a loop. Use the excess thread to make a loop below the button and pull the needle through, tying a simple knot with the thread.[12]
- You can repeat this process as many times as needed to make the button feel secure.
- Trim the thread directly above the knot to avoid undoing the knot by accident.


Sewing a 4-Hole Button
-
1Choose a 4-hole button to match others, or for a sturdier hold. While 2-hole buttons are much easier to stitch, 4-hole buttons are a stronger choice, as you can stitch them with an 'X' pattern to keep them firmly attached to your pants.[13]
-
2Use an 'X' pattern when stitching. As usual, enter the button hole by piercing the fabric behind and catching the needle on the other side. Then, insert the needle downward through the buttonhole diagonal to the one you came up through.[14]
- Stitch in the same direction 4 to 5 times before switching to the other diagonal pair of holes.
- If there are other buttons that use a stitch that looks like two letter 'I's next to one another, called “II” stitches, you can stitch them to match by not crossing over to the diagonal hole when making the stitch. Instead, stitch through the hole straight across.
-
3Place a spacer below the button to leave enough room. An 'X' stitch in a 4-hole button is sturdy enough that it can be difficult to fit it through the buttonhole if it is sewn on too tightly. You can avoid this by using a piece of paper thin cardboard with a 1 inch (2.5 cm) wide 'V' cut into it and placing it below the button as you are stitching.[15]
- The spacer should not block the button holes, but keep the button's edge sitting above the fabric.
-
4Create a thread shank. A thread shank will strengthen the button, and can be completed by following the shanking instructions above. You simply miss the button on your last upward stitch and wrap it around the button before piercing back down to the underside of the pants.[16]
-
5Be sure to tie a knot below the button. The security of the 4-hole button can make it feel as though the button does not need extra support, but a knot is necessary to keep the button from un-threading itself and falling off the pants.
- Cut the fabric in the same way as with a 2-hole button.


-Step-24-Version-5.webp)

References
- ↑ https://www.heddels.com/2019/04/sew-button-properly/
- ↑ https://www.heddels.com/2019/04/sew-button-properly/
- ↑ https://www.allfreesewing.com/Basics-and-Tutorials/How-to-Sew-a-4-Hole-Button
- ↑ https://www.allfreesewing.com/Basics-and-Tutorials/How-to-Sew-a-4-Hole-Button
- ↑ https://www.heddels.com/2019/04/sew-button-properly/
- ↑ https://www.heddels.com/2019/04/sew-button-properly/
- ↑ https://www.heddels.com/2019/04/sew-button-properly/
- ↑ https://www.heddels.com/2019/04/sew-button-properly/
- ↑ https://www.allfreesewing.com/Basics-and-Tutorials/How-to-Sew-a-4-Hole-Button
- ↑ https://www.allfreesewing.com/Basics-and-Tutorials/How-to-Sew-a-4-Hole-Button/
- ↑ https://www.allfreesewing.com/Basics-and-Tutorials/How-to-Sew-a-4-Hole-Button
- ↑ https://www.heddels.com/2019/04/sew-button-properly/
- ↑ https://www.allfreesewing.com/Basics-and-Tutorials/How-to-Sew-a-4-Hole-Button
- ↑ https://sewingmachineclub.com/how-to-sew-a-button-on-pants/
- ↑ https://youtu.be/kukrse7fCFg?t=89
- ↑ https://www.allfreesewing.com/Basics-and-Tutorials/How-to-Sew-a-4-Hole-Button
About This Article