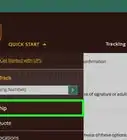
X
wikiHow is a “wiki,” similar to Wikipedia, which means that many of our articles are co-written by multiple authors. To create this article, volunteer authors worked to edit and improve it over time.
This article has been viewed 32,008 times.
Learn more...
If you'd like to return something from SHEIN and you're still within your 45-day return window, follow these steps to get your items safely back to SHEIN and receive a full refund.
Steps
-
1Log into your SHEIN account. Use the email and password you entered when making your purchase.
- If you forgot your password, you can click on “Forgot your Password?” and follow the steps.
- You can also log into SHEIN from your Google, Facebook or Apple ID.
-
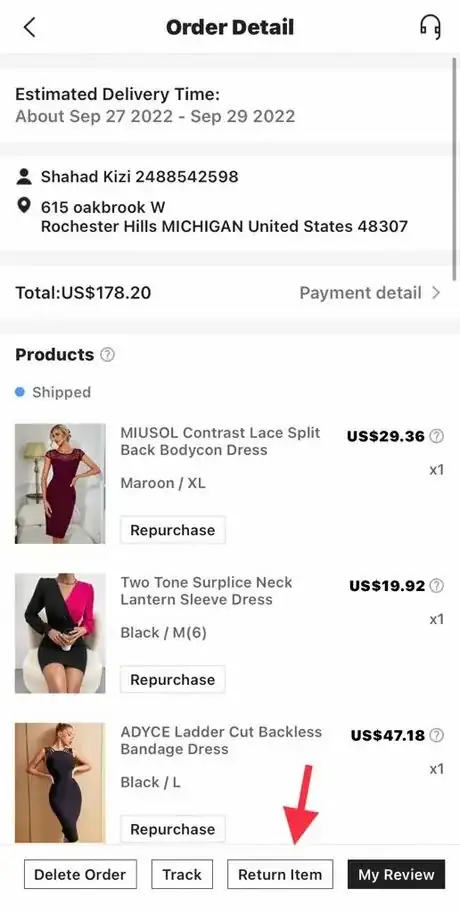
2Click on the message icon in the upper left corner and click on “Orders.” Select the order of the item(s) that you would like to return. The “Order Detail” page will be displayed.Advertisement
-
3Click on “Return Item.” This tap is located at the bottom of the “Order Detail” page.
-
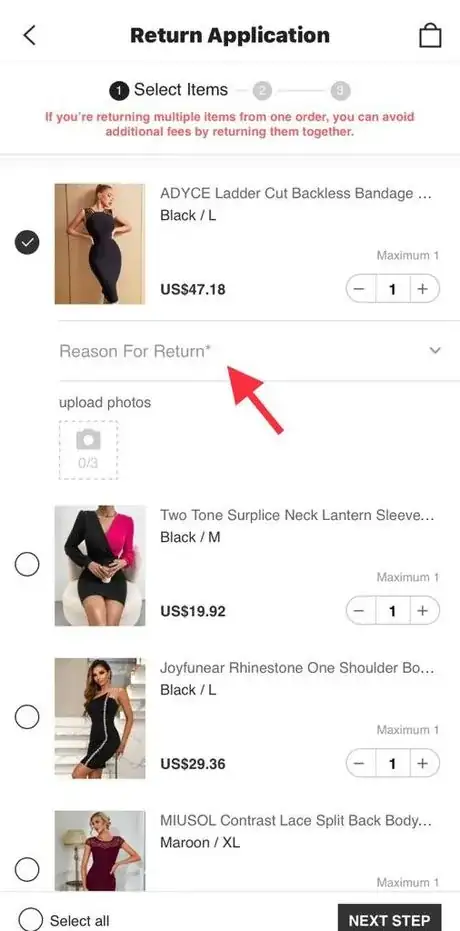
4Select the item(s) that you wish to return. On the left of the item that you wish to return, there is a small circle. Click on it.
-
5Select “Reason For Return.” Indicate the reason for your return by selecting one of the listed options.
-
6Upload pictures of your item(s). Uploading pictures is required for some of the options that you indicate in the “Reason For Return" menu. When selecting an option for indicating the reason for your return, you will see “Photos are requested when applying for return” written in red. If you do not see it, then uploading pictures is optional.
-
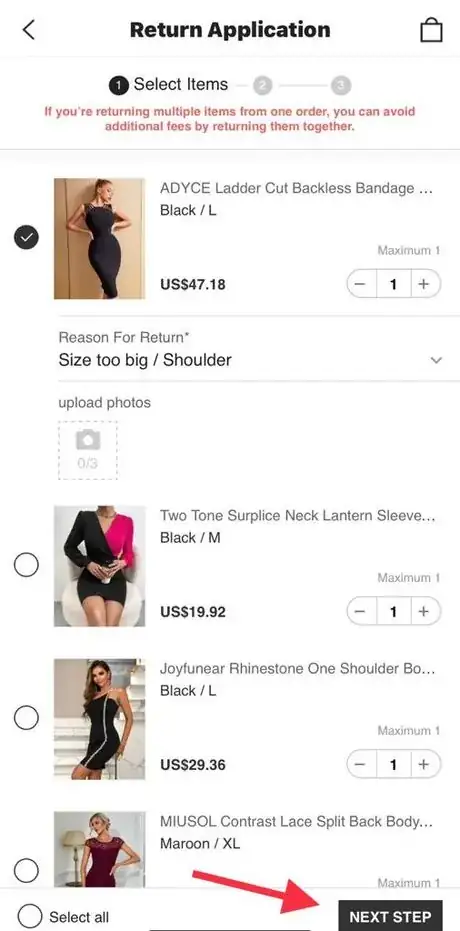
7Click “Next Step”. Once you click “Next Step,” a text box will pop up saying “ Please be sure ALL items you wish to return have been added to the 'return list ' to avoid additional fees.. OK/ CANCEL.” Click Ok to proceed. “Return Application” will be displayed.
-
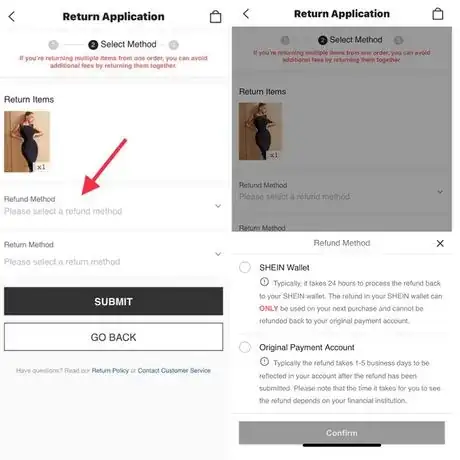
8Click on “Refund Method.” Select your preferred refund method, either “SHEIN wallet” or “Original Payment Account.” Selecting SHEIN Wallet takes about 24 hours to make your refund. That money will only be used for your next purchases and it may not be refunded back to the selected original payment method. Selecting “Original Payment Account” will process your refund from 1-5 days to be deposited into your bank account.
-
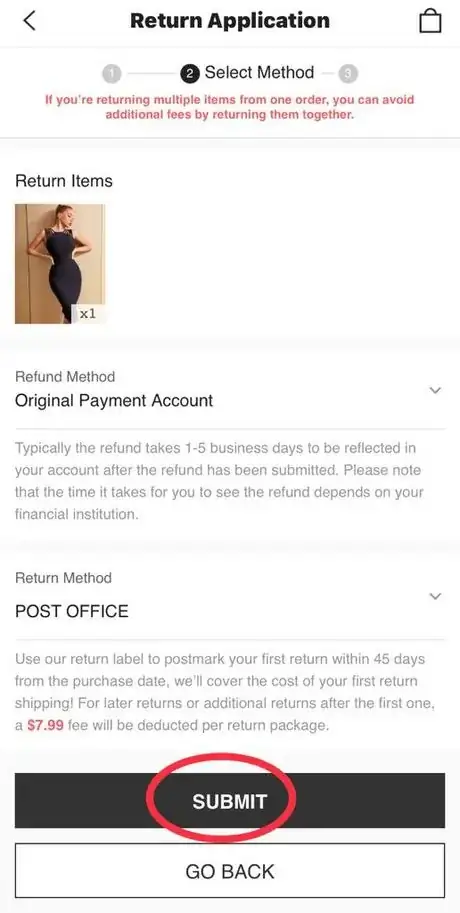
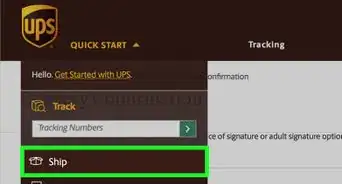
9Click on “Return Method.” Select your preferred return method, either “Post Office” or “UPS Store” If you select “Post Office,” you have to click on 'Return using the USPS label'. If you select “UPS Store,” you get to pick from two options which include returning by UPS label or by UPS QR code.
-
10Click 'Submit'. Once you click on the submit button, you will get your USPS/ UPS label or UPS QR code depending on your selected return method. You will also get a confirmation of your return to your email address.
Advertisement
About This Article
Advertisement








-Step-1.webp)


