This article was co-authored by Mark Spelman. Mark Spelman is a General Contractor based in Austin, Texas. With over 30 years of construction experience, Mark specializes in constructing interiors, project management, and project estimation. He has been a construction professional since 1987.
wikiHow marks an article as reader-approved once it receives enough positive feedback. In this case, 100% of readers who voted found the article helpful, earning it our reader-approved status.
This article has been viewed 982,923 times.
Refinishing your kitchen cabinets is a good way to liven up your living space and increase the value of your home. Planning and updating kitchen cabinets can produce a remarkable kitchen makeover in a few days over a long weekend. We'll give you a basic overview of refinishing kitchen cabinets, and clues on where to start.
Steps
Prepping the Surface
-
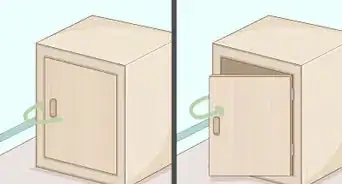
1Empty the cabinets completely. It is much easier to work inside them, prep them, remove them if necessary, and of course, paint them, without loose stuff inside getting in the way.
-
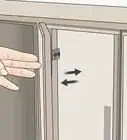
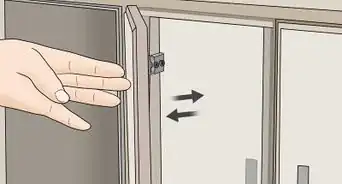
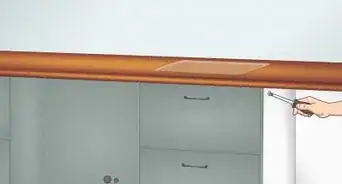
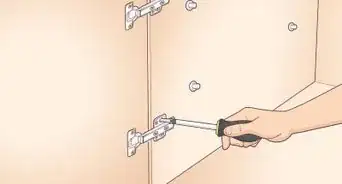
2Remove the cabinet doors and shelves.[2]
- Most shelves simply lift off of pegs or supports; some may need to be unscrewed or pried off their supports. If the screws are caked with old paint, clean out the channel with the tip of a knife or small screwdriver. Remove the screws, being careful not to slip and damage the channel, making it impossible to unscrew.[3]
- Lay out the cabinet doors in a grid on the floor so it's easy to tell their proper places.
- This is also a good chance to reface cabinet doors that need an update.
-
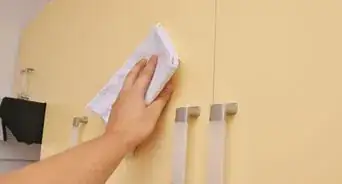
3Clean the cabinets thoroughly. Any grease remaining on the surfaces will interfere with refinishing.[4]
- TSP is the preferred product for this job, as it will clean and remove heavy grease deposits with a strong enough concentration to etch the paint so that it is ready to be primed. If you'd prefer an environmentally friendly alternative, try Simple Green.
- Lightly sand any rough areas of bubbled or peeling paint or varnish, then sand entire surfaces until they are smooth and even. Take your time with this step—the results will be well worth the extra effort.[5]
- When done sanding, wipe the wood with a tack cloth (to remove all dust particles) and let dry. If the finish you are working with is an oil base product, you may dampen a cloth with mineral spirits or paint thinner, rather than water, which will allow it to dry much more rapidly.
-
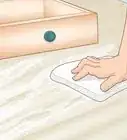
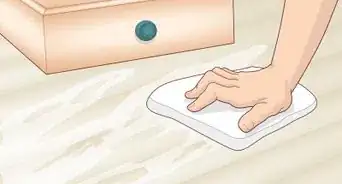
4Clean the cabinet hardware. Unless you're replacing the hardware, cleaning it will help give your cabinets a fresher look.
- Soak the hardware in a soapy water solution for 30 minutes, scrub lightly with a soft brush, rinse, let dry, and apply polish.[6]
-
5Strip painted hardware. Sometimes, in their haste for a nifty new kitchen, people would just slop a coat of paint over everything in sight, including the hardware. You have wisely chosen to restore that hardware to it's old glory.
- Put the hardware in a crockpot, and cover with water. Add 2 tablespoons (29.6 ml) of liquid laundry detergent, set the heat to medium, and set the timer to 8 hours or longer. When the time's up, carefully remove the hardware, and peel off the paint.
- If you're in a hurry, a solution of methylene chloride will strip the paint much faster, but it may also strip other finishes. DON'T put this in a crockpot. Apply directly to the hardware in a well-ventilated area while wearing neoprene safety gloves and eye protection. Leave for 10 minutes, then scrape the gel with a plastic putty knife.
- Immediately clean off the hardware with a stiff toothbrush—otherwise the paint will start to harden again.
- Buff with a beeswax polish to protect the surface, and repeat every 6 months. Do it in spring and summer, when you change your smoke alarm batteries!
- Put the hardware in a crockpot, and cover with water. Add 2 tablespoons (29.6 ml) of liquid laundry detergent, set the heat to medium, and set the timer to 8 hours or longer. When the time's up, carefully remove the hardware, and peel off the paint.
-
6Strip the cabinets (optional). If you want to take the cabinets back to the original wood, apply a clear varnish or polyurethane finish or stain previously painted cabinets, you will have to strip all the paint off the cabinets using strong chemicals, followed by sanding.[7]
- This is a much bigger project and will take more than a long weekend.
- Liquid strippers work best, but look for gel or semi-paste types because they won't drip as much when used on vertical surfaces. In order to choose the correct stripper, you also need to know what kind of finish you already have on your cabinets. Choose an obscure spot on the cabinets to put a few drops of the following substances:[6]
- Turpentine or mineral spirits will dissolve a wax finish.
- Denatured alcohol dissolves a shellac finish and latex paint.
- Lacquer thinner dissolves a lacquer, polyurethane, or shellac finish.
- Xylene or 'Xylol' will dissolve a water-based finish.
-
7Fill dents, chips and nicks with wood putty. Sand the putty smooth after it dries. Wipe the wood with a tack cloth (to remove all dust particles) and let dry.
Priming and Painting
-
1Prime the cabinets. If you plan to use paint to refinish your cabinets, they will need to be primed first. Primers are paint products formulated allow new paint to bond with the old paint below it. The primer seals the wood, covering any blemishes, stains, knots, or anything else whose color might leech into the final paint coat. Here is a quick primer on primer:[8]
- Do you need to prime? If you are painting an unfinished surface, whether wood, drywall, concrete, or metal, needs to be primed before it is painted.
- Pick the right primer. Many primers today will work on anything—ask the pros at the paint store what they recommend. A good rule of thumb is to match the primer with the paint: a shellac primer over latex paint, and an oil primer over oil paint. An exception to this would be applying water-based products over oil-based. This will not work.
- Painting oil over latex? The question has been asked 1,000 times, whether it's ok to paint latex over oil, or oil over latex. The answer depends on who you ask, but the bottom line is this: properly prepped, you can paint anything over anything. Prepare your surface properly by cleaning and sanding and cleaning again, then apply a primer.The key is making sure that the surface that is being primed doesn't have a gloss, as paint—especially latex, will not stick to a glossy base, and you'll have a much harder job to do in fairly short order.
- Read the label of the bonding primer carefully. Check to see if it will bond latex to oil.
-
2Paint your cabinets. This is the big moment, when you transform your kitchen from dull and dingy to hip and modern.[9]
- For the best finish, use a sprayer. It will give you a smooth, glossy, even appearance. The biggest drawback is that you have to mask everything in sight that is not going to be painted, as aerosol paint spray will get everywhere.
- Use a brush. Using a high-quality brush, apply new paint (or varnish) within the time limit specified in the directions. Always brush in one direction, and don't lay it on too thick. 2 light coats is much better than one heavy layer.
- Oil based paints tend to yellow over the years.[10]
- Paint additives like Floetrol can create better flow and reduce brush strokes in oil paints.
- If you are re-varnishing kitchen or bathroom cabinets, consider a marine varnish which is more water repellent.
Expert Q&A
Did you know you can get expert answers for this article?
Unlock expert answers by supporting wikiHow
-
QuestionCan I revarnish oak cabinets?
 Mark SpelmanMark Spelman is a General Contractor based in Austin, Texas. With over 30 years of construction experience, Mark specializes in constructing interiors, project management, and project estimation. He has been a construction professional since 1987.
Construction ProfessionalYou can. Just make sure to do some light sanding in between coats.
Support wikiHow by unlocking this expert answer.
-
QuestionCan I paint cabinets that were originally finished with linseed oil?Mark SpelmanMark Spelman is a General Contractor based in Austin, Texas. With over 30 years of construction experience, Mark specializes in constructing interiors, project management, and project estimation. He has been a construction professional since 1987.
Construction ProfessionalYes, you can. Just be sure to prime them well beforehand.Support wikiHow by unlocking this expert answer.
-
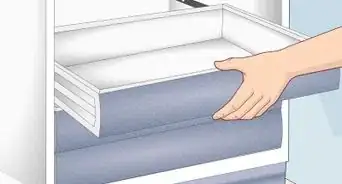
QuestionHow do you remove the false fronts on cabinets (bath or kitchen) that hide plumbing? Are they glued in place?Mark SpelmanMark Spelman is a General Contractor based in Austin, Texas. With over 30 years of construction experience, Mark specializes in constructing interiors, project management, and project estimation. He has been a construction professional since 1987.
Construction ProfessionalUsually there are little clips that snap the false fronts to the front of the actual cabinets. Don't be afraid to just pry a little bit on the front to remove them.Support wikiHow by unlocking this expert answer.
Warnings
- Realistically evaluate the time and savings ratio before getting started to manage for regrets.⧼thumbs_response⧽
- Fumes from degreasers and bonding agents can be strong, be sure and keep air fresh and circulated.⧼thumbs_response⧽
- It is best to be committed to this project so that you don't have "open faced" cabinets for years.⧼thumbs_response⧽
- Always wear a protective mask.⧼thumbs_response⧽
- Many paint strippers and solvents can be extremely flammable, so read precautions on their original containers.⧼thumbs_response⧽
Things You'll Need
- Degreaser & rags for cleaning
- Paint brushes or spray equipment
- Paint or varnish/polyurethane
- Bonding agent
- Cup hooks
- New hardware or old hardware cleaned for make-over
- Newspaper or drop cloths
- Painter's tape
- Wood putty
- Sandpaper in various grits
- Rags
- Paint thinner/solvents described in the article
- Tack cloth
- Old clothing
- Painter's plastic
- Masks


References
- ↑ https://www.lowes.com/n/how-to/how-to-paint-kitchen-cabinets
- ↑ https://www.sunset.com/home/how-to-refinish-kitchen-cabinets
- ↑ https://www.sunset.com/home/how-to-refinish-kitchen-cabinets
- ↑ https://www.sunset.com/home/how-to-refinish-kitchen-cabinets
- ↑ https://www.sunset.com/home/how-to-refinish-kitchen-cabinets
- ↑ 6.06.1http://www.lowes.com/lowes/lkn?action=howTo&p=HomeDecor/CabFceLft
- ↑ https://www.sunset.com/home/how-to-refinish-kitchen-cabinets
- ↑ https://www.sunset.com/home/how-to-refinish-kitchen-cabinets
- ↑ https://www.sunset.com/home/how-to-refinish-kitchen-cabinets
About This Article

Before you refinish your kitchen cabinets, empty the cabinets completely, then remove the cabinet doors, shelves, and any hardware. Clean the cabinets and hardware thoroughly, as any grease on the surface will interfere with the refinishing. Fill any dents, chips, and nicks with wood putty, then sand own the putty once it’s dry to create a smooth surface. Apply a coat of primer to the cabinets, then use a brush or a sprayer to apply your new paint or stain. For tips from our contracting reviewer on how to strip existing paint or stain off the cabinets, keep reading!