This article was co-authored by wikiHow staff writer, Jack Lloyd. Jack Lloyd is a Technology Writer and Editor for wikiHow. He has over two years of experience writing and editing technology-related articles. He is technology enthusiast and an English teacher.
The wikiHow Tech Team also followed the article's instructions and verified that they work.
This article has been viewed 1,353,722 times.
Learn more...
This wikiHow teaches you how to recover and repair a corrupted Microsoft Excel file on your Windows or Mac computer.
Steps
Repairing the File
-
1Make sure that you're using a Windows computer. You can only repair an Excel file in the Windows version of Excel.
- If you're using a Mac, try one of the other methods in this article.
-
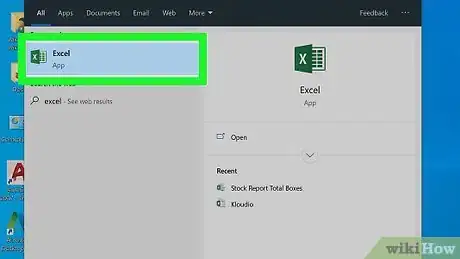
2Open Excel. Its app icon resembles a green box with a white "X" on it.Advertisement
-
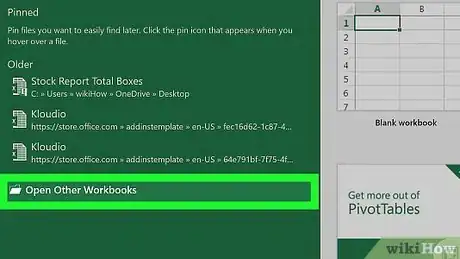
3Click Open Other Workbooks. This option is next to a folder-shaped icon in the lower-left corner of the window.
-
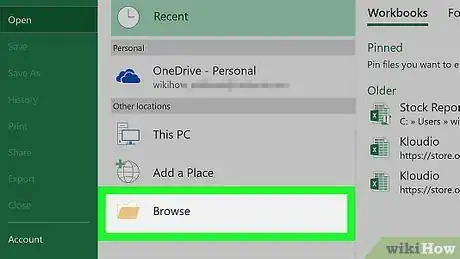
4Click Browse. It's a folder-shaped icon in the middle of the page. Doing so opens a File Explorer window.
-
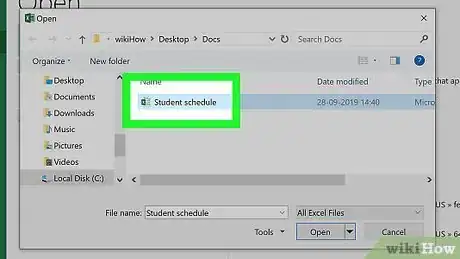
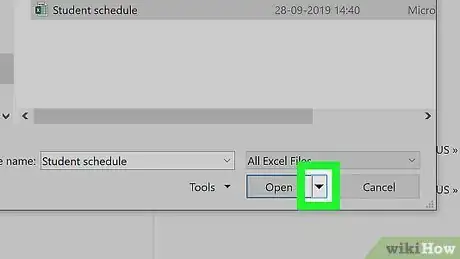
5Select your Excel file. Go to the folder in which your corrupted Excel file is stored, then click the Excel file to select it.
-
6
-
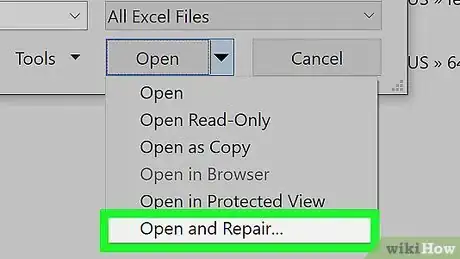
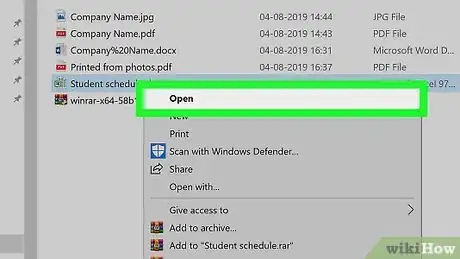
7Click Open and Repair…. This option is at the bottom of the drop-down menu.
- If Open and Repair... is greyed out, make sure that your Excel file is selected and try again. If it's still greyed out, you can't repair this file.
-
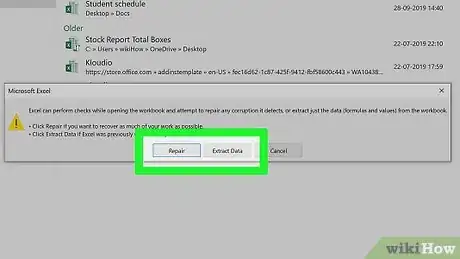
8Click Repair when prompted. It's in a pop-up window. Windows will begin attempting to repair your file.[1]
- If you don't have this option, click Extract Data instead, then click either Convert to Values or Recover Formulas. This will recover any salvageable data.
-
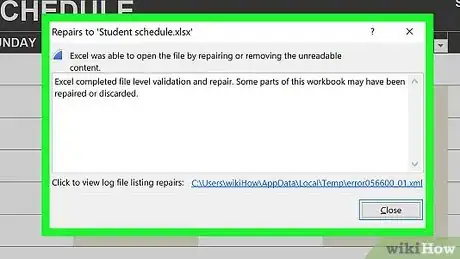
9Wait for the file to open. This may take a few minutes if your Excel file is large.
- If the file still won't open, go back through this process and click Extract Data instead of Repair when prompted.
-
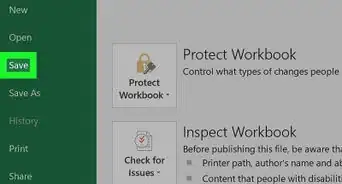
10Save your file. Once the repaired file opens, press Ctrl+S, double-click This PC, select a save location, enter a file name, and click Save.
- Be sure to select a different file name than the one which you used for the corrupted Excel file.
Changing the File Type on Windows
-
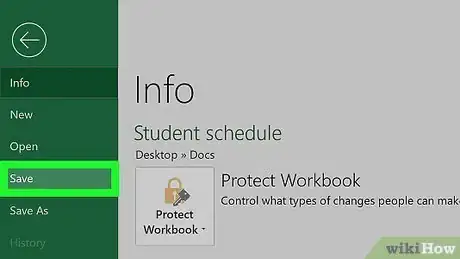
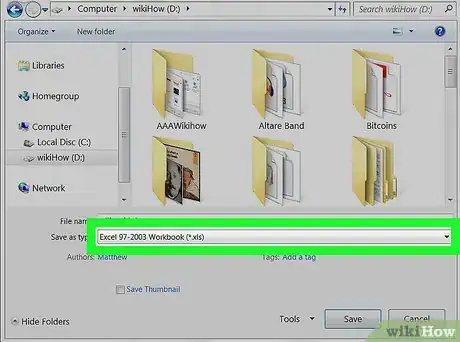
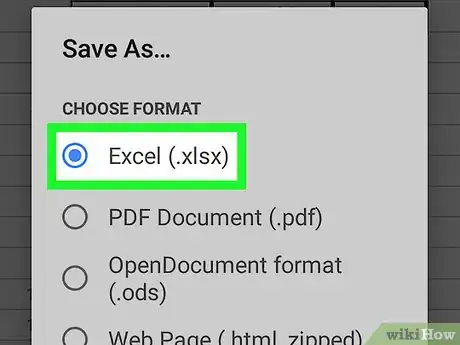
1Understand why the file type matters. Sometimes, Excel documents created on older computers or versions of Excel become unstable on newer versions; similarly, Excel documents can be saved in many different file formats. By changing the Excel file format to "xlsx" (or "xls" for older programs), you can fix this problem.
-
2
-
3
-
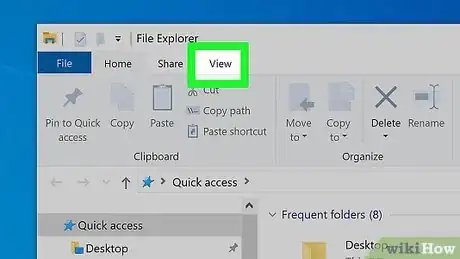
4Click the View tab. It's at the top of the File Explorer window. A toolbar will appear below this tab.
-
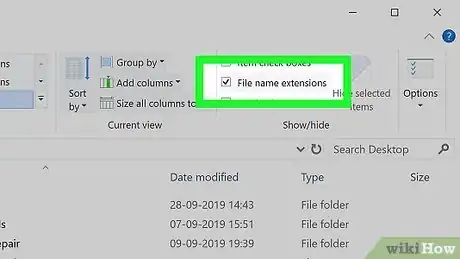
5Check the "File name extensions" box. This option is in the "Show/hide" section of the toolbar. Doing so will allow you to see the file type extensions at the end of files, including your Excel document.
-
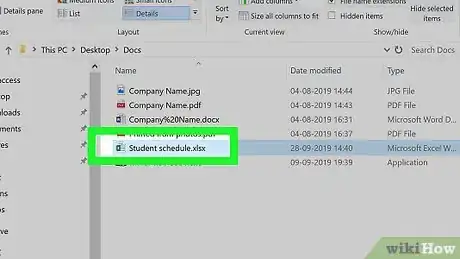
6Select your Excel file. Go to the location of the Excel document that you want to recover, then click the document to select it.
-
7Click Home. It's a tab in the upper-left side of the File Explorer window. This will prompt a toolbar to appear.
-
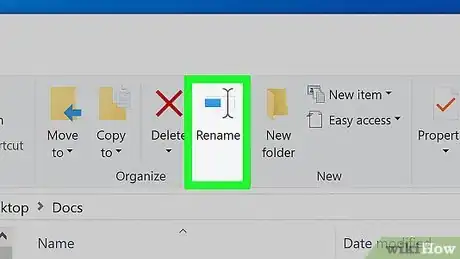
8Click Rename. This option is in the "Organize" section of the toolbar. Clicking Rename will cause the Excel file's name to become highlighted.
-
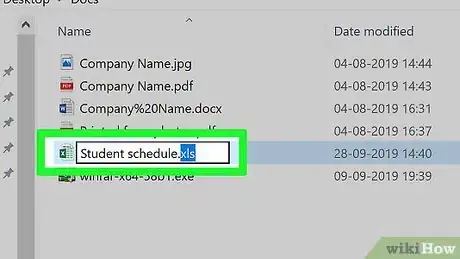
9Change the file type. Replace whatever comes after the period at the end of the file name with xlsx and then press ↵ Enter.
- For example, if the document was named "Spreadsheet1.docx", you would change it to "Spreadsheet1.xlsx".
- If the file extension already is "xlsx", try using "xls" or "html".
-
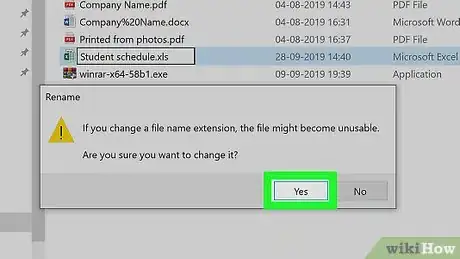
10Click Yes when prompted. This will confirm your changes and change the file extension.
-
11Try opening the file. Double-click the file to open it. If the file opens in Excel (or, if you selected "html" as the extension, a web browser), your file has successfully been recovered.
- If you chose the "html" extension, you can convert the webpage into an Excel document by dragging the html file onto the Excel icon and then saving the file that opens as a new "xlsx" file.
- If the file still won't open, proceed to the next Windows method.
Changing the File Type on Mac
-
1Understand why the file type matters. Sometimes, Excel documents created on older computers or versions of Excel become unstable on newer versions; similarly, Excel documents can be saved in many different file formats. By changing the Excel file format to "xlsx" (or "xls" for older programs), you can fix this problem.
-
2Open Finder. Click the blue, face-shaped app icon in your Mac's Dock.
-
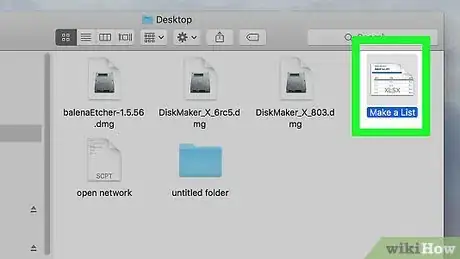
3Select the Excel file. Go to the folder in which your Excel file is located, then click the Excel file that you want to recover.
-
4Click File. This menu item is in the top-left corner of your Mac's screen. Clicking it prompts a drop-down menu.
-
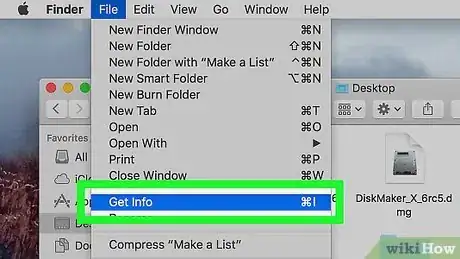
5Click Get Info. It's in the File drop-down menu. This will open a pop-up window.
-
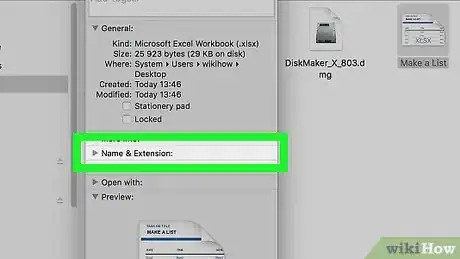
6Expand the "Name & Extension" section if necessary. If you don't see any file name or extension below this category, click the triangle to the left of the "Name & Extension" heading to view the file's name and extension.
-
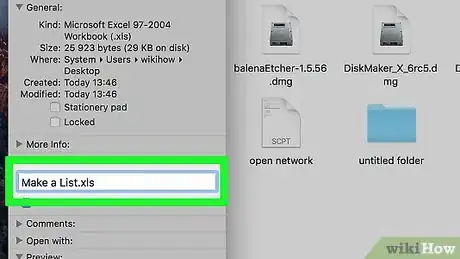
7Change the file type. Replace whatever comes after the period at the end of the file name with xlsx and then press ⏎ Return.
- For example, if the document was named "Spreadsheet1.txt", you would change it to "Spreadsheet1.xlsx".
- If the file extension already is "xlsx", try using "xls" or "html".
-
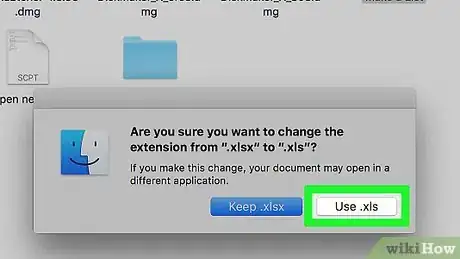
8Click Use .xlsx when prompted. This will confirm your decision and change the file type.
-
9Try opening the file. Double-click the file to open it. If the file opens in Excel (or, if you selected "html" as the extension, a web browser), your file has successfully been recovered.
- If you chose the "html" extension, you can convert the webpage into an Excel document by dragging the html file onto the Excel icon and then saving the file that opens as a new "xlsx" file.
- If the file still won't open, proceed to the next Mac method.
Recovering a Temporary Save on Windows
-
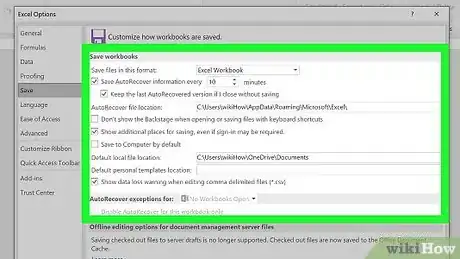
1Understand the limitations of this method. Like most Microsoft Office products, Excel will automatically save recovery versions of files, meaning that you may be able to restore a partial version of your corrupted Excel document. However, Excel doesn't always save these files in time, and you most likely won't be able to recover the whole document in this way.
-
2
-
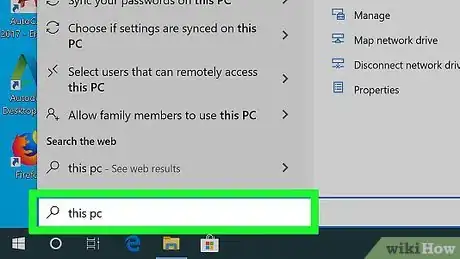
3Type in this pc. This will search your computer for the "This PC" program.
-
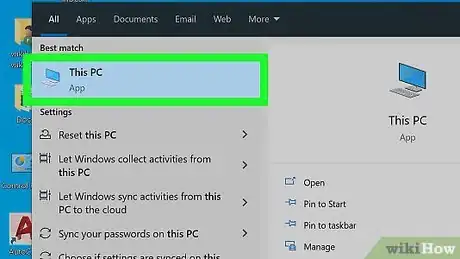
4Click This PC. It's the computer monitor-shaped icon at the top of the Start window. Doing so opens the This PC window.
-
5Double-click your computer's hard drive. This is usually the "OS (C:)" option below the "Devices and drives" heading in the middle of the page.
-
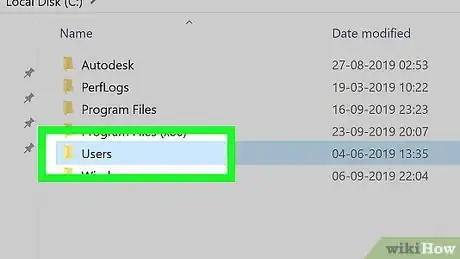
6Double-click the "Users" folder. You'll find this in the middle of the hard drive's folder.
-
7Double-click your user folder. This folder is labeled with part or all of your username on your computer.
-
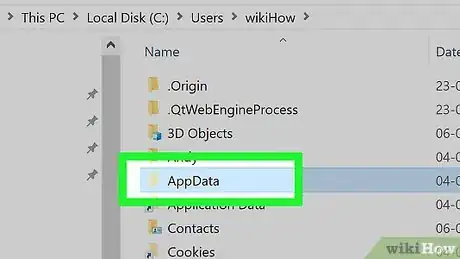
8Double-click the "AppData" folder. It's in the "A" section, so you'll most likely find this folder near the top of the window.
- If you can't find this folder, click the View tab, then check the "Hidden items" box in the "Show/hide" section to prompt the "AppData" folder to appear.
-
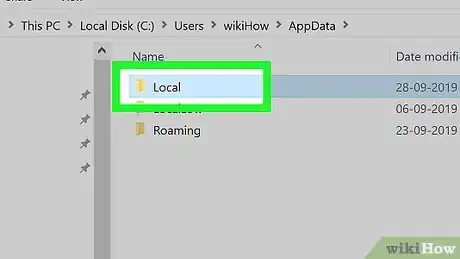
9Double-click the "Local" folder. This option is near the top of the folder.
-
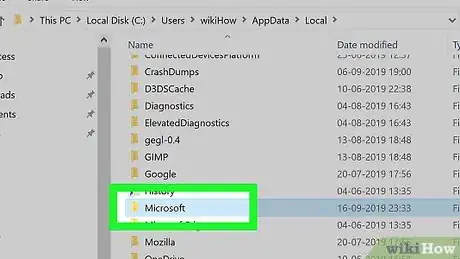
10Scroll down and double-click the "Microsoft" folder. You'll find it in the "M" section.
-
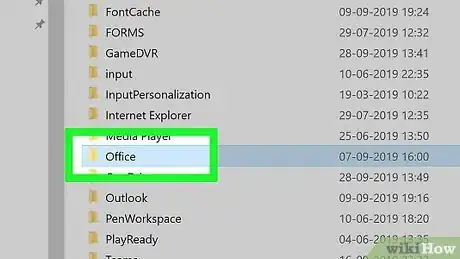
11Double-click the "Office" folder. It's in the "O" section of the Microsoft folder.
-
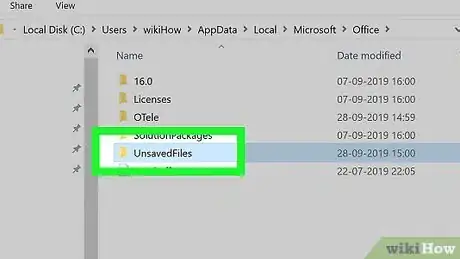
12Double-click the "UnsavedFiles" folder. This folder should be near the top of the window.
-
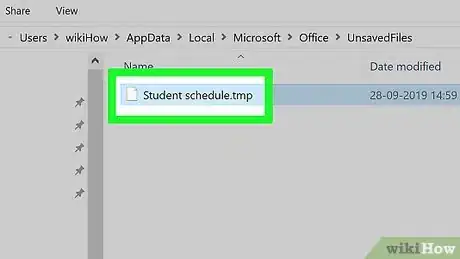
13Select an Excel file. Look for an Excel file icon that has a name matching your corrupted Excel file, then click it to select it.
- If you don't see any files here, a recovery version of your Excel document was not saved.
-
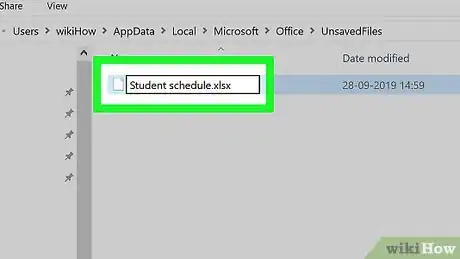
14Change the Excel file's extension. To do so:[2]
- Click View
- Check the "File name extensions" box.
- Click Home
- Click Rename
- Replace the .tmp section with .xlsx
- Press ↵ Enter.
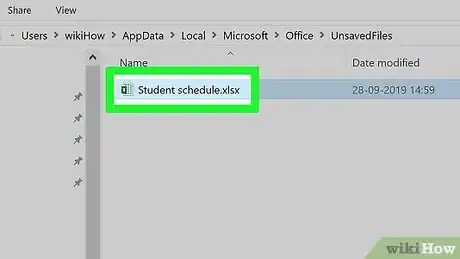
- Click Yes when prompted.
-
15Open the Excel file. Double-click the file that you just renamed to open it.
-
16Save your file. Once the restored file opens, press Ctrl+S, double-click This PC, select a save location, enter a file name, and click Save.
- Be sure to select a different file name than the one which you used for the corrupted Excel file.
Recovering a Temporary Save on Mac
-
1Understand the limitations of this method. Like most Microsoft Office products, Excel will automatically save recovery versions of files, meaning that you may be able to restore a partial version of your corrupted Excel document. However, Excel doesn't always save these files in time, and you most likely won't be able to recover the whole document in this way.
-
2Click Go. This menu item is at the top of the screen. Clicking it prompts a drop-down menu.
- If you don't see the Go menu item, first open Finder or click the desktop to make it appear.
-
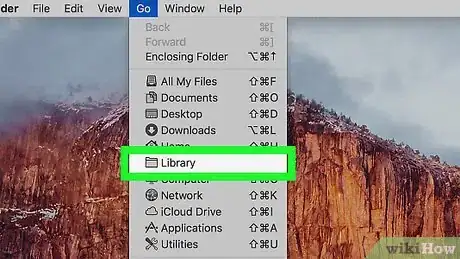
3Hold down the ⌥ Option key. After doing this, you should see the Library folder appear in the Go drop-down menu.
-
4Click Library. It's in the Go drop-down menu. This will open the Library hidden folder.
-
5Open the "Containers" folder. Double-click the "Containers" folder, which is in the "C" section of the Library folder.
-
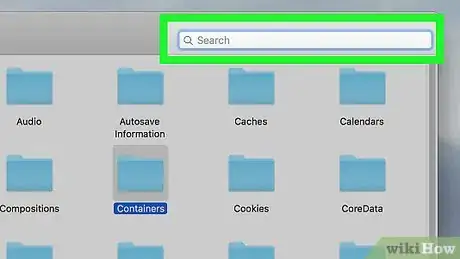
6Click the search bar. It's in the upper-right side of the window.
-
7Search for the Microsoft Excel folder. Type in com.microsoft.Excel and press ⏎ Return.
-
8Click the Containers tab. You'll find this to the right of the "Search:" heading near the top of the Finder window.
-
9Open the "com.microsoft.Excel" folder. Double-click this folder to open it.
-
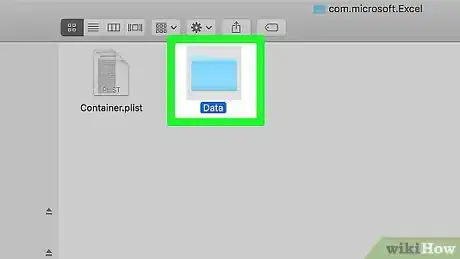
10Open the "Data" folder.
-
11Open the "Library" folder.
-
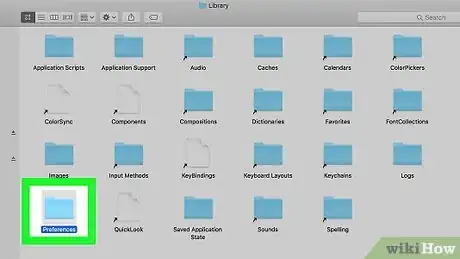
12Open the "Preferences" folder. If you don't see this folder, scroll down to find it.
-
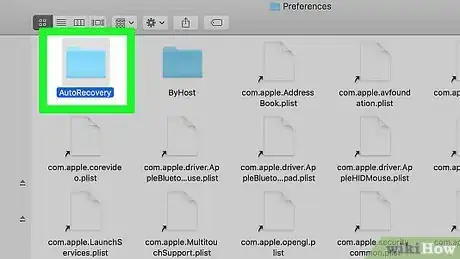
13Open the "AutoRecovery" folder. This will bring up a list of automatically saved versions of your Excel files.
-
14Find a temporary version of your Excel file. The temporary version of your Excel file should have some or all of the file's name in its title.
- If you can't find the temporary version of your Excel file, it wasn't backed up.
-
15Select the Excel file. Click the Excel file to do so.
-
16Click File. It's a menu item in the upper-left corner of your Mac's screen. A drop-down menu will appear.
-
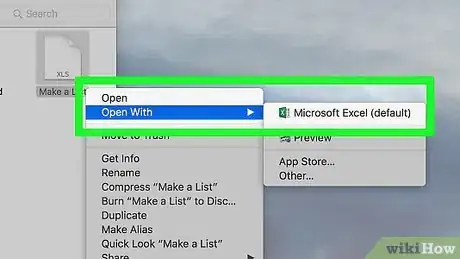
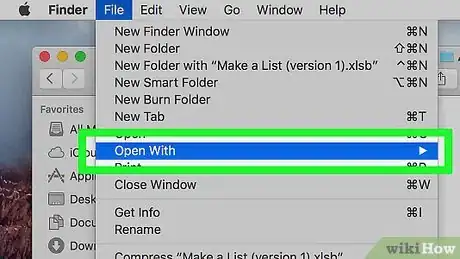
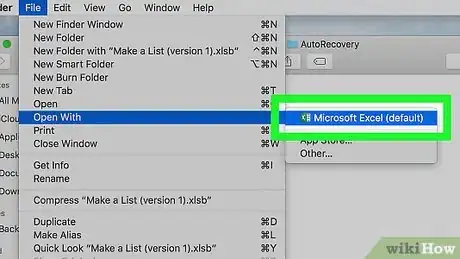
17Select Open With. This option is near the top of the File drop-down menu. You should see a pop-out menu open.
-
18Click Excel. It's in the pop-out menu. Doing so will prompt the temporary version of the Excel document to open in Excel.
- The temporary version will probably not include some of your most recent changes to the original Excel document.
-
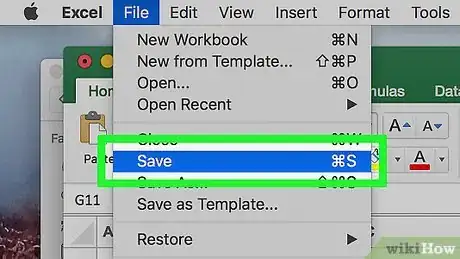
19Save the document. Press ⌘ Command+S, then enter a file name, select a save location in the "Where" menu, and click Save.
Community Q&A
-
QuestionI cannot open the file with my Excel file, but I can open it in another computer. Why?
 Community AnswerIt's likely that the other computer has either an older or newer version of Excel, and your document is not compatible with the version you have on your computer.
 -
QuestionWhat do I do if my Excel files are save with the extension xls?
 Nakamura ReiCommunity AnswerYou can repair .xls files using methods from this article as well as xlsx.
 -
QuestionHow do I recover a deleted excel file in Windows 7?
 Community Answery\You can use the same method. However, to change the file extension you will need to use CMD and run a command like this (make sure you are in the right directory): rename (corrupted excel file, add its file extension at the end) (corrupted excel filename, do NOT add the file extension at the end).(xls, xlsx).
Warnings
- Unfortunately, some Excel files may be entirely unrecoverable.⧼thumbs_response⧽
References
- ↑ https://support.office.com/en-us/article/Repair-a-corrupted-workbook-153A45F4-6CAB-44B1-93CA-801DDCD4EA53
- ↑ https://www.easeus.com/file-recovery/recover-and-repair-corrupted-excel-file-in-windows-10.html
- ↑ https://support.office.com/en-us/article/repairing-a-corrupted-workbook-7abfc44d-e9bf-4896-8899-bd10ef4d61ab
About This Article
1. Open Excel.
2. Select Open Other Workbooks.
3. Select the corrupted file.
4. Click the down-arrow menu next to "Open."
5. Select Open and Repair.
6. Click Repair.
7. Click Close when complete.

