This article was co-authored by wikiHow staff writer, Travis Boylls. Travis Boylls is a Technology Writer and Editor for wikiHow. Travis has experience writing technology-related articles, providing software customer service, and in graphic design. He specializes in Windows, macOS, Android, iOS, and Linux platforms. He studied graphic design at Pikes Peak Community College.
The wikiHow Tech Team also followed the article's instructions and verified that they work.
This article has been viewed 132,138 times.
Learn more...
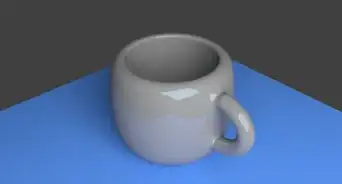
Blender 3D is a free, open-source computer graphics program used to create 3D models and effects for animated videos, computer art, video games, and applications. Blender 3D's interface may seem complicated at first, but you'll get used to it pretty quickly. Soon you will find yourself easily making any object you want. This wikiHow teaches you the basics of how to use the modeling tools in Blender 3D.
Steps
-
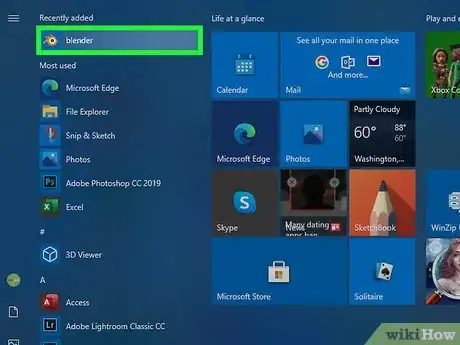
1Open Blender. Blender has an icon that resembles an orange, white, and blue target circle with three orange lines on the top-left side. Click the Blender 3D icon on your desktop, Windows Start menu, Dock, or Applications folder to open Blender. When you open Blender 3D, you will see a title screen with some settings. Simply click off the title screen to close it.
- If you do not have Blender 3D, you can download and install it from https://www.blender.org/download/. It is free to download and available for Windows, Mac, and Linux.
- It is recommended that you use a full keyboard with a number pad and a mouse with a mouse wheel when using Blender 3D. The number pad makes it a lot easier to navigate the 3D environment in Blender.
-
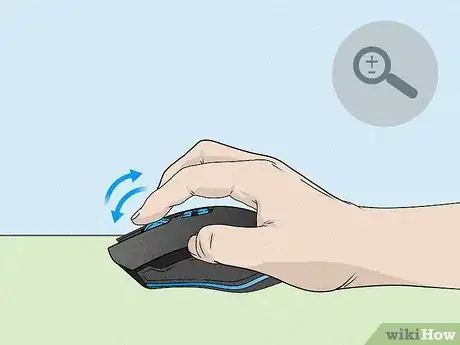
2Roll the mouse wheel to zoom in and out. Blender opens up with a basic scene that includes a mesh cube, a light, and a camera. To zoom in and out on the scene, simply roll the mouse wheel.
- Alternatively, you can press zoom in and out by pressing Ctrl and - or = on Windows or Control and - or = o Mac.
Advertisement -
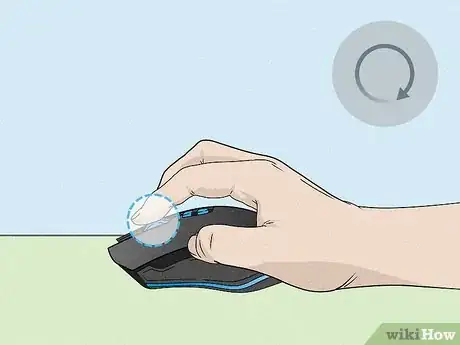
3Click and hold the mouse wheel and drag it to rotate. To rotate around an object in your scene, click and hold the mouse wheel (M3) and drag the mouse to rotate around your scene.
- Alternatively, you can rotate around an object by pressing the arrow keys on the number pad (2, 4, 6, and 8).
- If you don't have a mouse wheel, click Edit in the menu bar at the top. Then click Preferences. Click Input in the panel to the left. Then click the checkbox next to "Emulate 3 Button Mouse." This allows you to click the third mouse button (M3) by pressing Alt (Windows) or Option (Mac) and left-clicking.
-
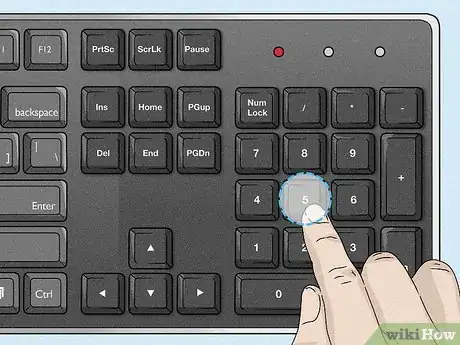
4Press "5" on the number pad to switch between perspective and orthoscopic view. There are two view types you can use in Blender 3D, perspective and orthoscopic.
- Perspective: Perspective view is how objects appear in real life. They appear to get smaller in the distance.
- Orthoscopic: In orthoscopic view, there is no perspective. Objects appear to be the same size no matter how far away they are. This is useful when modeling as it allows you to view the exact dimensions of an object.
-
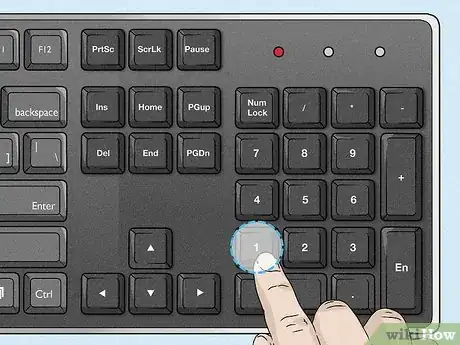
5Press "1" on the number pad to view the scene from the front. Pressing 1 on the number pad makes the viewport jump to a front view of the scene in orthoscopic view.
- Hold Ctrl or Command and press 1 on the number pad to view the scene from the back.
- Alternatively, you can access the different viewpoint options by clicking View in the upper-left corner and then clicking "Viewpoint." Click the viewpoint you want to jump to.
-
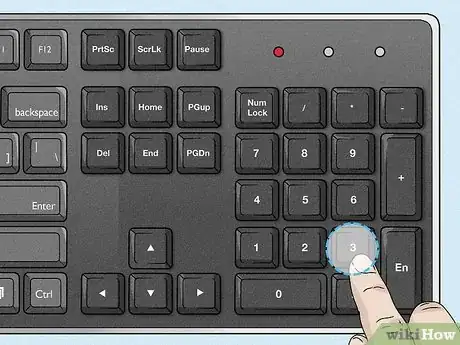
6Press "3" on the number pad to view the scene from the right. Pressing 3 on the number pad makes the viewport jump to a view of the scene from the right in orthoscopic view.
- Hold Ctrl or Command and press 3 on the number pad to view the scene from the left.
-
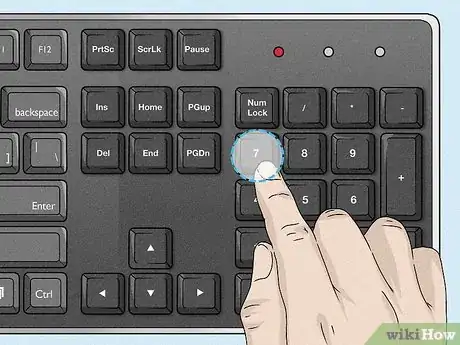
7Press "7" on the number pad to view the scene from the top. Pressing 7 on the number pad makes the viewport jump to a top view of the scene in orthoscopic view.
- Hold Ctrl or Command and press 7 on the number pad to view the scene from the bottom.
-
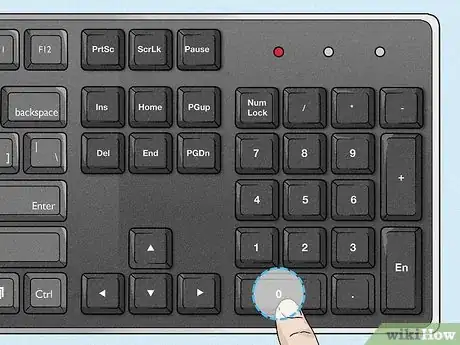
8Press "0" on the number pad to view the scene from the camera. When you render a scene in Blender 3D, the view from the camera will be the final output. To view the scene from the camera's perspective, press 0 on the number pad. The light area in the center of the screen is what will be rendered when you render the scene.
Manipulating and Adding Objects
-
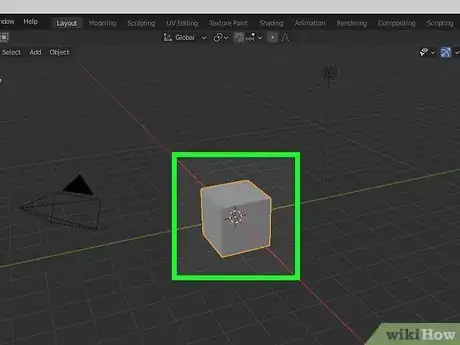
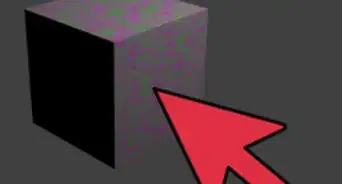
1Click an object to select it. The selected object will be highlighted in orange. When you start a new Blender project, there is an example cube in the scene. Try clicking the cube to select it.[Image:Model on Blender Step 9.jpg|center]]
-
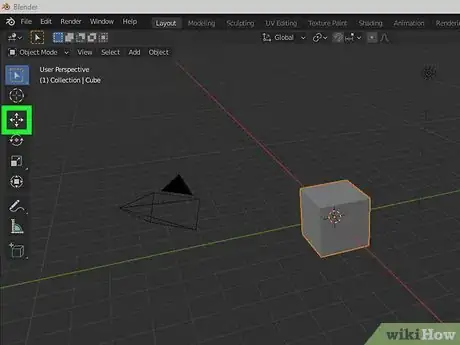
2Use the Move tool to move an object. To move an object, click the icon that resembles crossing arrows in the toolbar to the left. Then click one of the colored arrows over the object and drag it to move it along a particular axis.
- Alternatively, you can select an object and press G on the keyboard to "grab" the object. Then drag the mouse to move it. Click again to place the object.
-
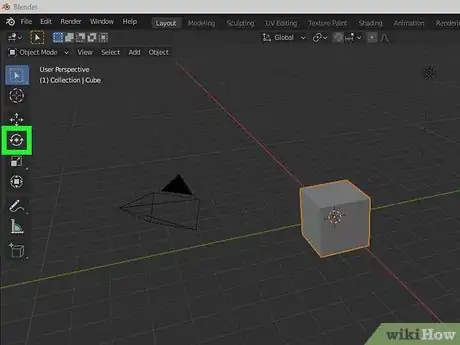
3Use the rotate tool to rotate an object. To rotate an object, click an object to select it. Then click the Rotate tool in the toolbar to the left. It has an icon that resembles two arching arrows around a diamond. Click and drag one of the colored bands around the object to rotate it.
- Alternatively, you can click an object and press R on the keyboard. Then drag the mouse to rotate the object. Click again to place the object.
-
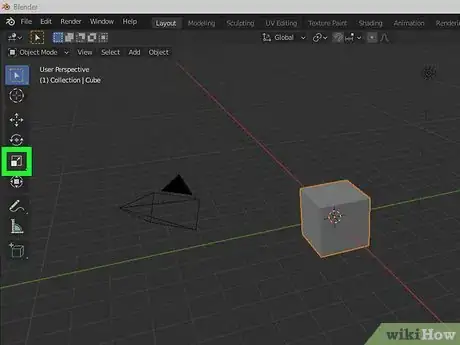
4Use the Scale tool to change the size of an object. To change the size of an object, click an object to select it. Then click the Scale tool in the toolbar to the left. It has an icon that resembles a small square inside of a large square. Click an object to select it and then click and drag one of the colored arrows over the object to stretch the object along a particular axis. Click and drag the circle around the object to Scale the object uniformly.
- Alternatively, you can click an object and press S and then drag the mouse to scale the object uniformly.
-
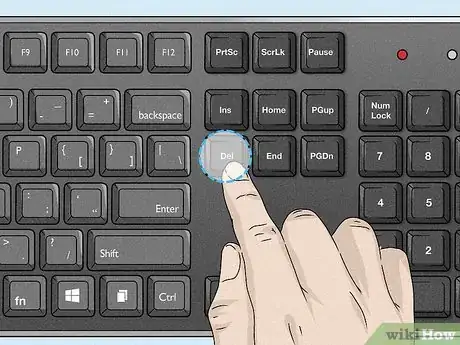
5Click an object and press Delete to remove it. If you want to delete an object, click the object to select it and press the Delete key. If the example cube from the start-up scene is still present, try to delete the cube in the scene.
-
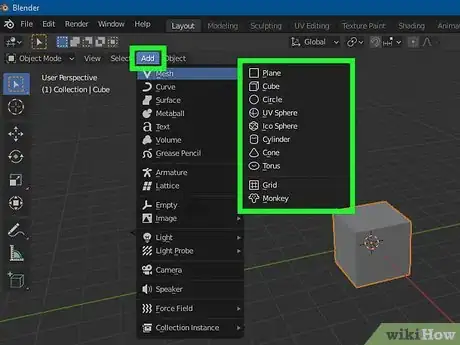
6Add an object. You can add a new mesh shape, light, camera, and more to a scene. Use the following steps to add a new mesh shape to a scene.
- Click Add in the upper-left corner of the viewport.
- Click the Mesh menu.
- Click a shape you want to add.
Editing an Object
-
1Click a mesh object to select it. This can be the cube you start with in Blender 3D or you can click an object you added in the Mesh menu.
-
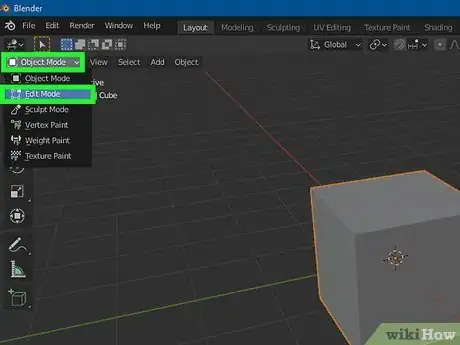
2Switch to "Edit Mode". To switch to edit mode, click the drop-down menu that says "Object Mode" in the upper-left corner of the viewport. Then click Edit Mode. Edit Mode gives you new tools you can use to edit the shape and details of an object.
- While in Edit Mode, you will not be able to select any other objects.
-
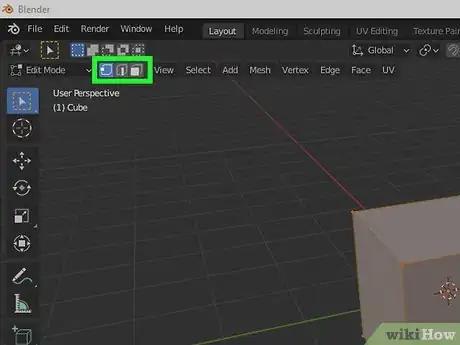
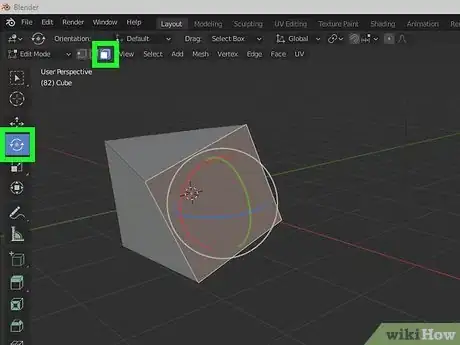
3Switch select modes to select parts of a mesh. In Blender 3D and other 3D modeling programs, mesh shapes are made of 3 elements; vertices, edges, and faces. Faces are small shapes (usually triangles or rectangles) that make up the surface of an object. Edges are the lines in between the faces, and vertices are the corners where the edges meet. You can use one of the three select modes and click to select individual faces, edges, or vertices. Click one of the three select mode icons in the upper-right corner of the viewport to change select modes: :
- Vertice Select: Vertice Select has an icon that resembles a cube with the corner highlighted.
- Edge Select: Edge Select has an icon that resembles a cube with the right corner edge highlighted.
- Face Select: Face Select has an icon that resembles a cube with the entire front side highlighted.
-
4Manipulate vertices, edges, and faces. Use one of the select modes and select some vertices, edges, or faces. Then use the Move, Rotate, or Scale tools to manipulate them. Hold Shift to select multiple vertices, edges, or faces. Move the vertices, faces, and edges of a mesh to create the shape you want.
- Press A on the keyboard to select all faces, vertices, and edges in an object.
- Press B on the keyboard to activate box-select mode. This allows you to select multiple vertices, edges, or faces by clicking and dragging a box over them.
- Press C on the keyboard to activate circle-select mode. This turns the mouse cursor into a circle that you can click and drag to select multiple vertices, edges, or faces.
- X-Ray Mode: Click the icon that resembles a square in front of another square in the upper-right corner to toggle X-Ray Mode on and off. When X-Ray Mode is on, you will be able to see through the objects and select any vertices, edges, or faces from any side. When X-Ray Mode is off, you will only be able to see the side of the object facing the viewport and you will only be able to select the vertices, edges, and faces that are visible in the viewport.
-
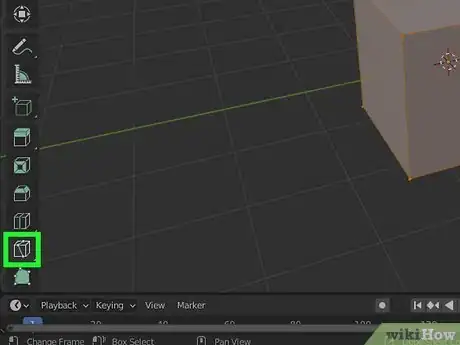
5Use the knife tool to cut more edges. To add more detail to an object, you need to cut more edges and faces into the object. One way to do this is by using the Knife tool. Click the knife tool icon in the toolbar to the left. It has an icon that resembles a cube with a green line cutting through it at an angle. Then click an edge or vertice in the mesh and drag a line to another edge or vertice. Press Enter to make a cut.
- If you don't like how the cut looks, right-click to undo the cut and try again.
-
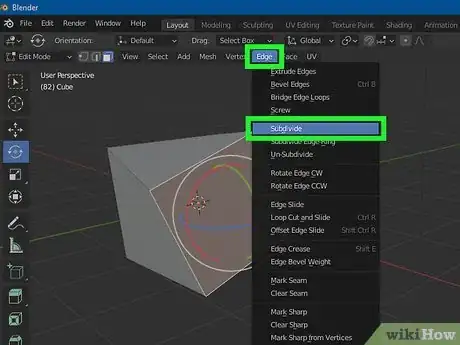
6Subdivide a face. A quick way to add more detail to a mesh is to use subdivide it. You can subdivide individual objects or entire objects. Use the following steps to subdivide and add more detail:
- Select the faces you want to subdivide or press A to select the entire object.
- Click Edge in the upper-left corner of the viewport.
- Click Subdivide.
-
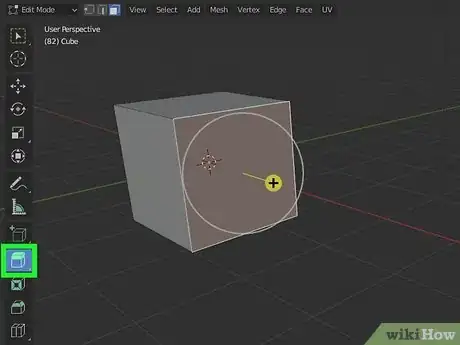
7Extrude a face. Extruding a face extends the face outward (or inward if you prefer). This adds more edges, faces, and vertices and makes the shape more complex. You can use the Extrude tool in the toolbar to the right to extrude a face. It has an icon that resembles a cube with a green top sticking out of it. Use the following steps to extrude a face:
- Select a face you want to extrude.
- Click the Extrude tool.
- Click and drag the yellow arrow over the face to raise or lower it.
- Click the plus (+) sign over the arrow or press Enter to finalize the extrude.
-
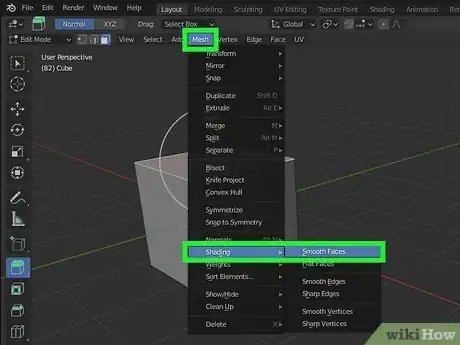
8Smooth the faces of an object. When modeling in Blender, initially your models will be very flat and jagged. This is fine if you are making objects like buildings or furniture. However, sometimes you want objects to look a little smoother and more organic. Use the following steps to smooth an object or individual faces:
- Select the faces you want to smooth or press A to select an entire object.
- Click Mesh in the upper-right corner of the viewport.
- Click the Shading sub-menu
- Click Smooth Faces.
About This Article
1. Click Add followed by Mesh and select a shape to add.
2. Click the shape to select it.
3. Use the "Move," "Rotate," and "Scale" tools to manipulate the object.
4. Use the drop-down menu in the upper-left corner to switch to Edit mode.
5. Select the Knife tool and drag a new cut in the shape and press Enter.
6. Subdivide shapes and faces by clicking Edges followed by Subdivide
7. Use the "Move," "Rotate," and "Scale tools to move vertices, edges, and faces of a mesh.
8. Use the "Extrude" tool to extend faces of a mesh.
