This article was co-authored by wikiHow Staff. Our trained team of editors and researchers validate articles for accuracy and comprehensiveness. wikiHow's Content Management Team carefully monitors the work from our editorial staff to ensure that each article is backed by trusted research and meets our high quality standards.
There are 7 references cited in this article, which can be found at the bottom of the page.
This article has been viewed 551,452 times.
Learn more...
Ambigrams are a really cool artistic endeavor to undertake! An ambigram is a word that has been written in such a way that it can be read both regularly and upside down or backward. An example of this is the word 'NOON' which looks the same when read normally, in reverse, and upside down. However, most words aren't this easy to transform so they require some creativity. Ambigrams are a little bit tricky to master and they require a bit of practice. Luckily, there are few tips and tricks to make the process easier!
Steps
Planning out Your Word
-
1Choose a word you want to turn into an ambigram. If this is your first time attempting to create an ambigram then choosing a word on the shorter side is a good idea. If you want to try something more advanced, pick a longer word.[1]
- Longer words pose more challenges as there are simply more letters that need to be made to look like each other.
- For example, a nice simple word to choose might be "BOOK" as it is only 4 letters. A more difficult word might be "TELEVISION" as it has 10 letters.
- Often, people will choose their name if they’re designing an ambigram for personal reasons so this is also an option.
-
2Write your word out normally, in capitals and upside down. Just do this on a piece of paper with a pencil or use a word flipper.[2] Write it so that the one spelling of the word is directly above the other spelling of the word. This will make it easier to analyze the word later on.
- For example, if your word was ‘great’, write it out on a piece of paper and then directly below it write ‘ʇɐǝɹƃ’ lined up letter-for-letter with the normal spelling.
- It’s also a good idea to write the word in cursive and upper case. This lets you look at what letters may transform well into other letters.
- This process is the same regardless of whether you are creating a reversal ambigram or an upside-down ambigram as at the moment, you are just getting clear on which letters must transform into each other.
Advertisement -
3Line up the two spellings of the word and connect the letters with lines. One spelling of the word (right side up or up side down) should be on top of the other to make this much easier. Make sure you are drawing lines down connecting letters from the regularly spelled word to the up side down spelled word.[3]
- You want to pair up the letters, ideally combine multiple into one.
- For example, for the word “great” you would connect ‘gr’ with ‘t’ with a straight line, then ‘e’ with ‘a’, then ‘a’ with ‘e’.
- Doing this allows you to pair up the letters and have a visual aid to what each letter needs to transform into when you look at the word from a different perspective.
-
4Decide whether any letters need to be combined into one. Combining letters is a way to make the ambigram more artistic but also much more difficult. Stick with just pairing individual letters up together if you want to keep it simple.[4]
- An example of how this works is that in the word ‘great’ the letter ‘g’ pairs up with ‘t’ (as these are the first and last letters). However, if you wanted to combine the letters, you might make it so the letter ‘g’ pairs up with the letters ‘a’ and ‘t’.
- This would mean that the letter ‘g’ will turn into ‘at’ when viewed from the alternative angle because you have combined the 'a' and the 't'.
- Combining letters is a bit more complicated so if you're just starting out, stick to just transforming 1 letter at a time.


Drawing the Ambigram
-
1Draw 4 sets of horizontal parallel lines about 1 inch (2.5 cm) wide. Position these anywhere on your paper or work surface. Don’t worry about doing this if you have lined paper already (but it can help to have clearer lines).[5]
- The purpose of doing this is to just give you a clear space where you can begin to sketch your letters. The letters need to be level when you are sketching them as if they aren’t, they can end up out of proportion and look a bit wayward.
- You can really draw as many of these lines as you feel that you need, 4 is just a good starting point.
- Alternatively use scotch tape to connect a blank paper sheet over squared or lined paper, and use the lines that way.
-
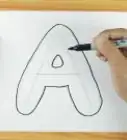
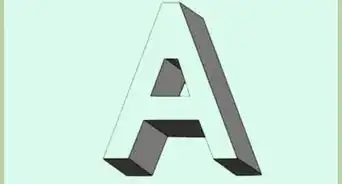
2Sketch out your letters individually. Try different shapes and exaggerating different features of the letters to make them look more like their pair. For example, you might exaggerate the curve on an ‘e’ to make it look more like an ‘o’. Another example may be that you play with the curve of the tails on letters like 'g' and 'q'.[6]
- This is where the creative portion of the ambigram really starts to become important, so be as artistic as you can. Don’t feel any pressure to find a quick solution, enjoy the process of figuring out the ways in which letters can transform.
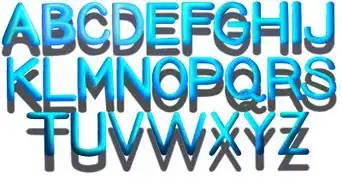
- Feel free to use fonts from word processors like Microsoft Word or Google Docs as inspiration for the way that you shape your letters.
- Consider looking at an ambigram generator for inspiration or google ambigrams of similar words to see how people solve certain letter combinations.
-
3Draw the ambigram in a rough sketch by combining your letters. This doesn’t have to be perfect but try and combine your letters to form the word. Don’t worry too much if the word looks a little bit odd, there’s plenty of time to refine it.[7]
- For example, if your word was ‘great’ you would now combine the individual letters to form the whole word.
- Combining the letters here before you get too specific and concrete with the design of the letters allows you to see how they mesh and flow together to create a word.
- Ideally, an ambigram looks like it has been written with all of the same font rather than each letter having its own individual style. Combining the letters here allows you to check that out and make adjustments.
-
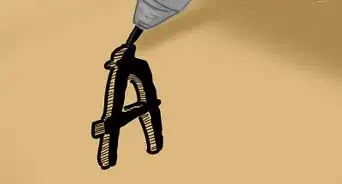
4Refine the ambigram with decoration. Once you’ve checked how the ambigram meshes together, you can decorate it even further. Look to accentuate the tails and features of letters as you often see in ornate styles of writing such as calligraphy.[8]
- For example, you may decorate the curve of the tails on a ‘g’ or a ‘y’ as is the case in calligraphy and other styles.
- Ambigrams are pieces of art and so here is your chance to really turn the word into a piece of artwork and make it flow.
- Remember that not every typographic style works with every single ambigram so be open to the possibility that you have to re-evaluate the style you’re working with. Creating ambigrams is a process that takes patience!
-
5Check that the ambigram reads from both of the intended views. Take a look at the piece of art you’ve created! Check that it reads in the way that you have constructed it to (such as forward and backward or right-side-up and upside-down) and make any little adjustments that you need to to have it looking slick![9]
- This is a good chance for you to just double check that everything reads as you have planned it to.
- It’s not a problem at all if it doesn’t read correctly, just pinpoint where the issue is and go back to sketching to correct it.


-Step-12.webp)

References
- ↑ http://www.johnlangdon.net/thoughts/advice-on-ambigrams/
- ↑ https://makeambigrams.com/word-flipper/
- ↑ https://designshack.net/articles/graphics/how-to-design-an-ambigram/
- ↑ https://www.onlineprinters.co.uk/magazine/tutorial-ambigram-design-5-steps/
- ↑ https://www.adobe.com/uk/creativecloud/design/discover/ambigram.html
- ↑ http://www.johnlangdon.net/thoughts/advice-on-ambigrams/
- ↑ https://www.slideshare.net/balajiprapancham/how-to-make-an-ambigram
- ↑ https://www.demilked.com/typography-ambigram-tutorial-nikita-prokhorov/
- ↑ http://www.johnlangdon.net/thoughts/advice-on-ambigrams/
About This Article


-Step-12.webp)