This article was co-authored by wikiHow Staff. Our trained team of editors and researchers validate articles for accuracy and comprehensiveness. wikiHow's Content Management Team carefully monitors the work from our editorial staff to ensure that each article is backed by trusted research and meets our high quality standards.
There are 17 references cited in this article, which can be found at the bottom of the page.
The wikiHow Video Team also followed the article's instructions and verified that they work.
This article has been viewed 56,736 times.
Learn more...
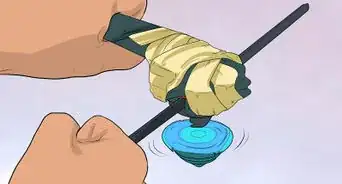
Tops are colorful and mesmerizing toys that are easy to make out of a few spare parts like plastic lids and wood skewers. For a longer-lasting toy, make the top out of metal pieces like washers. If you’re good with wood crafts, create a fancy wood top that you can spin for days without it breaking.
Steps
Creating a Plastic Top
-
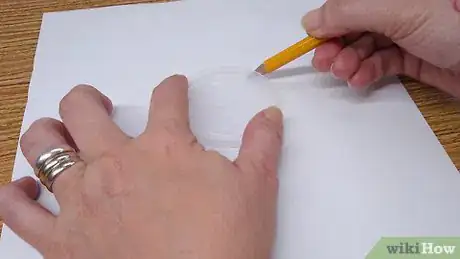
1Find a plastic lid and trace it onto a blank piece of paper. A plastic bottle cap or a coffee container lid are a few good options for a top. Wash the lid off with soap and water if you need to, then set it on a piece of white printer paper. Use a pencil to trace the lid’s shape on the paper.[1]
- The paper is used as decoration on the top. If you don’t wish to decorate the top this way, you can skip using the paper and instead move directly to skewering the lid.
- Try making tops out of other objects. Use CDs or metal cans for something unique. If you use a metal can, you can leave the can whole or cut it to a smaller size with tin snips.
-
2Cut the circle out of the paper with a pair of scissors. Get a sharp pair of scissors and carefully cut along the outline you traced. Keep the edges of the circle as smooth and even as possible. The paper will fit inside the plastic lid.[2]
- Keep in mind that larger, heavier tops tend to spin longer. Experiment with bigger lids and heavier paper for more spinning.
- If you plan on making multiple tops, sketch more circles on the scrap paper. Cut the paper carefully to avoid damaging any of the outlines.
Advertisement -
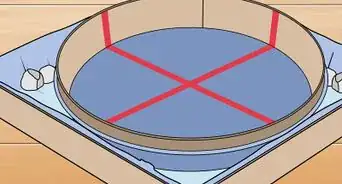
3Fold the paper in half, open it, then fold it in half again. Create creases in the middle of the paper with 2 separate folds. Carefully fold the paper horizontally, making sure the edges line up. After opening the paper, fold it in half vertically. The creases from the folds will meet in the middle of the paper.
- Work slowly so the creases meet in the center of the paper.
-
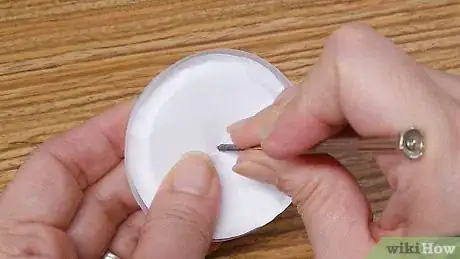
4Fit the paper in the lid and poke a hole through both of them. You will need a thick piece of metal with a sharp tip, such as a nail or wood burning tool. Aim the tool at the center of the paper. While holding it in place, push it down until it creates a small hole through the plastic lid. Wiggling the metal item or hitting its back end with a hammer often helps force it through the plastic.[3]
- If you didn’t use paper to mark the center part of the can, find the center by measuring the can’s diameter.
- Take the paper out if it gets in the way. If you’re having a hard time piercing the plastic, the nail may tear the paper.
- Other tools may be helpful for making the hole. Try making it with the tip of a utility knife. Thick needles or metal skewers are often enough to puncture thinner lids.
-
5Fit a toothpick or wood skewer through the hole in the plastic. Fit the paper firmly in the lid if it isn’t there already. Then, push the wooden stick about ⅓ of the way through the lid. Toothpicks work well for smaller tops like those made from bottle caps. For larger tops like those made from coffee can lids and the one used in these steps, get a skewer like the kind used to roast marshmallows over a campfire.[4]
- Wood skewers and toothpicks are available online or at most general stores.
- If you wish to shorten a skewer, clip off its end with a sharp pair of scissors or a similar tool.
- If you’re making a top out of a metal object like a can, use a nail instead of a wood skewer. Hammer it through the center of the metal.[5]
-
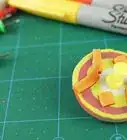
6Remove the paper and decorate it with markers and sequins. Draw any design you like on the paper with permanent markers or other tools. To add more flash to your top, attach sequins or other decorations with a craft or fabric glue. Use a toothpick to spread a dot of glue on the decoration, then stick it to the paper. Scatter the decorations evenly across the top to keep it well-balanced.[6]
- White PVA glue is safe for children decorating the top, but the glue usually doesn’t hold for very long.
- Come up with other ways to decorate the top. For example, wrap colored tape and pipe cleaners around the wood skewer to decorate the top’s handle.
-
7Glue the paper to the inside part of the plastic lid. Set the lid so the open end is face up. Spread some glue around inside the lid. White PVA glue works well, but use epoxy for a longer-lasting top. Spread the glue out as needed with a toothpick until it forms a thin layer. Then, place the paper in the lid with the decorations face up.[7]
- Transparent glues are best for this project since they don’t get in the way of the decorations.
- Make sure the holes in the plastic and paper are aligned, or else you won’t be able to fit the wood skewer in place.
-
8Slide the wood skewer back through the paper and plastic. Push the toothpick or skewer until it’s about ⅓ of the way through the lid. Check the paper decoration to make sure it stays in place. Then, touch the skewer to see if it fits snugly inside the plastic hole you made. If it doesn’t fit well, remove it and widen the hole a little with a thick needle.[8]
- If the skewer fits too loosely in the hole, spread some glue around it to fill in the gaps. Hot glue or epoxy work best.
-
9Wait for the glue to dry for at least 2 hours before spinning the top. Seeing the top will make you want to spin it right away, but it will last longer if you wait! Set the top aside on a countertop exposed to open air. To create a stronger bond, let the glue dry for 24 hours. Afterwards, let the top spin with dazzling colors![9]
- The drying time depends on the type of glue you use. An epoxy glue is better when left alone for up to 72 hours.
- Decorations like sequins are prone to flying off if you don’t give the glue enough time to dry. Make sure they’re well-secured to the paper before spinning the top.
Building a Metal Washer and Bead Top
-
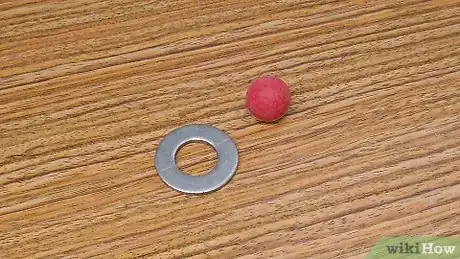
1Get a heavy washer and craft bead for the top’s base. Look for washers from 1 1⁄2 to 2 1⁄4 in (3.8 to 5.7 cm) in diameter. Bigger washers are heavier and cause the top to spin more. For the beads, get a wooden bead that is as wide as the hole in the center of the washer. The bead needs to fit inside the hole.[10]
- Washers are available at hardware stores and wooden beads are sold at some craft stores. Search online if you can’t find them at a store.
-
2Cover the washer with a colorful piece of tape. Choose tape that is wider than the washer, if possible. Cut off a piece of tape that is a little more than twice as long as the washer. Then, fold the tape over to seal the washer in like a wrapped present. Smooth it out to eliminate any wrinkles.[11]
- Colored duct tape and washi tape are perfect for wrapping up the washer. If you don’t have tape big enough to cover up the washer, wrap it with several smaller pieces.
- Use scissors as needed to trim the tape so it fits perfectly over the washer.
-
3Decorate the top with smaller pieces of tape and other material. Fit smaller strips of decorative tape over the washer to give your top more color. For example, try laying thin strips of red and blue tape over the center of the top. Look for craft tape with designs like flowers or rainbow patterns to make your top unique.[12]
- Tape is the easiest way to decorate this type of top, but try gluing objects like sequins to it with PVC glue or epoxy. They likely won’t stay attached very long, but doing the decorating can be fun. The decorations need to be placed fairly evenly across the top to keep it balanced.
- Any decorations in the center of the top will be removed later, so keep this in mind when arranging patterns.
-
4Cut the center of the washer out with a utility knife. Find a sharp utility knife or craft knife. Touch the top to find the hollow part in the center. Then, carefully cut around the inside part of the top. Remove all of the tape and other material from this center spot.[13]
- Another way to do this is by poking a hole through the tape with a toothpick or metal needle. Slip the tip of a scissor blade inside the hole, then cut out the tape.
-
5Glue a wooden bead to the center of the hole. Fit the bead snugly inside of the hole. To glue it in place, warm up a hot glue gun. Hold the tip of the glue gun above the bead, then press the trigger to fill in the gaps between it and the washer. Let the glue cool for about 24 hours to ensure it sets in place.[14]
- Make sure the holes in the bead face away from the washer or else you won’t be able to fit the top’s handle through it.
- A clear glue works best since it doesn’t stand out as much.
- Flip the top over and glue together the bottom surface. If 1 side is undecorated, spread the glue on that side so it’s more hidden.
-
6Slide a wood skewer through the bead and trim it to size. Use a marshmallow skewer to support the weight of the metal washer. Position the top so it is about 1⁄4 in (0.64 cm) up the length of the skewer. When the top is positioned correctly, the top will be able to spin without bumping the surface underneath it. Trim the top off the skewer with scissors so you are able to easily grab and spin the top by its handle.[15]
- Make the top half of the skewer about the same length as the bottom half. You can leave it a little longer if you need to.
- Using a skewer helps smaller tops spin more. If you have a larger top, you may be able to spin it without making a handle.
-
7Glue the skewer in place and let it dry to finish the top. Warm up the hot glue gun again. Chances are the skewer will be loose in the bead. Use the glue gun to pour glue directly into the hole where the skewer rests. Fill it and let the top sit still for about 24 hours to cure.[16]
- If you move the top too soon, the skewer will likely fall out. You will need to glue it in place again.
- Use plenty of glue to ensure the skewer doesn’t move inside the bead while you’re spinning the top. If the skewer feels loose, add more glue and wait for it to dry again.
Making a Wooden Top
-
1Purchase some wooden wheels and dowels. Find wheels and dowels that are the same size. The smaller toy wheels about 1 1⁄4 in (3.2 cm) in diameter with a 1⁄4 in (0.64 cm) hole are the best to get. Then, get some 1⁄4 in (0.64 cm)-thick dowels that will fit snugly in those holes.[17]
- These wooden components are available online and at some craft supply stores. The wheels usually come in bags of 100 or 300.
- If you get larger wheels, get larger dowels as well so your tops are well-balanced.
-
2Cut the dowel rod into smaller sections with garden clippers. Using a ruler or tape measure, divide the rod into sections about 2 in (5.1 cm) long. You only need a single 2 in (5.1 cm) section for each top. Mark the dowel with a pencil as needed to remind you where to cut the wood. Then, carefully cut through it.[18]
- If you use larger wheels, use thicker dowel rods and leave them about the same size. If you need to make the rod longer to balance the top, measure how much wider than 1 1⁄4 in (3.2 cm) your dowel is and add that to the rod length.
- Metal gardening shears are sharp, so have an adult handle the cutting. Consider wearing gardening gloves for protection.
- Another way to cut the rod is with a hand saw. Wear goggles to protect your eyes from wood shards.
-
3Use a pencil sharpener to hone the end of the dowel rod to a point. If you have an ordinary pencil sharpener, the smaller dowel rods fit right into it. Mechanical and electrical sharpeners makes this part easy, but plastic ones work as well. Sharpen the end of the rod so it gradually tapers to a blunt point.[19]
- You don’t need to sharpen the rod until it’s small and pointed like a pen. Keep it big and gradual like a blunted crayon.
-
4Decorate the wheels with paint or markers. Color the wheels to make your own unique top. Draw some patterns or images on it with a set of permanent markers or watercolors. Give the tops about 24 hours to dry before spinning them. Permanent markers create bright, vivid images, while watercolors are good for creating soft, gentle colors.[20]
- Decorate the tops before assembling them. Coloring them is much easier when the wheels are off of the dowel rods.
-
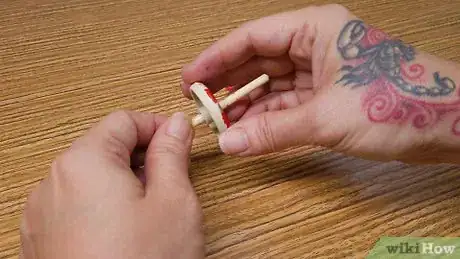
5Insert the rod into the wooden wheel. Select one of the toy wheels and push the pointed end of the rod through it. Let the wheel rest about ⅓ of the way up the rod. Make sure the pointed end sticks out slightly so your top spins properly. Then, repeat this with any other rod pieces and wheels you have to assemble more tops.[21]
- If the rod is too tight to fit in the hole, get a piece of super fine, 400 to 600 grit sandpaper. Applying light pressure, rub down the sides of the rod until the wheel fits snugly over it.
-
6Secure the wheel to the rod with wood glue if it is loose. Look for gaps between the wheel and the dowel rod. Spread a glue that works well on wood, such as a carpenter’s glue, epoxy, or a polyurethane super glue. Squeeze the glue into the gaps between the wood components.[22]
- The glue also holds the wheel in place on the rod. If the wheel fits snugly on the rod, adding glue isn’t necessary.
- Give the glue plenty of time to dry before playing with the top. Wood glue generally sets within 30 minutes or less, but you get a stronger bond by letting it set for a full day.
Community Q&A
-
QuestionWhere can I get plastic lids? I need a lot of them for a project.
 Brett GilbertTop AnswererLook around your home for some. Caps from soda bottles and lids from coffee canisters, for example, are good options. Most people have some they'll throw out anyway, so ask around.
 -
QuestionHow can you make your own fidget spinner?
 Brett GilbertTop AnswererCut a pattern out of paper, gluing several pieces together to make the fidget spinner thicker. Poke a hole through the center, put a toothpick through it, then cover the toothpick with cardboard or another object. Use some PVA glue to glue coins to the ends.
 -
QuestionCan I use this guide to make a BeyBlade?
 Brett GilbertTop AnswererYes, you can make a Beyblade by making a wood or metal top. Decorate the top with paint and other components to make it look more like a regular Beyblade from the show.
Warnings
- Most tops involve cutting or gluing components together, which can be unsafe for small children. Have an adult handle the tougher construction parts to avoid the risk of accidents.⧼thumbs_response⧽
- Watch out for sharp edges and splinters on wood. Trim or sand wood components to blunt them and avoid injuries.⧼thumbs_response⧽
Things You'll Need
Creating a Plastic Top
- A plastic lid
- A piece of paper
- A pencil
- Scissors
- Hammer
- Nail
- Craft or fabric glue
- Wood skewer or toothpick
- Sequins or other decorations
Building a Metal Washer and Bead Top
- Metal washer
- Wood craft bead
- Large tape
- Decorative tape
- Scissors
- Wood skewer
- Hot glue gun and glue
Making a Wooden Top
- Wood wheels
- Wood dowel
- Garden clippers or sharp cutting tool
- Wood glue
- Pencil sharpener
- Watercolors or permanent markers
References
- ↑ https://www.youtube.com/watch?v=LwL-LULCTA0&feature=youtu.be&t=9
- ↑ https://www.youtube.com/watch?v=LwL-LULCTA0&feature=youtu.be&t=31
- ↑ https://www.youtube.com/watch?v=l_JFxODTm7E&feature=youtu.be&t=13
- ↑ https://www.youtube.com/watch?v=l_JFxODTm7E&feature=youtu.be&t=22
- ↑ https://www.youtube.com/watch?v=zFgdos3TPbk&feature=youtu.be&t=89
- ↑ https://www.youtube.com/watch?v=nsdA2TFVx2c&feature=youtu.be&t=76
- ↑ http://www.pbs.org/parents/crafts-for-kids/bottle-cap-spinning-tops-dreidels/
- ↑ http://www.pbs.org/parents/crafts-for-kids/bottle-cap-spinning-tops-dreidels/
- ↑ https://www.adhesives.org/adhesives-sealants/adhesive-selection/types-of-glue-glue-tips
- ↑ https://www.youtube.com/watch?v=a1lxPS1UvqQ&feature=youtu.be&t=25
- ↑ https://www.youtube.com/watch?v=a1lxPS1UvqQ&feature=youtu.be&t=28
- ↑ http://www.pbs.org/parents/crafts-for-kids/easy-diy-toy-spin-finite-tops/
- ↑ http://www.pbs.org/parents/crafts-for-kids/easy-diy-toy-spin-finite-tops/
- ↑ https://www.youtube.com/watch?v=a1lxPS1UvqQ&feature=youtu.be&t=41
- ↑ https://www.youtube.com/watch?v=l_JFxODTm7E&feature=youtu.be&t=282
- ↑ https://www.youtube.com/watch?v=l_JFxODTm7E&feature=youtu.be&t=284
- ↑ https://www.mountclare.org/education/WoodenTops_PlayLearn.pdf
- ↑ https://www.mountclare.org/education/WoodenTops_PlayLearn.pdf
- ↑ https://www.mountclare.org/education/WoodenTops_PlayLearn.pdf
- ↑ https://www.youtube.com/watch?v=Fc8j1BpYFsM&feature=youtu.be&t=135
- ↑ https://www.mountclare.org/education/WoodenTops_PlayLearn.pdf
- ↑ https://www.youtube.com/watch?v=dOLPKhI1Gh8&feature=youtu.be&t=74
About This Article
One of the easiest ways to make a spinning top is with a plastic lid or bottle cap. Choose the lid you want to use, wash it off, and pierce it through the center with an ice pick or nail. Next, slide a toothpick or wood skewer about halfway through the hole in the lid to create the spinner. If the toothpick doesn't fit snugly into the hole, add some glue to secure it in place. When the glue dries, test out your new top! For tips on decorating your plastic spinning top, read on!
