This article was co-authored by wikiHow Staff. Our trained team of editors and researchers validate articles for accuracy and comprehensiveness. wikiHow's Content Management Team carefully monitors the work from our editorial staff to ensure that each article is backed by trusted research and meets our high quality standards.
There are 16 references cited in this article, which can be found at the bottom of the page.
The wikiHow Video Team also followed the article's instructions and verified that they work.
This article has been viewed 49,055 times.
Learn more...
Balls provide endless entertainment for kids and adults alike, so make your own if you want a fun toy to play with this weekend. But there are balls for other occasions, too. If you’re having a rough week, for instance, create a stress ball to squeeze when you just want to scream. Or get creative and make balls out of things like rubber bands, fabric, and even cheese!
Steps
Making a Bouncy Ball
-
1Combine school glue, cornstarch, and any add-ins in a bowl. Stir together the 1 tablespoon (15 ml) of school glue and 1 tablespoon (15 ml) of cornstarch until they’re thoroughly combined, using a spoon or wooden stick. If you want to add any extras, like food coloring or glitter, do so now.[1]
- You can use either white or clear school glue. If you use white glue and don’t add any coloring, your ball will be white.
Fun Add-Ins for Your Bouncy Ball
Sprinkle in glitter for a little extra sparkle.
Squeeze in a few drops of food coloring to make a ball in your favorite hue.
Stir glow in the dark paint into the glue for a ball that can be used at night.
Swirl 2 colors of food coloring together if you want a multi-colored masterpiece.
-
2Stir warm water and Borax together in a separate bowl. Mix 2 tablespoons (30 ml) of warm water and 1⁄2 teaspoon (2.5 ml) of Borax until the Borax is completely dissolved. Stir vigorously to ensure there are no clumps of powder left in the bowl.[2]
- Heat the water in the microwave or on the stove until it’s warm to the touch. It shouldn’t be boiling.
- You can find Borax in the laundry aisle of a store.
- Borax is safe to use, but it's poisonous if ingested in large quantities. If you or your child get it in your eyes or mouth, contact poison control immediately.
Advertisement -
3Add 1⁄2 teaspoon (2.5 ml) of the Borax mixture in the bowl with the glue. Do not stir the ingredients together when you add them. Simply pour the Borax and water into the other bowl containing the glue and cornstarch.[3]
- Set aside the remaining Borax mixture if you plan on making more balls.
-
4Let the mixture sit for 15 seconds. This allows time for the Borax to react with the glue, making the polymers of the glue link together which will create the ball shape. If you start stirring right away, the bouncy ball may not form or harden properly.[4]
- Set a kitchen timer or use the clock app on your phone to keep track of the time.
-
5Use a spoon to combine the ingredients until they’re too thick to stir. Within 1 to 2 minutes, the mixture will thicken. Stir vigorously while the mixture is still liquid to make sure the ingredients are blended well.[5]
- Choose a sturdy spoon, like a metal or thick plastic one. Something flimsy, like a plastic spoon, will likely break off in the goo.
- If you’ve made homemade slime with Borax, this process is very similar.
-
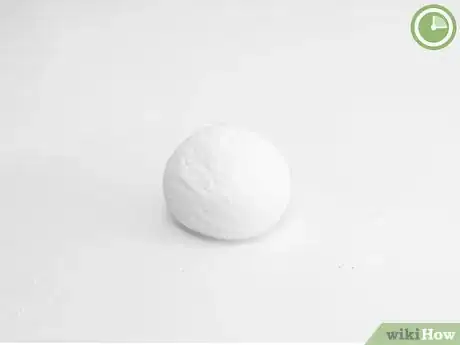
6Remove the mixture and roll it between your hands to form a ball. Once the mixture is too thick for your spoon or stick, pull it out of the bowl and place it between your palms. Roll it around by moving your hands in circular motions until the ball is no longer sticky.[6]
- The more you handle the ball, the more firm it will become.
- If you’re having trouble getting rid of the stickiness, dip the ball in the Borax water, then roll it a little more. This should remove any tacky texture.
-
7Let the ball harden for about 10 to 20 minutes before you use it. This dries the ball a little more, so that it’s extra bouncy. If the ball starts to flatten while it sits, simply roll it back into shape when you’re ready to play with it.[7]
- Once you’re done playing, store the ball in an airtight container to prevent it from drying out. Keep it in a cool, dark place, like the pantry.
- If stored properly, your ball could last for up to 6 months. It won’t go bad, but it will dry out eventually.
- To make more bouncy balls, mix up another batch of glue and cornstarch and use some of the leftover Borax and water mixture.
Creating a Paper Soccer Ball
-
1Trace 20 hexagons on white paper, then cut them out. Draw your hexagons on the paper with a template, making each side the exact same length. Use scissors to carefully cut along the traced shapes, then set them aside.[8]
- If you want a life-sized soccer ball, make the edges 2 inches (5.1 cm) long.
- To make a template, use a ruler to draw the hexagon shape on a piece of cardboard. Cut it out and trace around it with a pencil to make each paper hexagon.
- Cardstock is the best type of paper to use for this craft. It’s sturdy enough to hold the shape of the ball yet still easy to fold.
-
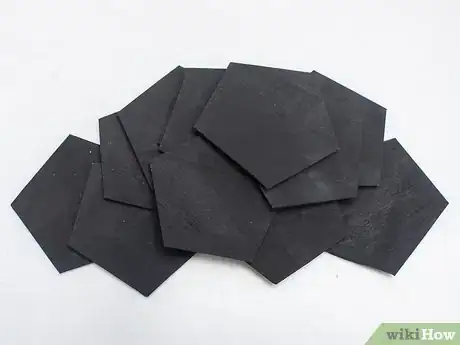
2Trace and cut out 12 black pentagons with sides the same length. The edges of the black and white pieces need to be equal so that they fit together properly. Use a template to draw your pentagon shapes, then cut them out with scissors.[9]
- For example, if you’re creating a life-sized ball, make your pentagon sides 2 inches (5.1 cm) long.
- You can use a different color paper instead of black, or get creative and make a multi-colored ball with a variety of shades.
- Cut a pentagon template out of cardboard to trace on the black paper so that the pieces are all equal size.
-
3Fold up a thin border around each hexagon and pentagon. This edge will allow you to build your ball seamlessly, so there are no gaps between pieces. You only want to fold enough of each edge to have a place to apply glue or tape. Keep the border size equal on each piece so they all remain the same size after folding.[10]
- To fold the same border on each piece, trace the border before you fold, using a ruler to ensure each edge is an equal width.
- Use a straight edge, like a ruler, to help you fold the edges in a perfect line.
- If the edges are crooked, re-fold them. They have to be straight for your ball to be the right shape.
To make folding easier, snip off the corners of your border before you fold. This allows you to fold the edges up without dealing with corners that crumple up or stick out.[11]
-
4Apply glue or tape to the folded edges of each piece. This is how you’ll stick the the pieces together to form the ball. Swipe glue on each of the edges of all the hexagons and pentagons. You can also use a strip of tape on the edges instead.[12]
- A glue stick will work better than liquid glue to prevent the paper edges from getting soggy.
- If you are slow at putting the ball together, you may want to apply the glue as you go, rather than all at once. Otherwise, it will dry out on the final pieces by the time you get to them.
-
5Attach 5 white hexagons to 1 black pentagon. On a standard soccer ball, each black piece is completely surrounded by white pieces. Press 1 white hexagon onto each edge of a black pentagon. Hold the edges together until the glue dries.[13]
- If you’re using a glue stick, the glue will dry almost instantly. Wait about 5 to 10 seconds while pressing the edges against one another.
-
6Continue gluing the pieces together in this pattern, forming the soccer ball. On the other edges of the white hexagons that you attached to the original pentagon, glue more black pentagons. Don’t forget to glue the white edges that touch each other, too. Once you connect all of the pieces, you’ll have a ball shape.[14]
- A black piece should never touch another black piece. However, white edges will touch other white edges.
- If you’re having trouble visualizing the pattern, look up an image of a soccer ball online as a guide.
- You can stuff the ball with shreds of paper if you want to create a fuller shape.
Using Play Dough for a Homemade Stress Ball
-
1Use your hands to roll play dough into a long shape. Place a pile of play dough on a flat surface, then gently roll it out with the palms of your hands. This should form what looks like a snake.[15]
- It doesn’t matter what color play dough you use, since it will just be going inside the balloon.
- Buy pre-made play dough or make your own at home.
- If you buy play dough, use one 5 oz (140 g) container per balloon.
-
2Insert the play dough into the balloon. Stretch the neck of the balloon open as wide as you can, then stuff the play dough snake into the balloon. The play dough should fill the balloon just to the base of the neck.[16]
- If there is a lot of empty space in the balloon, add more play dough.
- Stretch out the neck of the balloon before you insert the play dough to loosen it up.
- This step is easier if you have someone else hold the balloon open while you put the play dough inside.
-
3Tie a knot in the neck at the top of the balloon to secure it. This will keep all of the play dough inside the balloon. Wrap the neck around your finger to make your knot, tying it as tightly as possible.[17]
- If you want extra protection, you can place your original balloon inside another empty balloon before tying it shut. This adds a double layer in case you poke a hole.
- You can decorate your stress balls with permanent markers if you’d like. For example, you could draw a funny face or write a calming phrase, like “just breathe.”
Forming Other Types of Balls
-
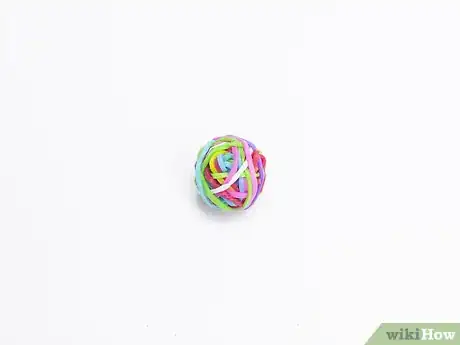
1Build a rubber band ball for a creative way to store supplies. Instead of tossing your rubber bands in a drawer, keep them together in 1 big ball. Fold up a thick rubber band to form the center, then begin wrapping all of other bands around it. Criss-cross directions often to round out the ball.[18]
- You can also wrap your bands around a bouncy ball or crumpled-up piece of paper for a larger ball.
- Start with smaller rubber bands, then add the larger ones as the ball gets bigger.
-
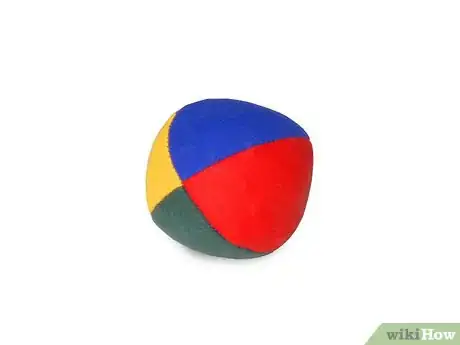
2Sew a fabric ball if you want a soft toy for kids or pets. Young children, particularly babies, could get injured by hard rubber balls. Instead, stitch together a ball out of strips of fabric, then stuff it with polyfill for a plush feel or use dried beans for a bean bag texture.[19]
- This also makes a great pet toy for dogs to chew on or for cats to bat around. If the ball is for a pet, pick a durable fabric like vinyl or nylon and keep your pet in sight as it plays with the ball.
- You can use a sewing machine to make your ball or sew it by hand.
- Cotton is ideal for kids’ toys since it’s a long-lasting and soft fabric that’s easy to wash.
-
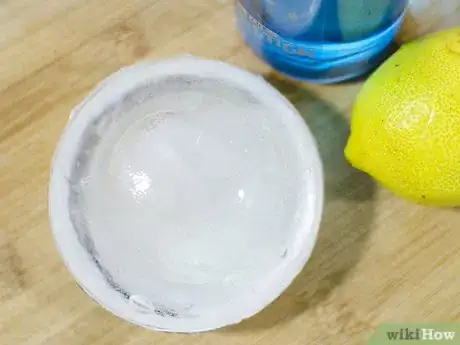
3Use ice to make a ball for a unique cocktail add-in. Not only do ice spheres look much cooler than regular cubes floating in your drink, they also melt slower, so your beverage doesn't get watered-down as quickly. Fill a silicone ice ball mold with water, then place it in the freezer for at least 6 hours, or until the balls have set and hardened.[20]
- For extra flair and flavor, add things like fresh herbs or edible flowers into the water in the mold before it freezes.
- You can buy ice ball molds from a kitchen store or online retailer.
-
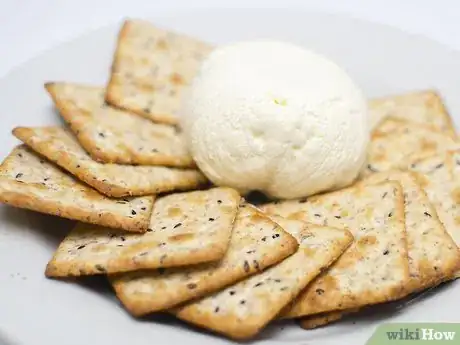
4Make a cheese ball if you’re having people over for dinner or a party. When it’s your turn to play host or hostess, whip up a cheese ball as an impressive appetizer. Mix together cream cheese and other soft cheeses, shape it into a ball, then chill it in the refrigerator. Roll it in chopped nuts and other garnishes before serving.[21]
- You can substitute mascarpone, neufchatel, or goat cheese for the cream cheese if you’d like.
- Pair any type of softer cheese with the creamy base, depending on your taste preferences. As long as it’s not a dry, crumbly cheese like parmesan, it will work.
- Serve a cheese ball with finger foods for dipping, like crackers, pretzels, or raw veggies.
Warnings
- Borax is poisonous. Get help immediately if you accidentally ingest it or get it in your eyes.⧼thumbs_response⧽
- Never let young children handle Borax without close supervision.⧼thumbs_response⧽
Things You'll Need
Bouncy Ball
- 2 tablespoons (30 ml) of warm water
- 1⁄2 teaspoon (2.5 ml) of Borax
- 1 tablespoon (15 ml) of school glue
- 1 tablespoon (15 ml) of cornstarch
- Spoon or wooden stick
- 2 cups or small bowls
- Food coloring or other add-ins (optional)
- Airtight container (optional)
Paper Soccer Ball
- Black and white sheets of paper
- Scissors
- Cardboard
- Pencil or pen
- Glue stick or tape
Homemade Stress Ball
- 12 in (30 cm) latex balloon
- Play dough
- Permanent marker (optional)
References
- ↑ https://www.juneandjanuary.com/blogs/blog/17694648-diy-glitter-bouncy-balls-with-not-so-sahm
- ↑ https://www.juneandjanuary.com/blogs/blog/17694648-diy-glitter-bouncy-balls-with-not-so-sahm
- ↑ https://www.juneandjanuary.com/blogs/blog/17694648-diy-glitter-bouncy-balls-with-not-so-sahm
- ↑ http://myfrugaladventures.com/2013/06/how-to-make-homemade-bouncy-balls-for-kids-that-really-bounce/
- ↑ https://www.juneandjanuary.com/blogs/blog/17694648-diy-glitter-bouncy-balls-with-not-so-sahm
- ↑ http://www.the36thavenue.com/how-to-make-a-bouncy-ball/
- ↑ https://www.goodhousekeeping.com/home/craft-ideas/a42693/diy-bouncy-balls/
- ↑ https://youtu.be/79xMX93kGm8?t=58
- ↑ https://youtu.be/79xMX93kGm8?t=90
- ↑ https://youtu.be/79xMX93kGm8?t=45
- ↑ https://youtu.be/79xMX93kGm8?t=76
- ↑ https://youtu.be/79xMX93kGm8?t=97
- ↑ https://youtu.be/79xMX93kGm8?t=130
- ↑ https://youtu.be/79xMX93kGm8?t=176
- ↑ https://www.somewhatsimple.com/wacky-sacks/
- ↑ https://www.somewhatsimple.com/wacky-sacks/
- ↑ https://www.somewhatsimple.com/wacky-sacks/
- ↑ http://www.twindragonflydesigns.com/how-to-make-a-rubber-band-ball/
- ↑ https://www.craftideas.info/html/ball_tutorial.html
- ↑ https://culinarylore.com/drinks:why-do-bartenders-use-sperical-ice-balls/
- ↑ https://www.thekitchn.com/how-to-make-a-cheese-ball-239455
About This Article
To make a bouncy ball, combine 1 tablespoon of school glue and 1 tablespoon of cornstarch in a bowl. Next, stir 2 tablespoons of warm water and 1⁄2 teaspoon of Borax together in a separate bowl until the Borax is completely dissolved. Then, add 1⁄2 teaspoon of the Borax mixture to the glue mixture and let it sit for 15 seconds without stirring. Once the mixture thickens, stir the ingredients together. Finally, remove the mixture, roll it between your hands to form a ball, and let it harden for 10-20 minutes before you use it! Keep reading to learn how to make paper balls!
