This article was co-authored by Sarah Stearns. Sarah Stearns is a DIY Specialist, Artist, Maker, Blogger, and the Founder of SarahMaker.com. With over ten years of experience, she specializes in fun, approachable crafts like crocheting, making polymer clay jewelry, quilting, and creating Cricut projects. Her work has been featured in several publications, such as Scientific American, Good Housekeeping, Vox, and Apartment Therapy. Sarah holds a BA in Psychology from Vanderbilt University.
This article has been viewed 217,133 times.
Polymer clay is a sculpting medium used by crafters and artists alike. It's soft and can be easily formed into a wide variety of shapes. The great thing about polymer clay is that, while it's soft and easy to manipulate, when baked it becomes hard. Because it's so versatile, it can be used to make many different kinds of jewelry.[1] Here are a few jewelry projects you can do with polymer clay.
Steps
Making a Simple Beaded Necklace with Polymer Clay
-
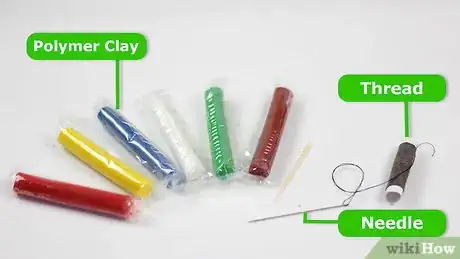
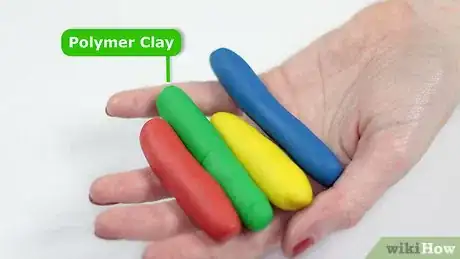
1Assemble all of your supplies. You will need several colors of polymer clay, a toothpick, a pan that can go in the oven (that will only be used for polymer clay, not food), a piece of string, and a needle that can be threaded onto the string.
- Polymer clay is available at all craft supply stores and easily available online as well.
-
2Loosen up the polymer clay. Polymer clay needs to be worked and warmed up a little bit before it can be easily manipulated.[2] Cut off a small piece of the first color you want to use, about the size of a marble. Roll it around in your hands, making it round and loosening it up.
- If your clay is really hard, cut it up into small pieces with a knife. Lay the pieces on on a cutting board and add a drop of mineral oil. Now knead all the little pieces back together. The mineral oil should make it more pliable.
Advertisement -
3Pierce the ball of polymer clay right down the middle with your toothpick. Be careful that the ball keeps its round shape and that the hole made by the toothpick is big enough to get your needle through later.
- Polymer clay does not really expand or contract when cooked, but bead holes may tend to shrink a bit. This means that you should make your bead holes a little bit bigger than your needle.
-
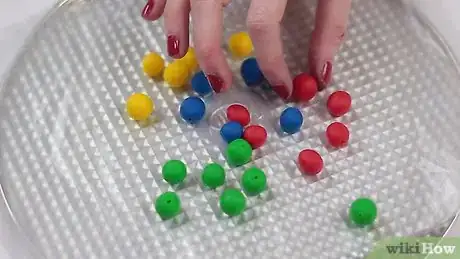
4Lay your bead on your baking sheet. Remember that the baking sheet you use will should not be used for baking food after it's used for baking polymer clay.
-
5Repeat these steps with all of the colors of clay you have. Try to keep your beads all the same size, so that they look the same.
-
6Make marbled beads. Once you have practiced making beads of a single color, try mixing several colors together to create a marbled effect. Simply take small pieces of several colors and knead them together. However, be careful not to knead them too long or the colors will simply combine and create a new solid color.
- Different brands of polymer clay may have different baking directions, so it's best to only combine polymer clays of the same brand.[3]
-
7Make a two-sided multicolor bead. Roll each color into a long skinny tube, about a quarter inch wide and four inches long. Press all the tubes of color into each other, making one long roll. Roll out this larger roll a little bit, just to make sure that it is round. Then slice off marble size pieces and roll them into beads. Your finished bead should have two multicolored sides.
- You can make a variety of patterns and designs by using this process. Try slicing thin round pieces off of your multicolor roll and then applying the flat sides of them to the surface of a single color bead (as made in the steps above). Once the surface is covered, smooth the surface out by rolling the bead lightly in your hands.
-
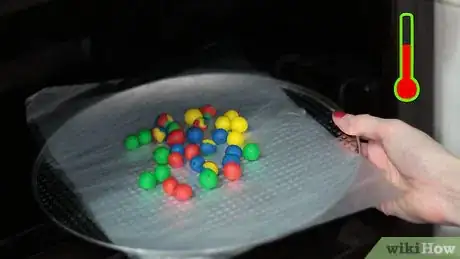
8Follow the baking directions given on the wrapper of the clay. Be sure to follow the directions carefully, as over baking or under baking your bead can damage them.
- No matter what brand it is, it will smell up your kitchen a bit while baking. These fumes are not good for you. Be sure to open us some windows or turn on a vent to get proper ventilation.
-
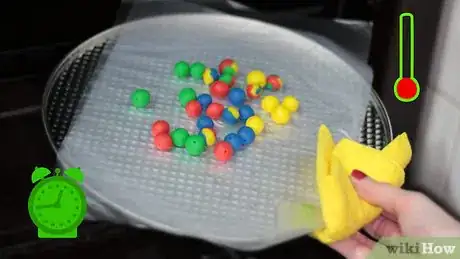
9Remove the beads from the oven and let them cool before assembling your necklace. The beads need to be completely cool before you touch them. When they are still warm they will not be totally hard, so touching them could damage the surface.
-
10Assemble your necklace. Thread your needle with the string you got. Then string the beads on, paying attention to any kind of color pattern you would like to make. Once all of your beads are on the string, take the needle off the end and tie the ends of the string off, making sure the loop you make is big enough to fit over your head.
-
11Put on your brand new necklace!
Making Pendants with Polymer Clay
-
1Purchase several different colors of polymer clay. You'll want to choose colors with projects in mind. Polymer clay blends very well, so keep in mind that you can mix colors.
- There are several different brands of polymer clay available. You may wish to purchase more than one brand to see which one you like best. Some are softer than others. Remember, however, that different brands may have different baking directions, so you may not want to mix them together.
- You can also make your own polymer clay at home.
-
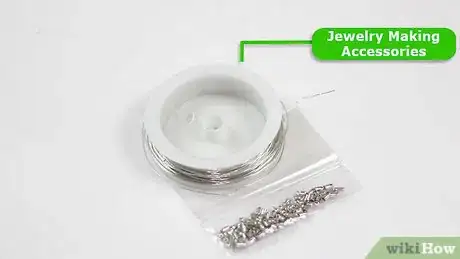
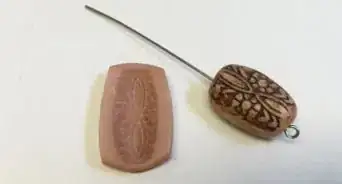
2Choose some jewelry making accessories. You will need to plan what type of pendants you want to make.[4] For a necklace pendant or several hanging earrings, you will need to purchase an oven-proof band holder. This is basically a piece of wire that you can stick into the clay before it is baked that is made to withstand the heat of the oven. This wire will have a loop the sticks out of the pendant, that way you can attach the pendant to a necklace string or chain or to earring wires.
- You can find a wide variety of jewelry making tools and accessories at any craft store.
-
3Mix and blend colors. Pick your favorite colors and blend them together just enough so that they create a marbled effect.
- You can also mix colors together completely in order to make a brand new color. It might be fun to only buy red, yellow, and blue polymer clay and try to make other colors yourself by mixing them together.
-
4Sculpt your polymer clay. Using your fingers alone you can sculpt pendants, figurines, or beads.[5] Begin with simple shapes, adding small pieces of clay on top of that to create a pattern.
- Make unique shapes. There are no limits to what you can do with polymer clay. Try to make an abstract shape out of a variety of colors or a tiny version of your favorite animal. The options are endless on what you can make.
- Try covering a square or circle of polymer clay with small dots of other colors of polymer clay. Once covered, smooth out the surface gently or leave it with a textured surface.
- If you run out of ideas, try looking online for inspiration. There are a wide variety of websites that can give you ideas to start from.
-
5Add metal accessory pieces to your sculpted items before baking. There are some accessories that need to be baked into the piece. Be sure anything you put in the oven is oven-proof.
-
6Place your sculpted items on a foil covered cookie sheet. This protects both the pan and the back of the jewelry pieces.
-
7Bake the polymer clay items according to the package directions. Most clays are baked at 275 degrees F (135 degrees C) for 20 to 25 minutes.
-
8Allow sculpted items to cool completely. You can lightly sand with extra fine paper if needed. If you are making a necklace, thread your necklace string or chain through the wire loop on your pendant. If you are making a pair of earrings, simply attach the earring wires you purchased to the loops coming out of the pendants.
Expert Q&A
-
QuestionWhat can you make with polymer clay to sell?
 Sarah StearnsSarah Stearns is a DIY Specialist, Artist, Maker, Blogger, and the Founder of SarahMaker.com. With over ten years of experience, she specializes in fun, approachable crafts like crocheting, making polymer clay jewelry, quilting, and creating Cricut projects. Her work has been featured in several publications, such as Scientific American, Good Housekeeping, Vox, and Apartment Therapy. Sarah holds a BA in Psychology from Vanderbilt University.
DIY Specialist Lots of things! Since polymer clay is so moldable, you can shape it into beads, pendants, and miniature charms. You can even try making bold, colorful earrings, too!
 -
QuestionIs it possible to make jewelry with any other clay than polymer clay?
 Community AnswerYes, because most clays can go into the oven and be baked to harden the piece.
 -
QuestionWhat do you recommend for the oven-proof accessories? I don't see exactly what to get at Michael's to make the clay piece attach to a fish hook earring.
 Community AnswerPretty much any small pieces of metal are fine in the oven. You will need small metal jump rings and eye pins. You basically stick the eye pin into the clay piece so the little hoop part is sticking out, bake it and then attach the jump ring, which you then connect to the tiny hoop at the bottom of the fish hook earring. If in doubt, there are many oven-bake (polymer) clay jewelry tutorials on YouTube.
Warnings
- The fumes from polymer clay are toxic! Be sure the room where you are baking the clay is well ventilated.⧼thumbs_response⧽
- Polymer clay should not be ingested! While many tools from the kitchen are great for working with polymer clay, be sure that anything you use does not go back to use in the kitchen.⧼thumbs_response⧽
References
- ↑ Sarah Stearns. DIY Specialist. Expert Interview. 4 October 2021.
- ↑ http://www.polymerclaycentral.com/beginner1.html
- ↑ http://www.polypediaonline.com/133688/Polymer-Clay-Baking
- ↑ Sarah Stearns. DIY Specialist. Expert Interview. 4 October 2021.
- ↑ Sarah Stearns. DIY Specialist. Expert Interview. 4 October 2021.
About This Article
To make a beaded necklace or bracelet with polymer clay, start by rolling a marble-sized piece of clay in your hands to warm it and make it more pliable. Then, roll it into a ball and poke a toothpick through the center so you can thread it later. Next, lay the bead on a baking sheet, then repeat the rolling and poking process to make as many beads as you want. Once the beads are rolled, bake them according to the package directions, then let them cool. Finally, thread a needle with string and push it through each bead to make a necklace or bracelet. To learn how to make a pendant out of polymer clay, read on!

