This article was co-authored by Natasha Dikareva, MFA. Natasha Dikareva is a San Francisco, California based sculptor, and installation artist. With over 25 years of ceramics, sculpting, and installation experience, Natasha also teaches a ceramic sculpture workshop titled "Adventures in Clay" covering concept development, hand-building techniques, texture, and glazing techniques. Her work has been featured in solo and group exhibitions at the Beatrice Wood Center for the Arts, Abrams Claghorn Gallery, Bloomington Center for the Arts, Maria Kravetz Gallery, and the American Museum of Ceramic Art. She has taught at the University of Minnesota and the American Indian OIC School. She has been awarded the Excellence Award at the 1st World Teapot Competition, Best in Show at the 4th Clay & Glass Biennial Competition, and a Grand Prize at the American Museum of Ceramic Art. Natasha holds an MFA from the University of Minnesota and a BFA from Kiev Fine Arts College.
There are 8 references cited in this article, which can be found at the bottom of the page.
wikiHow marks an article as reader-approved once it receives enough positive feedback. This article has 23 testimonials from our readers, earning it our reader-approved status.
This article has been viewed 1,561,208 times.
Are you tired of spending money on expensive polymer clay? You can save money (and have fun) by making your own polymer clay substitute right at home, and it's super easy. This wikiHow will show you 4 different ways to make polymer clay substitute. Let's get started!
Steps
Glue and Cornstarch
-
1Pour ¾ cup of glue and 1 cup cornstarch into the non-stick pot. The pot should be either sitting on the counter during this step or if it is perched on the stove, make sure the flame is not on. Stir well until fully combined.[1]
- PVA wood glue works best for this recipe although the normal white children's glue will work well also. The children's glue may result in clay that is a bit weaker than clay made with wood glue.
-
2Add 2 tablespoons of mineral oil and 1 tablespoon (14.8 ml) of lemon juice to the glue and cornstarch mixture. Stir well until completely blended. You can get mineral oil online, but if you cannot find it then you can use petroleum oil (not jelly) or baby oil as a substitute.[2]
- If you want, you can add food coloring or acrylic paint to the mixture at this point to color it. Be careful not to add too much paint or else you could change the texture. If you want vibrant colors then you should simply paint your creation once it is made.[3]
Advertisement -
3Transfer the pot to the stove. Simmer over low heat/flame. As you heat up the stove, stir constantly to keep the liquid ingredients moving. Don't let the mixture sit still, as this will compromise the integrity of the clay's texture.[4]
-
4Continue stirring the mixture until it resembles mashed potatoes. Once it turns to the mashed potato consistency, it's time to remove from the heat/flame and place onto a cool/flat surface.
- Consider placing a hot pad or towel on the counter to protect your countertops.
-
5Add a small squirt of mineral oil to the mushy clay. The oil will coat and grease your hands as you knead it so that it does not stick to your hands.
-
6Transfer the clay to the countertop to work and knead. You should do this while it is still quite warm, but it's important to wait at least a few minutes for it drop to a temperature that is safe enough to handle.[5]
- You can also use either rubber or work gloves to protect your hands.
-
7Knead the dough until it's smooth. The consistency should appear like well-worked pizza dough and be completely blended together. Roll into a ball when finished.[6]
-
8Store the finished clay in a re-sealable freezer bag that can be kept in the refrigerator. To keep clay fresh and avoid having it harden, remove as much air as possible before sealing the bag and storing it.[7]
- If the clay is still warm, place in the bag but leave a small amount of the bag open. Once it has cooled completely, then you can seal and store it.
-
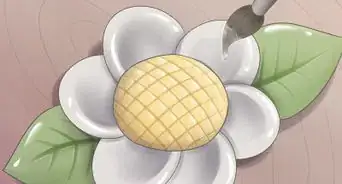
9Use your dough to create something. Now that you have made your dough, you can use it to create anything you choose. When working with the dough it helps to put a little hand cream on your hands to allow you to smooth the clay easily.
- Allow your creation to dry for at least 24 hours, or more if it is not yet dry.
- Paint with your choice of paint. Tempera paint works well but other types will work as well.[8]
- You should paint even those areas that you want to remain white because it can start to look translucent if you do not.
-
10Use this recipe for a homemade version of clay. This clay behaves the most like commercial polymer clay, but it might shrink slightly (polymer clay doesn't shrink). The effect should be minimal, but be aware of this when working on projects, and consider making a test piece first to gauge how much shrinkage you can expect on your final piece.
- You may want to build your project a bit bigger so that when it shrinks it will be the correct size.


Glue and Glycerin
-
1Use this recipe for homemade polymer clay for a version that does not crack. This recipe has a higher ratio of glue, which makes it much stickier but also prevents cracks. The addition of glycerin also reduces cracking in the final product.[9]
- This recipe also dries much faster, taking only about 30 minutes.
- However, after making the recipe you will have to wait at least one night and preferably a week until you can use the dough. This makes it less sticky.
-
2Wear old clothes or an apron. This will keep your clothes clean and tidy during the process.
-
3Mix the water and glue in a non-stick pot and boil for two minutes. Mix ½ cup water with 2 cups pva (wood) glue in a non-stick pot. Boil them for two minutes while stirring constantly and then remove from the heat.
- You can use any white children's glue but wood glue works best for this recipe because it is stronger.
-
4Mix the cornflour with ¼ cup of water in a mixing bowl and pour into the blend. Put the cornflour and water in a bowl and pour into the pot of boiling glue and water. Mix the ingredients well.
- Cover the dough with plastic while it is cooling.
- If using food coloring, add one to two drops and adjust as needed. Otherwise you can paint the clay after drying.
-
5Sprinkle cornflour on a suitable work surface. Remove the dough and knead well. Continue kneading and adding extra cornstarch until the dough becomes less sticky.
-
6Stop kneading when the clay is smooth and pliable. You want to work the gluten in the cornstarch into nice pliable dough. It is now ready for use.
-
7Store in an airtight bag to prevent drying out. Put the dough in an airtight bag to prevent it from drying out while you wait until making use of it.


Unbreakable Clay
-
1Use this recipe for very strong clay. This recipe involves additional ingredients but it results in very strong clay that can be dropped from one meter high and not break.[10]
-
2Combine all the ingredients except the cornstarch in a non-stick pan over low heat. Mix 1 cup PVA glue, ½ tablespoon stearin (stearic acid), 1 ½ tablespoon glycerin, 1 ½ tablespoon Vaseline and ½ tablespoon citric acid in a non-stick pot over low heat. Mix completely.
- Use the lowest heat possible to heat up the pot.
-
3Add the cornstarch little by little and keep stirring. Add the ½ cup cornstarch little by little into the mixture, stirring the whole time. Adding the cornstarch little by little prevents lumps from forming. Keep mixing the clay until you can lift the clay up from the pan.
- It will get stickier and stickier and then heavier and very hard to stir but you must continue until you can lift it out of the pan.
-
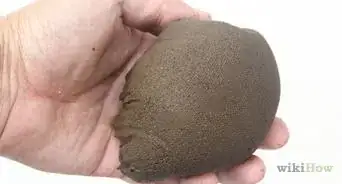
4Knead the clay for about 20 minutes. Place the clay on a table on top of non-stick paper (baking paper). It should be hot, a little sticky and a little lumpy. Knead the clay for about 20 minutes until all the lumps disappear and the clay becomes smooth and no longer sticky.
- Allow the clay to cool down for a bit if it is still hot when you finish kneading.
-
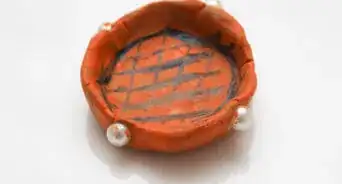
5Store the clay in a sealed plastic bag. Store the clay in sealed plastic bags to prevent it from hardening before use. Make sure you press all the air out of the bag before sealing. Use the clay to make whatever you prefer and paint using acrylic paints.


Pasta Francesa
-
1Use this method for a traditional-style recipe from Latin America. This recipe is very popular in Latin America and makes useful clay. Many recipes call for 10% formaldehyde or formalin but this has been replaced with white vinegar in this recipe for a safer, non-toxic version.
-
2Mix the cornstarch, water and glue into a Teflon-coated pot. First mix 1 cup cornstarch with ½ cup water in a Teflon-coated pot over low heat until it is completely dissolved. Once the cornstarch has dissolved, add and mix in the 1 cup glue.
-
3Add the glycerin, cold cream and vinegar to the pot and mix. Add 1.5 tablespoons (22.2 ml) of glycerin, 1.5 tablespoons cold cream with lanolin and 1.5 tablespoons (22.2 ml) white vinegar to the pot. Continue cooking on low heat while stirring constantly until a dough forms and begins to come away from the sides of the pot.
- Be very careful not to overcook or else the dough will harden.
- Glycerin is a common baking ingredient that you should be able to find in the baking section of the supermarket or online.
- Find cold cream with lanolin in the cosmetics section of the store.
-
4Knead the dough with lotion on your hands. Allow the dough to cool with a damp cloth used as covering. Once you can handle the dough knead it into a smooth clay consistency. It is ready to be molded however you wish.
- Allow your creation to dry for at least three days in the air.
- Oil paints and acrylics can be used to paint your creation once you have allowed it to dry.
-
5Store in plastic wrap. Store in plastic wrap and keep in a cool, dark place.


Community Q&A
-
QuestionCan I use PVC glue for it?
 Community AnswerYes, you can. White glue or PVA or PVC or wood glue are all the same. Any thick white glue should work fine.
 -
QuestionDo I bake the clay in the oven at home?
 Community AnswerIf you have an oven, you could but it's not necessary. Alternatively, find a very warm spot in the house, such as on the porch or in a windowsill that gets very hot during the day. Or, use a hair dryer on the clay (which will require about an hour, so set the hair dryer up on a stand).
 -
QuestionCan I use flour instead of cornstarch?Community AnswerYou can but it can result in many cracks in your final product. Cornstarch will give you a much better result.
Things You'll Need
Method 1:
- About 3/4 cup per batch of regular white glue (the non-toxic “school glue” will do the trick)
- 1 cup of cornstarch
- 2 tbsp of mineral oil
- 1 tbsp of lemon juice
- A non-stick pot (any non-stick pot will do, but if you don't have one on hand, a light coating of non-stick spray around the bottom and sides of the pan should keep ingredients from sticking)
- A wooden spoon
Method 2:
- 3/4 cup water
- 2 cups pva (wood) glue
- 1 cup cornflour
- 2 tablespoons glycerin
- Food coloring (optional)
Method 3:
- 1 cup of cornstarch
- 1 cup of polyvinyl acetate glue or PVA wood glue
- 1/2 cup of water
- 1.5 tablespoons glycerin
- 1.5 tablespoons cold cream with lanolin
- 1.5 tablespoons white vinegar
Method 4
- 1 cup PVA wood glue or other white glue
- 1/2 cup cornstarch
- 1/2 tablespoon stearin (stearic acid)
- 1 ½ tablespoon glycerin
- 1 ½ tablespoon Vaseline
- 1/2 tablespoon citric acid
References
- ↑ https://static1.squarespace.com/static/5dcd7a3952fa6d5d0ea30298/t/6202c3e05a72a8068a1ad5ce/1644348385469/Polymer+Clay+%281%29.pdf
- ↑ https://static1.squarespace.com/static/5dcd7a3952fa6d5d0ea30298/t/6202c3e05a72a8068a1ad5ce/1644348385469/Polymer+Clay+%281%29.pdf
- ↑ https://thebluebottletree.com/10-simple-polymer-clay-tips/
- ↑ https://static1.squarespace.com/static/5dcd7a3952fa6d5d0ea30298/t/6202c3e05a72a8068a1ad5ce/1644348385469/Polymer+Clay+%281%29.pdf
- ↑ https://inspirationlaboratories.com/cornstarch-and-glue-play-dough/
- ↑ https://www.clay-it-now.com/besthomemadeclay.html
- ↑ https://www.figurines-sculpture.com/cold-porcelain-recipe.html
- ↑ http://www.decal.ga.gov/documents/attachments/PaintPlayCraftRecipes.pdf
- ↑ https://www.familyeducation.com/fun/clay/homemade-clay-recipes
About This Article

To make your own polymer clay substitute, add ½ cup (120 mL) of white glue, ½ cup (65 g) of cornstarch, 2 teaspoons (10 mL) of lemon juice, and 2 teaspoons (10 mL) of baby oil to a large bowl. Add a few drops of food coloring if you want your clay to be a different color. Mix everything together, then microwave the mixture in three 25-second intervals, stirring between each interval. Alternatively, heat the mixture in a pot on the stovetop over low heat, stirring continuously until it has the consistency of mashed potatoes. Once heated, let the mixture cool slightly so it’s not too hot to touch, then transfer it to a flat surface and knead it until smooth. Store your clay in an airtight bag or container in the fridge until it’s cold before using it. Mold the clay into different shapes and let it harden at room temperature. Read on for variations to create polymer clay that doesn’t crack or is extremely strong, as well as a traditional recipe from Latin America!