This article was co-authored by wikiHow Staff. Our trained team of editors and researchers validate articles for accuracy and comprehensiveness. wikiHow's Content Management Team carefully monitors the work from our editorial staff to ensure that each article is backed by trusted research and meets our high quality standards.
There are 8 references cited in this article, which can be found at the bottom of the page.
The wikiHow Culinary Team also followed the article's instructions and verified that they work.
This article has been viewed 58,529 times.
Learn more...
If you want to make a tasty, easy treat to help you cool down on these hot summer days, then try these recipes for homemade frozen lollies! It can be as simple as freezing fruit juice in an ice cube tray, or you can bust out the blender and get creative, mixing flavors and freezing up multi-layered pops. Let your creativity and taste buds run free!
Ingredients
- 1 cup orange juice
- 1 tbsp simple syrup
- 2 tbsp lemon juice (optional)
- 1 lb strawberries
- 1/4 cup heavy cream
- 1/3 cup simple syrup
- 1 tbsp lemon juice
- 1/2 cup strawberries
- 4 1/2 tbsp simple syrup
- 3 large peaches
- 5 large kiwi
Steps
Orange Ice Cube Lollies
-
1Combine orange juice and simple syrup in a bowl. Stir or whisk to make sure the syrup is evenly mixed with the orange juice. Consider using fresh-squeezed juice that you can find a many grocery stores, which will be less watered down and have more flavor.
- For a little extra kick, add 2 tbsp lemon juice to the mixture.[1]
- Feel free to experiment with any kind of fruit juice you like! Grape, pineapple, watermelon, limeaide--it's up to you!
- You may even want to try adding some veggie juice--carrot juice is naturally very sweet and can add a nice complexity to your lollies.
-
2Pour mixture into a clean, empty ice cube tray. Fill each cell almost to the top, but don't overflow or your lollies will stick together.Advertisement
-
3Cover the tray with aluminum foil or plastic wrap. Make sure the wrap is tight across the top of the tray.[2]
- Tape plastic wrap to the sides of the ice tray to keep it tight and in place.
-
4Stick toothpicks through the plastic wrap or aluminum foil and into each cube. This will be the handle for your ice lolly--make sure it is standing up straight and is far enough into the tray for the juice to freeze around it.[3]
-
5Place the tray in the freezer. To be certain your lollies are totally frozen, leave them in overnight.[4] If you just can't wait, check after 2-3 hours.
- You can gently wiggle one toothpick to feel if the juice has frozen completely.
-
6Remove the tray the freezer once juice has completely frozen and remove the cover. Your mini-ice lollies should be ready to eat.
-
7Bend and twist the ice cube tray to loosen your mini ice lollies, then remove with the toothpick handle. Be gentle while working the ice cube tray--you don't want to snap it!
- If you have trouble getting the cubes out, try dipping the bottom of the tray in warm water.


Fresh Strawberry and Cream Lollies
-
1Hull the strawberries. It's best to let an adult do this, since it requires you to use a knife. Use a small, sharp knife (a pairing knife works best), holding it against the thumb of your dominant hand so about 1/2 inch of the tip sticks out beyond your thumb. Hold the strawberry in your opposite hand.
- Insert the tip of the knife into the top of the strawberry--under the leaves, where the red turns white--at a 45 degree angle.
- Turn the strawberry and the knife in opposite directions.
- Cut until your knife reaches the starting point and you can easily remove the core from the strawberry.
-
2Puree the hulled strawberries in a blender.[5] The finished puree should be smooth and thick. Have an adult help you with this part so you don't cut yourself on the blades or make a mess!
- You can substitute frozen strawberries if you don't have any fresh strawberries. Frozen fruits are frozen when ripe, so they should still taste great.
- You can also leave chunks of strawberries to add texture to your lollies. Use the "pulse" setting on the blender so you don't puree all the fruit. You can also add slices of strawberry to the puree later.
-
3Place the strainer over a bowl and pour the puree through the strainer. You want to catch all the little strawberry seeds in the strainer, so make sure the strainer is fine enough to only let the juice pass through.[6]
- It's okay if you don't strain out your seeds. Your lollies won't be quite as smooth and the seeds may get stuck in your teeth, but they will still be delicious.
- If you decided to leave some fruit chunks in your puree, skip this step so you don't lose those big pieces of fruit.
-
4Add the simple syrup, heavy cream, and lemon juice to the bowl of strawberry juice and whisk the mixture until combined. The mix should be the same color and consistency throughout. If there are white streaks from the heavy cream, you may want to mix a little more thoroughly.
- If you don't like strawberry, feel free to experiment with other fruit flavors! Try watermelon, mango, blueberry--whatever you like best! Look for fruit that is ripe and in season for the best, sweetest flavors.[7]
- Try coconut milk instead of heavy cream for a refreshing tropical flavor.
- You can also improvise with your sweetener. Instead of simple syrup, try agave nectar, honey, or maple syrup.
-
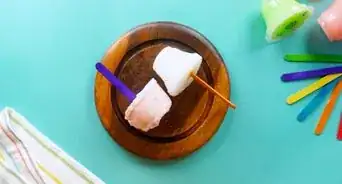
5Pour the mixture into the ice pop molds.[8] Fill almost to the top, but be careful not to overflow the molds or your lollies will stick together when frozen. A little extra space also gives the liquid room to expand.
- If you don't have molds, you can easily make your own. Just pour the mixture into a paper or plastic cup instead.
- Do not try to make your own mold using a glass. Liquid expands as it freezes, and it may break the glass. This will ruin your pop and make a dangerous mess in your freezer.
-
6Top the mold with the lid. Usually, molds come with a lid that also acts as the handle. If your mold didn't come with a lid, you lost the lid, or you're using cups instead of store-bought molds, cover the top tightly with aluminum foil or plastic wrap. Then insert a popsicle stick through the wrap.
- Don't move the popsicle stick around too much--the smaller the hole in the aluminum, the straighter your handle will stand.
- You can also use plastic knives as handles if you don't have popsicle sticks--just be careful not to lick the rough part when you're eating!
-
7Place molds in the freezer. Leaving them overnight will ensure the pops are completely frozen, but they may be ready in as little as four hours.[9]
-
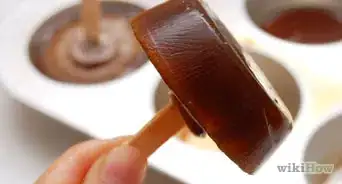
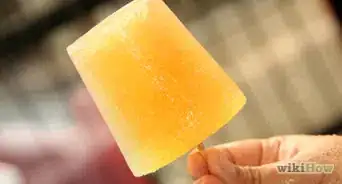
8Remove molds from the freezer once the juice is completely frozen through. If you try to wiggle the handle, it should be firm in the juice and not move at all. You can run warm water over the sides and bottom of the mold to help release ice lollies in one piece.[10]
- If you used a paper cup, you can try to just peel the paper off the lolly.


Traffic Light Lollies
-
1Ask an adult to help you prepare the fruit, since you'll need to peel and slice the fruit. All the fruit should be ripe (or even overripe)--ripened fruit is sweeter, so you won't need to add any extra sugar.[11]
-
2Hull the strawberries. Use a small, sharp knife to cut the core out of the strawberries.
- Insert the tip of the knife into the top of the strawberry, right where it turns white.
- Cut out the white center of the strawberry. In doing so, you will remove the leaves as well.
-
3Puree the hulled strawberries in a blender.[12] If you don't have fresh strawberries, it's ok to use frozen. The taste might not be as intense or fresh, but it will still be delicious!
- Clean the blender after use, since you will be using it again for the peaches and the kiwi.
-
4Place the strainer or sieve over a bowl and pour the puree through the strainer. This should catch all the strawberry seeds so they don't end up in your frozen lolly.[13]
-
5Add 1 1/2 tbsp simple syrup to the strawberry puree and mix.
- You can substitute another sweetener for simple syrup. Try honey, agave nectar, or maple syrup.
- Sample a little of the puree to make sure it's sweet enough. If not, add a little bit more sweetener, to taste.
-
6Pour the sweetened strawberry mixture into your ice pop molds, filling only 1/3 of the way to the top.
- If you don't have an ice pop mold, you can substitute a paper or disposable plastic cup.
- Don't try to substitute a glass for the pop mold--as the juice freezes, it expands, and it may break the glass. This will ruin your pop and make a dangerous, sharp mess in your freezer.
-
7Put the mold in the freezer until the strawberry mixture is frozen. This should take 1 1/2 to 2 hours.[14] Cover the mold with plastic wrap or aluminum foil. If the molds came with covers that double as a handle/popsicle stick, wait to use these. If the first layer of your ice lolly freezes around the stick, you won't be able to add the next two layers.
-
8Peel the skin off the peaches with a peeler or knife. If you don't have fresh peaches, you can use canned peaches that are already peeled, stoned, and sliced. Just drain the water from the can.
-
9Remove the pits from the peaches and slice into small pieces. Your blender won't have to work as hard to puree the fruit if it's cut into little slices. Using a paring knife, cut all the way through one side of the peach, until your knife hits the pit.[15]
- Run the knife all the way around the peach, keeping the blade against the pit, cutting the peach in half.[16]
- Hold the peach in your hands and twist each half in opposite directions until the come apart. The pit should still be stuck in one half of the peach.[17]
- Remove the pit with your fingers or the tip of the knife.[18]
-
10Puree the peaches in the blender and add 1 1/4 tbsp simple syrup.[19] Taste the puree to make sure you like the flavor. If it's not sweet enough, and a little simple syrup until it's to your liking.
- Clean the blender so it will be ready for the kiwi puree.
-
11Pour the sweetened peach puree into the ice lolly mold. Only fill the mold another 1/3 of the way to the top.[20] Cover the mold with tinfoil or plastic wrap.
- Make sure the strawberry puree is completely frozen before you add the peach puree, or they will mix together. This will probably taste good, but the effect of having 3 individual sections of flavors will be ruined.
-
12Put the mold in the freezer until the peach mixture is frozen. This should take another 1 1/2 to 2 hours.[21]
-
13Peel the kiwi with a knife or peeler and slice into smaller pieces. Make sure you remove all the fuzzy skin and discard the top and bottom tips.[22]
-
14Puree the sliced kiwi and 1 1/4 tbsp simple syrup in the blender.[23] Blend out all the chunks for a smooth and thick mixture. Again, you may want to taste the puree to make sure it's sweet enough.
-
15Pour the sweetened kiwi mixture into the ice lolly mold. Don't let the kiwi spill out of the top of the mold, or your lollies will all freeze together. Leave a little room at the top so you can insert the handle and give the puree a little room to expand as it freezes.
-
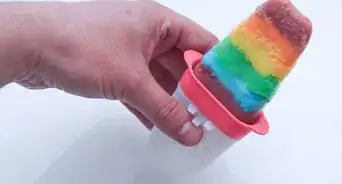
16Top the mold with the lid. Usually, molds come with a lid that also acts as the handle. You may have to push it into the already frozen part of the lollie.
- If your mold didn't come with a lid, you lost the lid, or you're using cups instead of store-bought molds, cover the top tightly with aluminum foil.
- Insert a popsicle stick through the aluminum foil. Make sure it is straight. It's okay if you have to push it into the frozen peach layer to make sure it's secure.
-
17Put the mold in the freezer for another 2 hours, or until the kiwi mixture is frozen.
- Test that the juice is completely frozen by wiggling the handle of one of the pops. It should be firm in the juice and not move at all. You can run warm water over the sides and bottom mold to help release ice lollies in one piece--just don't loosen them from the handle![24]
-
18Your finished ice lollies should be equal layers of pink, yellow, and green--just like a traffic light! After you've enjoyed these frozen treats, consider experimenting with other flavors. Try to stick with fruits that are all in season at the same time for the most harmonious flavors.[25]
- Spring and summer fruits include blackberries, blueberries, raspberries, strawberries, boysenberries, grapes, melons, nectarines, plums, peaches, and pluots.[26]
- Blackberries, apples, kiwis, dates, kumquats, peaches, pomegranates, and raspberries are all in season during late summer and fall.[27]
- Try grapefruit, kumquats, limes, mandarins, and pomelos in the winter.[28]
- Oranges are in season all year long.[29]


Community Q&A
-
QuestionHow do I make one with simple syrup?
 IlhaamCommunity AnswerStrawberry lollies are simple. You can use; 400g of ripe strawberry, 200ml of semi skimmed milk and a 400g can of condensed milk. Put the strawberries in a food processor and mix it with the other ingredients. Then pour the mixture in 12 ice lolly molds and attach the tops.freeze for about 4hrs.
 -
QuestionBut what if all these fruits are not available?
 Community AnswerUse whatever fruits you have available- most will work. Peaches, mangos, pineapples, kiwis, etc.
 -
QuestionCan I make it with yogurt?
 Community AnswerYou can! You can use the exact same process, and they'll be a healthy snack for hot weather!
Things You'll Need
Simple Syrup
- Small sauce pan
- Stove
Orange Ice Cube Lollies
- 1 ice cube tray
- Plastic wrap or aluminum foil
- Toothpicks
- Bowl
- Whisk
Strawberry and Cream Lollies
- Blender
- Fine strainer
- Bowl
- Whisk
- Ice pop molds
- Pairing knife
Traffic Light Lollies
- Blender
- Fine strainer
- Pairing knife
- Peeler
- Bowl
- Whisk
- Ice pop molds

References
- ↑ https://www.yummly.com/recipe/Orange-Popsicles-1166915
- ↑ http://www.howcast.com/videos/233722-how-to-make-your-own-popsicles/
- ↑ http://www.howcast.com/videos/233722-how-to-make-your-own-popsicles/
- ↑ http://www.howcast.com/videos/233722-how-to-make-your-own-popsicles
- ↑ http://www.saveur.com/article/Recipes/Strawberries-and-Cream-Ice-Pops-Paletas-de-Fresas-y-Crema
- ↑ http://www.saveur.com/article/Recipes/Strawberries-and-Cream-Ice-Pops-Paletas-de-Fresas-y-Crema
- ↑ http://www.epicurious.com/archive/howtocook/primers/popsicle-tips
- ↑ http://www.saveur.com/article/Recipes/Strawberries-and-Cream-Ice-Pops-Paletas-de-Fresas-y-Crema
- ↑ http://www.saveur.com/article/Recipes/Strawberries-and-Cream-Ice-Pops-Paletas-de-Fresas-y-Crema
- ↑ http://www.saveur.com/article/Recipes/Strawberries-and-Cream-Ice-Pops-Paletas-de-Fresas-y-Crema
- ↑ http://www.epicurious.com/archive/howtocook/primers/popsicle-tips
- ↑ http://www.annabelkarmel.com/recipes/traffic-light-ice-lollies
- ↑ http://www.annabelkarmel.com/recipes/traffic-light-ice-lollies
- ↑ http://www.annabelkarmel.com/recipes/traffic-light-ice-lollies
- ↑ http://www.finecooking.com/articles/how-to/pit-a-peach.aspx
- ↑ http://www.finecooking.com/articles/how-to/pit-a-peach.aspx
- ↑ http://www.finecooking.com/articles/how-to/pit-a-peach.aspx
- ↑ http://www.finecooking.com/articles/how-to/pit-a-peach.aspx
- ↑ http://www.finecooking.com/articles/how-to/pit-a-peach.aspx
- ↑ http://www.annabelkarmel.com/recipes/traffic-light-ice-lollies
- ↑ http://www.annabelkarmel.com/recipes/traffic-light-ice-lollies
- ↑ http://www.annabelkarmel.com/recipes/traffic-light-ice-lollies
- ↑ http://www.annabelkarmel.com/recipes/traffic-light-ice-lollies
- ↑ http://www.saveur.com/article/Recipes/Strawberries-and-Cream-Ice-Pops-Paletas-de-Fresas-y-Crema
- ↑ http://www.epicurious.com/archive/howtocook/primers/popsicle-tips
- ↑ http://www.cuesa.org/eat-seasonally/charts/fruit
- ↑ http://www.cuesa.org/eat-seasonally/charts/fruit
- ↑ http://www.cuesa.org/eat-seasonally/charts/fruit
- ↑ http://www.cuesa.org/eat-seasonally/charts/fruit
About This Article

To make orange ice cube lollies, start by mixing 1 cup of orange juice and 1 tablespoon of simple syrup in a bowl. You can also add 2 tablespoons of lemon juice to give your ice lollies more flavor. Then, pour the mixture into an empty ice cube tray, making sure the cells don't overflow so your ice lollies don't stick together. Next, cover the tray with plastic wrap or aluminum foil, and stick a toothpick into each cell. Finally, freeze your ice lollies for at least 3 hours or until they're frozen solid. To learn how to make strawberry and cream lollies, scroll down!