X
wikiHow is a “wiki,” similar to Wikipedia, which means that many of our articles are co-written by multiple authors. To create this article, 15 people, some anonymous, worked to edit and improve it over time.
This article has been viewed 43,710 times.
Learn more...
Making fake ice can be a creative, fun project to do if you're for up a little bit of experiment, or if you like staging and taking photographs. It isn't too difficult to make and only requires a few tools to make realistic, real-looking ice cubes. With a little bit of molding, baking, and cooling, fake ice makes a fun and cool experiment for a science class or when it comes to staging and photography, too.
Steps
Part 1
Part 1 of 2:
Creating the Mold
-
1Gather your tools and materials. You will need clear craft beads, a metal file, baking tray, aluminum foil, small ice cube sized boxes, a utility knife, and an oven.
-
2Fold a sheet of aluminum foil several times until it's thick.Advertisement
-
3Place the small box on the foil and neatly wrap it around securely. It's important to securely wrap the box to avoid leakage when melting the beads.
-
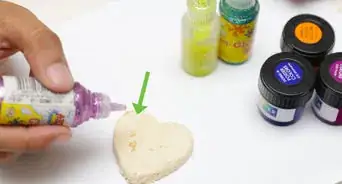
4Mold the box twice as tall as your finished ice cube. When the ice cubes bake you'll want them to have plenty of room to form, so it's important to keep the mold tall. Make an opening on one face of the box.so you'll have an area to pour the beads in. [1]
-
5Carefully unfold the foil off the box, but not folding all the way through. After removing the foil you will have a finished mold to use when it's time to make the fake ice.
-
6Repeat the same steps to make more molds for multiple ice cubes.


Advertisement
Part 2
Part 2 of 2:
Baking and Cooling
-
1Preheat the oven to 450° Fahrenheit (232° Celsius).
-
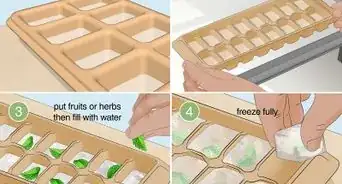
2Pour the clear beads in each opening in the foil molds.
-
3Place the molds on a baking tray standing straight.
-
4Allow the fake ice to bake for about 30 minutes, until the beads melt
-
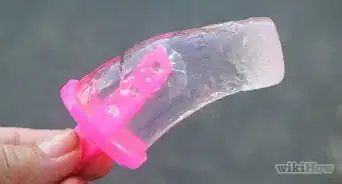
5Remove the fake ice from the oven and carefully peel off the foil. Take extreme caution, the molds and foil will be hot.
-
6Leave the fake ice on a plate to sit until they're cool enough to touch.
-
7Using the knife and metal file, shave off the extra lingering pieces. Carefully shave off an excess foil on the edges or corners to help form a smooth, shiny surface on the fake ice.
-
8Understand how it works. When you place the clear beads in the oven, it melts and turns into a clear color. When it's placed in the mold, the shape resemble an ice cube shape once baked and cooled. This creates the fake ice structure. [2]
-
9Finished.


Advertisement
Community Q&A
-
QuestionHow do I make crushed ice? Do I just smash it?
 DonaganTop AnswererYes. Cover the ice with cloth, and hit it with a hammer or similar tool.
Advertisement
Warnings
- When peeling off the foil from the fake ice, always take serious caution. The melted beads from the mold will be hot and can possibly cause burns if its not handled correctly.⧼thumbs_response⧽
Advertisement
Things You'll Need
- Clear craft beads
- Metal file
- Aluminum foil
- Small ice cube sized boxes,
- Utility knife
- Oven
- Baking tray

-Step-15.webp)

References
About This Article
Advertisement