This article was co-authored by wikiHow Staff. Our trained team of editors and researchers validate articles for accuracy and comprehensiveness. wikiHow's Content Management Team carefully monitors the work from our editorial staff to ensure that each article is backed by trusted research and meets our high quality standards.
The wikiHow Video Team also followed the article's instructions and verified that they work.
This article has been viewed 51,463 times.
Learn more...
Make 3D photos using a printout of a picture or an online photo, depending on your desired method. To create a 3D print, use scissors to cut out each layer of the photograph and tape them together using foam adhesive that gives them greater depth. Photoshop is great for turning regular photos into 3D pictures—just put on your 3D glasses to bring the photo to life!
Steps
Creating 3D Prints
-
1Choose a photo with a simple layered background. Select a photo that shows dimension easily, such as a person standing in front of a building or monument, or a dog running on a beach with the sunset in the background. It’s also a good idea to choose a photo with shapes that will be easy to cut out and aren’t too detailed.[1]
- In the examples mentioned, the photo of the person might have 2 layers, the person standing and the building. In the second example, the dog is the first layer, the beach is the second layer, and the sunset is the background.
- Shapes that are easy to cut out include people and buildings with clean lines or simple flowers. Difficult objects might be the Eiffel Tower, a leafy tree, or an intricate chandelier.
-
2Make copies of the picture in the same size and medium. Once you’ve chosen the picture to use, print out duplicates yourself or have copies made in the exact same size and color, as well as using the same paper. Decide how many layers your picture will have beforehand to make the right number of copies.[2]
- For example, if you chose a picture of a person posing in front of the Statue of Liberty, your layers might be the person posing, the statue, and the background, meaning 3 copies are needed.
- Make extra copies just in case you make a mistake.
- Create as many layers as desired, though 2-4 is ideal.
Advertisement -
3Use scissors or a craft knife to cut out the first layer. Place a copy of the photo on a cutting board. Cut out the foreground layer, or the part of the picture that’s closest to the viewer. Scissors work well for softer edges, while a sharp craft knife works better for more intricate details.[3]
- This is the layer that pops out the most.
-
4Cut out each layer of the rest of the pictures, leaving one untouched. Get a fresh copy of the picture and cut out the next layer that will pop out. Continue cutting out the rest of the layers, leaving the last photo whole, as this will be the background and doesn’t need to be cut.[4]
- Use the cutting board for each layer to avoid damaging any surfaces while using the craft knife.
-
5Place adhesive foam pieces on the back of the first layer. Cut the adhesive to fit the layer, if needed, and space pieces of the adhesive out so that no edges of the layer will come up once adhered. Leave the protective backing on the adhesive once it's attached to the layer for now.[5]
- Use 2-5 small pieces of foam adhesive on each layer.
- Use smaller foam squares for the smaller sections and larger ones for the larger sections of the photo.
- Look for a double sided adhesive foam tape at a craft store or big box store.
-
6Attach the first layer to the second layer using the adhesive. Remove the adhesive from one of the foam pieces on the back of the photo, choosing one that’s near an edge. Line up the first layer so that it’s directly on top of the second layer and the images overlap perfectly. Once the first foam piece is attached in the right place, remove the rest of the protective backings from the foam adhesive to stick the layer securely.[6]
- Remove just one of the protective foam backings at a time to ensure the images are straight first.
- For example, if the first layer is a cutout of a flower vase and the second layer is the photo with the flower vase and a kitchen table, line up the flower vases so that they’re directly on top of one another.
-
7Continue adhering the layers to one another using the foam pieces. Once the first layer is successfully attached to the second layer, continue attaching each layer in order using the double sided foam adhesive. Line up the images and edges of the photo to create a whole picture that pops out in 3D.[7]
- When you’re finished, the first cut-out layer should stick out the most, and the background should be an uncut copy of the photo with each additional layer on top of it.
-
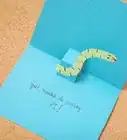
8Display your photo in a frame or scrapbook. To show off your photo in a frame, remove the glass from the frame and place the new 3D picture inside. 3D pictures with just 2 or 3 layers go inside a scrapbook or card easily as well.[8]
- If the finished picture doesn’t fit in the frame, trim the edges of the 3D photo using scissors or a craft knife and a ruler until it fits well.


Using Photoshop and 3D Glasses
-
1Take a photo of a stationary object looking through a viewfinder. Stationary objects are easier to work with since it's necessary to take a second picture that looks the exact same, though it's possible to take a picture of a person if they hold the same pose for both pictures. Use your left eye to look through the camera’s viewfinder before taking the picture.[9]
- A building, food item, or plant are all good examples of a stationary object to use.
- Use the center focus of the viewfinder to aim while taking the picture.
- If your camera doesn’t have a viewfinder, like if you’re using a cellphone, this is okay.
-
2Snap another picture of the object using your other eye in the viewfinder. Instead of using your left eye to look through the viewfinder, now use your right eye to take the photo of your object. It’s important to keep your head stable, only moving the camera from your left eye to your right.[10]
- If you’re taking the picture with a camera that doesn’t have a viewfinder, shift the camera over 3 in (7.6 cm), keeping the same focal point, distance, and angle.
- The picture you took first will be called the left photo and the second picture you took will be the right one.
-
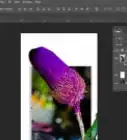
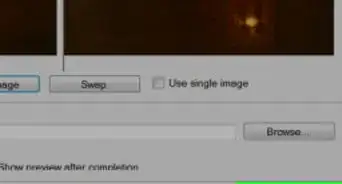
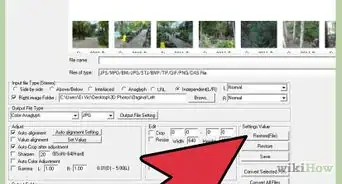
3Upload both pictures to your computer and open them in Photoshop. Plug in your camera to a laptop and download both of the photos. Open up Photoshop and pull up both photos. To do this, click “File” and then “Open” before selecting each of the pictures.[11]
- Use another photo editing software as long as it lets you adjust the red, blue, and green color channels, if desired.
-
4Copy the right picture over the left picture. Select the right picture and then select the layer. Drag the layer on top of the left picture and then release it. After you do this, one photo that has 2 layers will be left: the right picture is “Layer 1” while the left picture is “Background.”[12]
- To select the layer, click on the “Layers” tab under the right side bar.
-
5Alter the red channel so that the blending option is disabled. Do this by double clicking on “Layer 1” and looking under “Blending Options.” Click on “Advanced Blending” and then “Channels” before finding the “R” standing for “red.” Uncheck the “R” and then press “OK.”[13]
- Once you do this, the colors in your photo should change to look like the 3D images.
-
6Align the pictures so that their focal points match up. Click on the first layer and move it around until the focal point, or the object that you chose to photograph, is lined up. To move the layer around, use the move tool that’s in the upper left corner.[14]
- Use your 3D glasses to look at the photo and see if the focal points line up well.
-
7Crop the photo and save it on your computer. When you’re cropping the picture, look for spots that haven’t been altered and look like the original picture. Crop these spots out, as they aren’t part of the layered section. Crop the photo by selecting the crop tool in the left toolbar and dragging the handles around the section you want to keep before pressing “Enter.”[15]
- Save the photo as a jpeg for the easiest conversion.
-
8Put on your 3D glasses and view the photo. If you haven’t made your 3D glasses yet, find a pair of clear, plain glasses and color one lens red and the other lens blue. Put on the glasses and enjoy your new 3D photo![16]
- It doesn't matter which lens is blue and which is red.


Things You'll Need
Creating Prints
- Copies of a photo
- Scissors or a craft knife
- Cutting board
- Double sided foam adhesives
Using Photoshop
- Camera with viewfinder
- Computer
- Adobe Photoshop
- 3D glasses
References
- ↑ http://blog.consumercrafts.com/paper-crafts/how-to-make-photos-3d/
- ↑ http://blog.consumercrafts.com/paper-crafts/how-to-make-photos-3d/
- ↑ http://blog.consumercrafts.com/paper-crafts/how-to-make-photos-3d/
- ↑ http://blog.consumercrafts.com/paper-crafts/how-to-make-photos-3d/
- ↑ http://blog.consumercrafts.com/paper-crafts/how-to-make-photos-3d/
- ↑ http://blog.consumercrafts.com/paper-crafts/how-to-make-photos-3d/
- ↑ http://blog.consumercrafts.com/paper-crafts/how-to-make-photos-3d/
- ↑ http://blog.consumercrafts.com/paper-crafts/how-to-make-photos-3d/
- ↑ https://stereo.gsfc.nasa.gov/classroom/3d.shtml
- ↑ https://stereo.gsfc.nasa.gov/classroom/3d.shtml
- ↑ https://stereo.gsfc.nasa.gov/classroom/3d.shtml
- ↑ https://stereo.gsfc.nasa.gov/classroom/3d.shtml
- ↑ https://www.tweaking4all.com/home-theatre/create-3d-pictures/
- ↑ https://www.tweaking4all.com/home-theatre/create-3d-pictures/
- ↑ https://www.tweaking4all.com/home-theatre/create-3d-pictures/
- ↑ https://www.tweaking4all.com/home-theatre/create-3d-pictures/
About This Article

To make a 3D picture, start by finding a picture that has multiple layers. For example, a photo of your dog in front of a tree would have 2 layers. Your dog would be one layer, and the tree would be the other. Next, make a copy of your photo in the same size and medium so you have 1 copy for each layer. Then, cut out each layer in the photos, leaving one of the photos untouched. Finally, attach adhesive foam pieces to the back of each layer and stack them on the untouched photo so the layers are popping out in 3D. To learn how to make 3D pictures with photoshop, scroll down!