This article was co-authored by Ryaan Tuttle. Ryaan Tuttle is a Home Improvement Specialist and the CEO of Best Handyman, Inc. in Boston, Massachusetts. With over 17 years of experience, he specializes in building home service businesses, focusing on creating scalable and efficient brands. With the help of his global team, the companies have achieved over 10+ million in sales and received recognition through magazine features, and enjoy partnerships with wikiHow and Jobber field service software. Boston Magazine and LocalBest.com have named Best Handyman Boston the Best Handyman in Boston. Ryaan holds Construction Supervisor and Home Improvement Contractor Licenses.
This article has been viewed 92,210 times.
Framing a pocket door refers to the first stage of installing a concealed door. This makes a room more versatile, since it can be closed off from the rest of the house when necessary. [1] This is a great way to maximize your living space, and with a lot of patience and a little bit of know-how, it is a home-improvement goal that you can accomplish for yourself. Here are some steps to help you as you learn how to frame a pocket door.
Steps
-
1Determine whether or not the wall you've chosen for pocket door installation is a good candidate. The wall needs to be wide enough to accommodate twice the door's width, plus 1 inch (2.54cm). You'll also need to know whether or not the wall is load-bearing. You can determine this by the wall's placement in the house.
- Generally, load-bearing walls will be in a central location, and they will be perpendicular to the floor joists. If you have a basement, you can easily identify a load-bearing wall by checking the direction of the joists in the ceiling of the basement.[2] [3]
- If you're installing a pocket door in a load-bearing wall, you may need temporary ceiling support while you replace the existing header. This might mean consulting a professional contractor.
-
2Verify that the wall doesn't have any electrical wiring or pipes running through it. Look for switches or electric outlets on the wall. Use a stud finder with a wire-finding feature, which should be available and affordable at most hardware stores, to check for electrical wiring. If you have attic and basement access, wiring can usually be rerouted. However, if you find pipes in the wall, this usually means that you can't put a pocket door there.Advertisement
-
3Replace the existing header. Use a reciprocating saw with a metal-cutting blade to cut through the nails in order to remove the door jamb.
-
4Remove pieces of the wallboard using a wood-cutting blade. Be careful to keep the cut shallow. Take out the section of drywall which is above the door in order to frame the new header.
- Use a section of 2 by 4 (5.08 by 10.16cm) as the new header. This will need to be 1 inch (2.54 cm) more than twice the length of the pre-existing header, since it will need to span the distance of the entire rough opening.
- When you're replacing a header in a load-bearing wall, it is recommended that you use 2 by 12's (5.08 by 30.48 cm) for the new header.
- Be sure that your saw is safety-rated for wood containing nails. Tilt the door out of the opening.
-
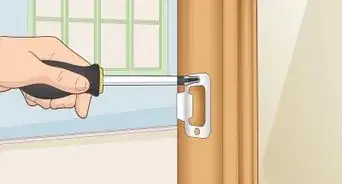
5Remove the existing door by pulling off the molding. This will create a gap, which you can use to access the shims. Saw through the cluster of nails surrounding the shims.
-
6Tip the saw blade down to cut shallowly into the drywall and remove it from between the studs. Remove the drywall from above the header leaving a margin of about 2 to 3 inches (5.08 to 7.62cm) of drywall under the ceiling.
-
7Remove the header using a reciprocating saw. Cut away the studs making enough room for the pocket door's framing. Cut the nails joining the studs to the soleplate (the piece of framing which runs along the bottom of the wall).[4]
-
8Determine the height of the header by adding 3 1/4 inches (8.26 cm) to the length of the new door, and then add the height of the soleplate, which will only be necessary if the floor is carpeted.
- Generally, a 1 by 4 (2.54 by 10.16cm) plate will enable the door to clear the carpeting without cutting it. If there is no carpet, the brackets of most door kits can be installed directly into the floor.
-
9Cut the stud tops to this determined length to support the new header. Measure the rough opening and put the new stud in at the same distance as the stud which is in the opposite side.
-
10Install the new header using nails or screws and then cut and install the soleplate to the floor.
-
11Finish the installation of your new pocket door according to the manufacturer's instructions. Then put the trim and the hardware on it.


References
About This Article