This article was co-authored by Robert Vallelunga. Robert Vallelunga is a Locksmith and the Owner of ACME Locksmith in the Phoenix Metro Area. Robert has over 15 years of experience in the industry and specializes in working with automotive ignitions, locks, keys, and master key systems. Robert and the team at ACME are the #1 Rated Phoenix Locksmith Service and the Winner of the Better Business Bureau Ethics Award. Robert has his Residential & Commercial Contractor’s License and a Bachelor of Science in Electrical Engineering from Arizona State University.
This article has been viewed 90,700 times.
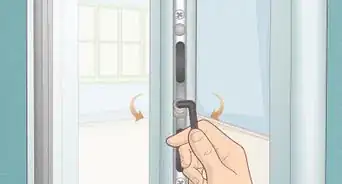
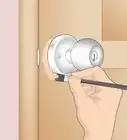
Replacing a door handle or door knob just requires a new door handle set and a flat-head screwdriver. Whether you want to fix a worn-out door knob or upgrade the appearance of a door with a new handle, replacing the existing handle is something that is usually hassle-free. Pick up a new door handle set that you like from a hardware store or home improvement center and get your screwdriver ready to go—soon enough, your door will have a whole new look and feel!
Steps
Removing the Existing Handle
-
1Open the door and stick a door stop under the bottom edge of the door. Open up the door about halfway, so you can easily access both sides of the door handle. Push a door stop under the bottom edge of the door to keep it from moving and closing while you replace the handle.[1]
- If you don’t have a door stop, you could use a wedge-shaped piece of wood or any other wedge-like object you can find around your home that will fit under the door.
-
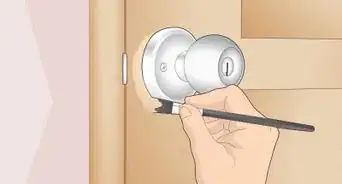
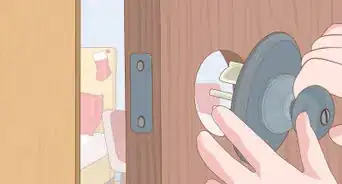
2Push the handle’s pressure release in with a screwdriver and pull it off. Look for a small slot in the side of the door knob or door handle where it connects to the cover plate or look on the side of the cover plate where it sits flush against the door. Insert the tip of a flat-head screwdriver into the slot and apply pressure with the tip of the screwdriver, then pull the handle or door knob off.[2]
- The cover plates are the round or rectangular plates that sit against the door between the handle or door knob and the door itself. These parts are there to hide the inner workings of the door handle and give it an attractive appearance.
- Try unscrewing the knobs or handles if you don’t see this type of pressure slot. Different handles come off in different ways.
- Some types of handles might not come off separately. If yours don’t seem like you can pull or screw them off, skip this step. For instance, if your handle has a rectangular plate, the handle might be attached to the plate and will just come off when you remove the whole plate.
Advertisement -
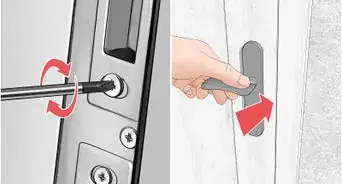
3Unscrew and pull off the door handle’s cover plates. Remove any screws that are holding the cover plates in place on either side of the door using a flat-head screwdriver. Insert the edge of your screwdriver under the plates and pry them up gently until they pop off, then remove them and set them aside.[3]
- Not all cover plates have screws holding them in place. Some might just snap into place, so you can just pry them right off using your screwdriver. Look for a slot on the side or bottom of the cover plate that you can slide your screwdriver into to pry it off.
- Some round types of cover plates might screw on, so try turning the cover plate itself counterclockwise if you can’t remove it by unscrewing it or prying it off.
-
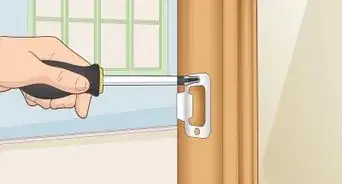
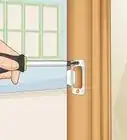
4Take out the screws holding the latch and inner plates in place. Unscrew and remove the screws holding the latch in place on the inside edge of the door. Take out the screws that hold the inner plates in place on either side of the door.[4]
- The inner plates are what sit directly under the cover plates you just removed. These hold the door handle’s latching mechanism in place inside the hole in the door.
- The latch is the angled metal piece that moves in and out of the hole on the inside edge of the door. When you close the door, this latch hooks into a hole in the door frame to keep the door closed. Turning the door handle moves this latch in, so you can open the door.
-
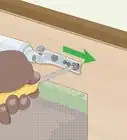
5Pull out the latch plate and door latch mechanism. Carefully pull the latch plate and mechanism out from the hole on the inside edge of the door and set it aside. Remove the plates from either side of the door and set them aside as well.[5]
- You should now just have holes in your door, into which you can install a new door handle.
Attaching the New Handle
-
1Choose a new door handle that fits on your door. Use a tape measure to measure from the inside edge of the door to the center of the hole in the door to get the backset measurement, then choose a handle that fits this backset. Pick a new handle or knob with cover plates that are the same shape and size as the old ones to cover up any marks in the surface of your door that the old plates made, such as screw holes and scratches.[6]
- Most door handles have a standard backset of 60 mm or 70 mm, so you shouldn’t have any trouble finding a new door handle that fits in the existing holes in your door.
- For example, if your old door handle had rectangular cover plates, it’s probably best to stick to a new handle with similar rectangular cover plates, rather than switching to one with round plates.
-
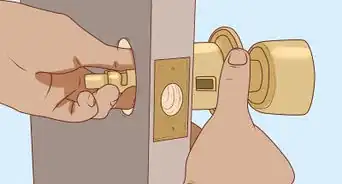
2Insert your new handle’s latch into the hole on the door’s inside edge. Position the latch in the hole on the inside edge of the door so that the smooth angled part faces in the same direction as the door closes in. Slide the latch mechanism into the hole until the latch plate rests flush against the inside edge of the door in the old latch recess.[7]
- Door handle latches come in a standard size, so the new latch should fit into the old recess without any problems. If it doesn’t seem to fit for some reason, you can use a chisel to make adjustments to the depth and shape of the recess in the door.
-
3Screw the new handle’s inner plates to the door. Line up the cylinders on the insides of the inner plates with the corresponding holes in the latch mechanism and slide them into place. Fasten the plates flush against the door using the provided screws and your screwdriver.[8]
- If the inner plates are different from each other, make sure to look at the instructions on your new handle to see which one goes on the inside and which one goes on the outside of the door.
-
4Put the cover plates in place on top of the inner plates. Slide the new cover plates on and press them against the inner plates until they snap into place. Attach any provided screws that hold the plates in place using your screwdriver.[9]
- These plates should be the same for both sides, since they are just the cosmetic plates that cover up the inner plates.
-
5Press the new knobs or handles into place. Slide the outer knob or handle onto the handle mechanism’s cylinder on the outside of the door and press it until it snaps into place. Do the same for the inner knob or handle.[10]
- Remember that some knobs and handles screw on. If you see threads on the door handle mechanism cylinders, screw the knobs or handles on instead of pressing them into place.
- If your new door handles are already attached to the cover plates, you don’t have to put them on separately. They will already be in place after you attach the new cover plates to the door.
-
6Replace any other locks and deadbolts on the door if you want them to match. Choose new locks and deadbolts that match your door handle to update the appearance of all the hardware on the door. Unscrew and remove the old locks and deadbolts, then slide the new ones into place on the door and attach them with the provided screws to finish upgrading the door’s hardware.[11]
- This is totally optional and would only matter if the new handle looks way different from the other hardware on the door.
- For example, if you have a silver deadbolt lock on your front door and you just replaced the old handle with a new silver handle, the difference might not be that noticeable. However, if your new handle is gold, you might want to update the locks.
Warnings
- Modern door handles are all pretty much a standard size. However, if you’re replacing an old handle, the housing holes in your door might be different sizes. If this is the case, it might be a good idea to remove your old handle first and measure the housing holes before you buy a new door handle.⧼thumbs_response⧽
Things You’ll Need
- Door handle set
- Flat-head screwdriver
- Tape measure
References
- ↑ https://www.youtube.com/watch?v=33OBoxvgX6A&feature=youtu.be&t=36
- ↑ https://www.bhg.com.au/replace-door-handle
- ↑ https://www.youtube.com/watch?v=33OBoxvgX6A&feature=youtu.be&t=44
- ↑ https://www.bhg.com.au/replace-door-handle
- ↑ https://www.idealhome.co.uk/diy-and-decorating/how-to-fit-a-door-handle-204524
- ↑ https://www.bhg.com.au/replace-door-handle
- ↑ https://www.bhg.com.au/replace-door-handle
- ↑ https://www.bhg.com.au/replace-door-handle
- ↑ https://www.bhg.com.au/replace-door-handle


