This article was co-authored by wikiHow staff writer, Travis Boylls. Travis Boylls is a Technology Writer and Editor for wikiHow. Travis has experience writing technology-related articles, providing software customer service, and in graphic design. He specializes in Windows, macOS, Android, iOS, and Linux platforms. He studied graphic design at Pikes Peak Community College.
This article has been viewed 117,849 times.
Learn more...
This wikiHow teaches you how to enable the Attribute Editor tab in Active Directory. In order to display the Attribute Editor tab, you must enable Advanced Features in the Active Directory Users and Computers console.
Steps
-
1
-
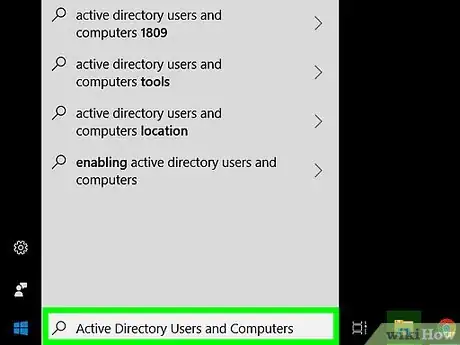
2Type Active Directory Users and Computers. This displays Active Directory Users and Computers in the Start menu.Advertisement
-
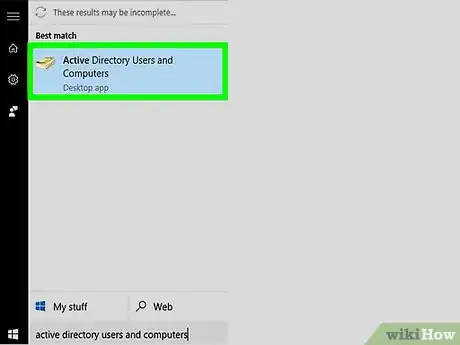
3Click Active Directory Users and Computers. It's the program that has an icon that resembles a yellow pages phone book. This opens Active Directory Users and Computers.
- If you don't have Active Directory Users and Computers installed on your computer, contact your system administrator.
-
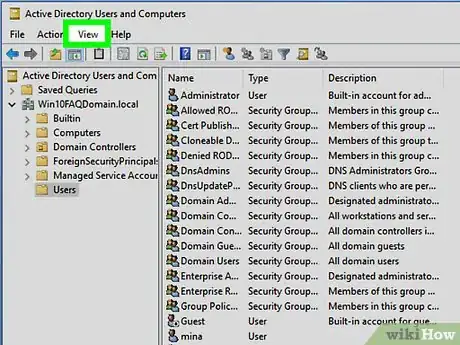
4Click View. It's in the menu bar at the top of Active Directory. Click "View" to display the drop-down menu.
-
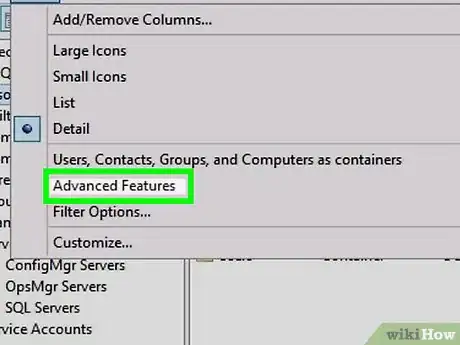
5Check Advanced Features. If you don't see a checkmark to the left of "Advanced Features" click it to turn on Advanced Features.
-
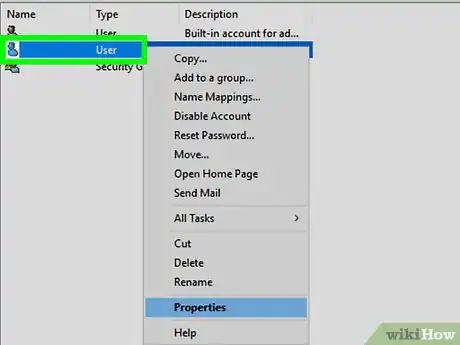
6Right-click a user-object you want to edit. User-objects are listed in the main window of Active Directory. Right-clicking a user-object displays a pop-up menu next to the object.
-
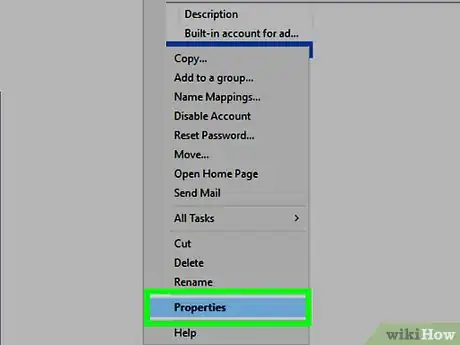
7Click Properties. This opens the properties window of the user-object.
-
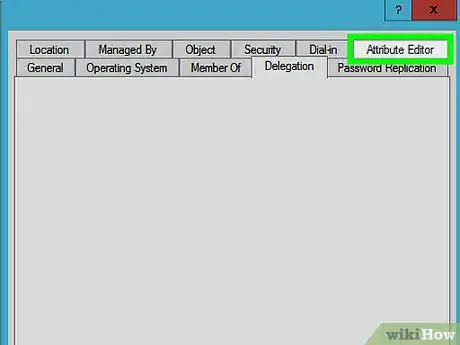
8Click Attribute Editor. With Advanced Features checked, the Attribute Editor tab is displayed at the top of an user-object properties window.[1]
About This Article
1. Open Active Directory Users and Computers.
2. Click View.
3. Check Advanced Features.
4. Right-click a user-object.
5. Click Properties.
6. Click Attribute Editor.


