This article was co-authored by wikiHow staff writer, Nicole Levine, MFA. Nicole Levine is a Technology Writer and Editor for wikiHow. She has more than 20 years of experience creating technical documentation and leading support teams at major web hosting and software companies. Nicole also holds an MFA in Creative Writing from Portland State University and teaches composition, fiction-writing, and zine-making at various institutions.
This article has been viewed 448,667 times.
Learn more...
With each new version of Minecraft comes a slew of features and changes designed to enhance gameplay. But what if your favorite server requires an earlier Minecraft version to connect? While downgrading used to require a bunch of extra work, things are a lot easier in the latest version of the Minecraft Launcher. This wikiHow teaches you how to switch to an older version of Minecraft by creating a new profile in the Minecraft Launcher.
Steps
-
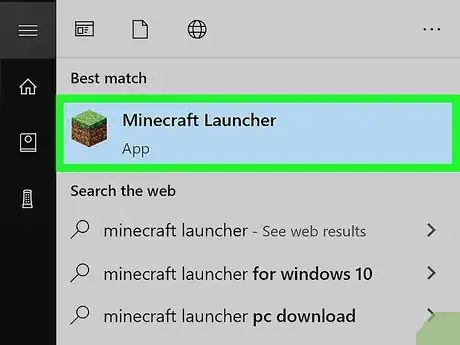
1Open the Minecraft Launcher. You can use the Minecraft Launcher to load earlier versions of Minecraft. This method will work as long as you're using Minecraft 1.14.3 or later.[1]
- If you're already playing a game in the Launcher, you'll need to quit it and restart the Launcher before you can switch versions.[2]
- It's not possible to switch back to an older version of Minecraft using the Android or iPhone mobile app.
-
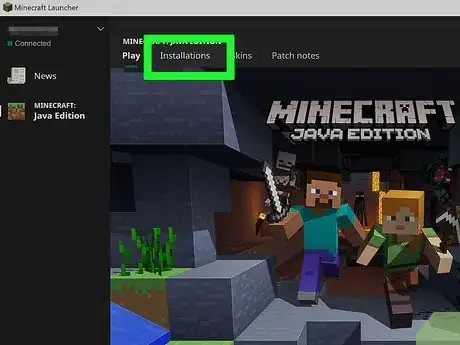
2Click Installations. It's the second tab at the top of the Launcher.Advertisement
-
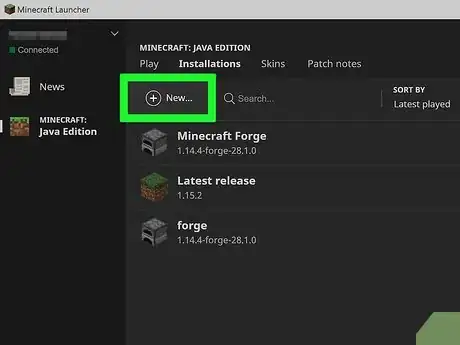
3Click + New. It's near the top-center part of the Launcher. This opens the "Create new installation" window. You will need to enable Historical Versions if you want to play an Alpha or Beta version of the game.
-
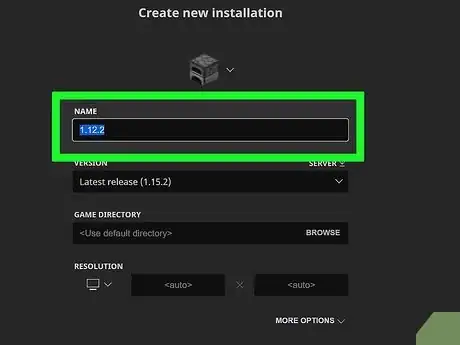
4Type a name for your installation into the "Name" field. For example, you could type the name of the server you'll be connecting to here.
-
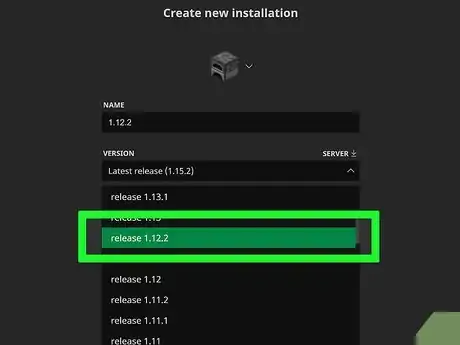
5Select a version from the "Version" menu. It's to the right of the "Name" field. For example, if you're connecting to a server that requires you to downgrade to version 1.13.2, you can select 1.13.2 from the menu.[3]
- If you'd like to customize the resolution of your new installation, enter the dimensions into the "Resolution" blanks.
-
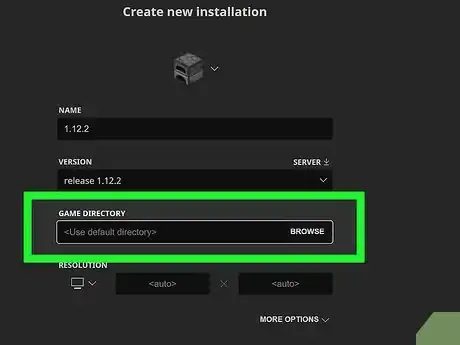
6Select a directory from the "Game Directory" menu. If you leave the default option (Use default directory) selected, Minecraft will store the old version's data in the default directory. However, if you want to play a version earlier than 1.6, you'll need to select a different folder. Click Browse to choose a directory.
-
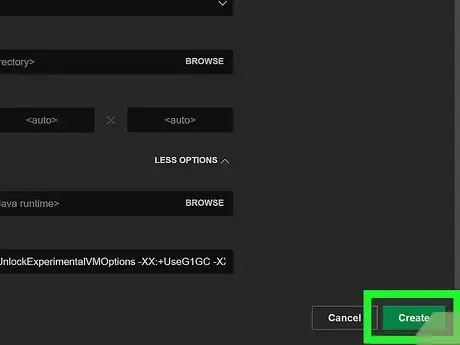
7Click the Create button. It's at the bottom-right corner of the window. This adds the older version to your list of installations.
- To play the older version of Minecraft, click Play at the top of the Launcher to return to the main screen, select the desired version from the drop-down menu at the bottom of the screen, and then click the large green Play button.
Community Q&A
-
QuestionCan I just re-login to Minecraft to fix my 1.9.2 to 1.9?
 Community AnswerYou should able to uninstall Minecraft and then redownload it and choose what iOS you want.
 -
QuestionCan I change my version of Minecraft to the very first version?
 Community AnswerWhen you say "very first version", I think you mean first playable version. Yes, you can change it to the fist playable versions by clicking on "enable Alpha" or "enable Beta". These are the first versions of Minecraft.
 -
QuestionHow can I go back to my old Minecraft launcher?
 Community AnswerI know why you want to get it back, but you can't. It got replaced, and even downloads from forums won't help. This is due to a complete removal of the old launcher.
References
About This Article
1. Open Minecraft Launcher.
2. Click Installations.
3. Click New.
4. Enter a name for your new installation.
5. Select an older version.
6. Change the game directory.
7. Click Create.
