This article was co-authored by wikiHow staff writer, Travis Boylls. Travis Boylls is a Technology Writer and Editor for wikiHow. Travis has experience writing technology-related articles, providing software customer service, and in graphic design. He specializes in Windows, macOS, Android, iOS, and Linux platforms. He studied graphic design at Pikes Peak Community College.
The wikiHow Tech Team also followed the article's instructions and verified that they work.
This article has been viewed 801,199 times.
Learn more...
This wikiHow teaches you how to crop an image in Adobe Illustrator. In Adobe Illustrator 2017 or newer, you can crop images using the new cropping tool. You can also crop both raster and vector graphics in Illustrator using a clipping mask.
Steps
Using the Cropping Tool
-
1Open or create a file in Adobe Illustrator. To do so click on the yellow and brown app that contains the letters "Ai.
-
2Click New or Open. To create a new Illustrator file, click New from the title screen. To open an existing Illustrator file, click Open on the title screen and then navigate to the Illustrator (.ai) file and double-click it.
- You can also find the New and Open options under the "File" menu in the upper-right corner of an open Illustrator file.
Advertisement -
3Place an image in Illustrator. Use the following steps to place an image in Illustrator.
- Click File in the menu bar at the top.
- Click Place in the drop-down menu below "File".
- Select an image and click Place.
- Click and drag where you want the image to go.
-
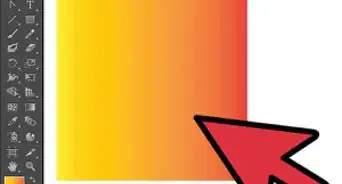
4Click on the Selection Tool. It's the solid-black pointer near the top of the toolbar to the left.
-
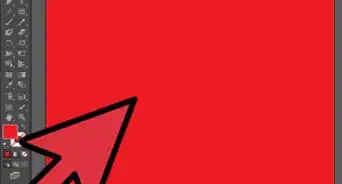
5Click on the image you want to crop. This selects the image. The cropping tool will not appear unless an image is selected.
-
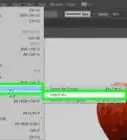
6Click on Crop Image. It's in the Control Panel at the top of the screen below the menu bar.
- You can also find the "Crop Image" button in the Properties window in the menu bar to the right. If you don't see the Properties window, click Window in the menu bar at the top, then click Properties.[1]
- If a warning about linked images opens, click on OK.
- The "Crop Image" tool is only available in Illustrator 2017 or newer.
-
7Click on and drag the crop marks in the corner of the image. The crop marks are in the corner and sides of the image. Dragging the crop marks inwards displays a rectangle with dotted lines inside the image. The light part of the image outside the rectangle is the area that will be removed with the image is cropped. Center the rectangle around the area of the image you want to keep.[2]
-
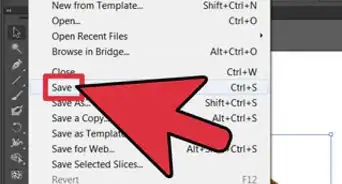
8Click on OK. It's in the Control Panel at the top of the screen or in the Properties. This crops your image.

Using a Clipping Mask
-
1Open or create a file in Adobe Illustrator. To do so click on the yellow and brown app that contains the letters "Ai In Vector art, a clipping mask uses the object or shape on top to crop all the images and objects below the object.
-
2Click New or Open. To create a new Illustrator file, click New from the title screen. To open an existing Illustrator file, click Open on the title screen and then navigate to the Illustrator (.ai) file and double-click it.
- You can also find the New and Open options under the "File" menu in the upper-right corner of an open Illustrator file.
-
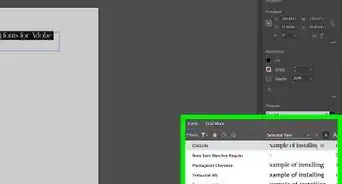
3Create graphics or place an image. You can apply a clipping mask to a raster image, or vector graphics created in Illustrator. Use the art tools to create graphics, or use the following steps to place an image:
- Click File in the menu bar at the top.
- Click Place in the drop-down menu below "File".
- Select an image and click Place.
- Click and drag where you want the image to go.
-
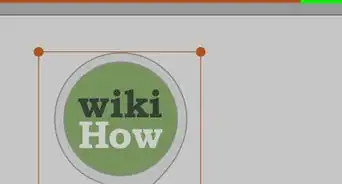
4Draw your clipping mask over your image. You can make the clipping mask any shape you want. You can use the rectangle or ellipse tool to create a rectangle or oval-shaped clipping mask, or you can use the Pen tool to create a custom shape for your clipping mask. Place the shape over the area of the image or graphics you want to keep.
- To make things easier to see, turn the fill off on the clipping mask shape, and make the stroke a clearly visible color.
- You can apply a clipping mask to multiple objects, but the clipping mask shape must be on top. To bring the clipping mask shape to the top click it with the selection tool, then click Object in the menu bar. Then click Arrange, followed by Bring to Front.
-
5Click the Selection tool. The selection tool is the icon that resembles a black arrow. It's at the top of the toolbar on the left.
-
6Select everything you want to crop. To select everything, click and drag over all objects you want to crop. This selects all objects, including the clipping mask shape.
-
7Click Object. It's in the menu bar at the top of Illustrator. This displays a drop-down menu.
-
8Click Clipping Mask. It's near the bottom of the drop-down menu below "Object". This displays a sub-menu to the left.
-
9Click Make. This creates a clipping mask. A clipping mask uses the top object to crop all objects below it.[3]


References
- ↑ https://www.youtube.com/watch?v=27R84L0cdNg
- ↑ https://helpx.adobe.com/illustrator/using/crop.html#Adjust_the_crop_widget
- ↑ https://helpx.adobe.com/illustrator/using/clipping-masks.html
- Set up Columns in Illustrator
- Draw Fabric in Adobe Illustrator Cs3
- Draw a Hamburger In Adobe Illustrator
About This Article

1. Open or create a file in Adobe Illustrator.
2. Click on the Selection Tool.
3. Click on the image you want to crop.
4. Click on Crop Image.
5. Click on and drag the crop marks in the corners and sides of the image.
6. Click on Apply.