This article was co-authored by wikiHow staff writer, Travis Boylls. Travis Boylls is a Technology Writer and Editor for wikiHow. Travis has experience writing technology-related articles, providing software customer service, and in graphic design. He specializes in Windows, macOS, Android, iOS, and Linux platforms. He studied graphic design at Pikes Peak Community College.
This article has been viewed 271,460 times.
Learn more...
Adobe Illustrator is a vector graphics editor. This means that it uses lines and data points to create images instead of pixels. If you place a pixel-based (raster) image in Illustrator, you can use a clipping mask to remove the background from the image. You can then create a new background layer or edit the color of the artboard. This wikiHow teaches you how to change a background in Adobe Illustrator.
Steps
Creating a Clipping Mask
-
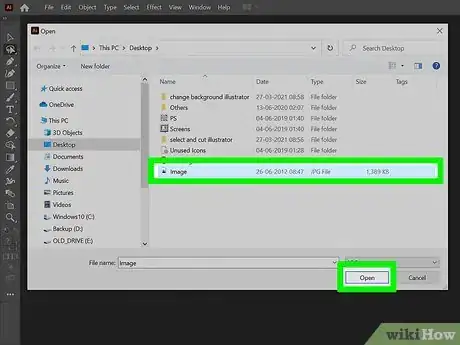
1Place an image in Illustrator. This can be any image with a background you want to remove. This includes raster images (i.g. JPEG, PNG, PDF) or vector images (i.g. SVG, EPS).
- If the image is in vector format, you only need to click the background objects to select them and press "Delete" to remove them.
- If you place a raster image that has only a few colors and is not too detailed, you can use Live Trace to convert the image to vector format. Then you can just double-click the background objects and press "Delete" to remove them.
-
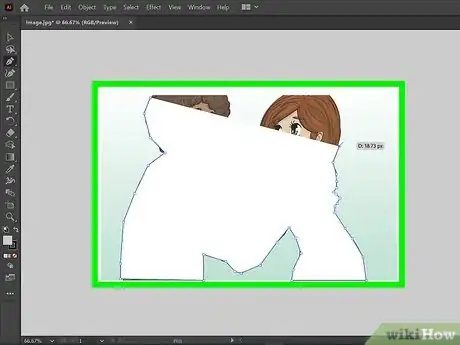
2Use the Pen tool to trace the objects you want to keep. This will create a new vector shape over the object in the image you want to keep. Use the following steps to use the Pen tool.
- Click the icon that resembles the head of a fountain pen in the toolbar.
- Click along the edge of the object you want to keep to create a new vector point.
- Click another spot along the edge to create a new vector point and a straight line between the two vector points.
- Click and hold another spot and drag to create a curved line.
- Click another spot to continue the curved line.
- Click the previous vector point to change the direction of the curve or create a new straight line.
- Alternatively, you can use the marquee and ellipse tools to create rectangular and circular shapes. Then use the Tools in the Pathfinder tools to combine shapes, or subtract from the shape.
Advertisement -
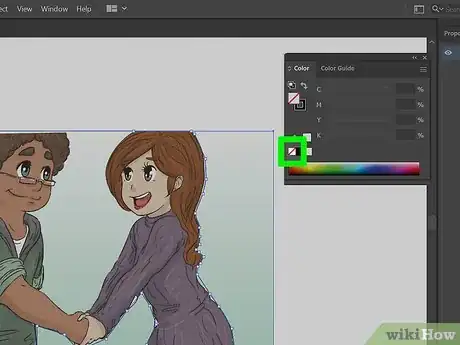
3Remove the color of the shape. When tracing an outline around a shape, the fill color may cover the object you are tracing. Use the following steps to remove the color of the shape and just use a colored outline around the shape.
- Click the icon that resembles a paint pallete or click Window followed by Color to open the Color menu.
- Click the solid square icon to select the fill color.
- Click the icon that resembles a white box with a red line through it to turn off the color.
- Click the icon that resembles a hollow square to select the outline.
- Use the color picker to select a color for the outline.
-
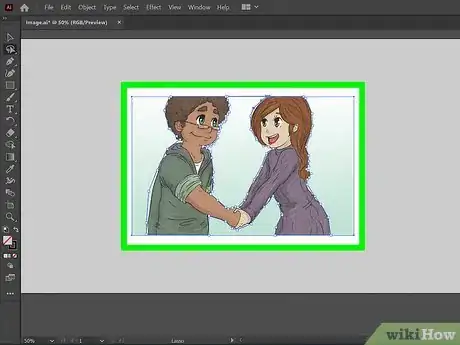
4Select the outline and the image background. Once you have a shape drawn around the object you want to keep, hold "Shift" and select both the background image and the outline shape.
-
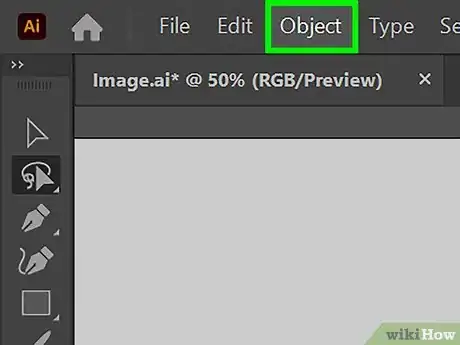
5Click Object. It's in the menu bar at the top. This displays the Object menu.
-
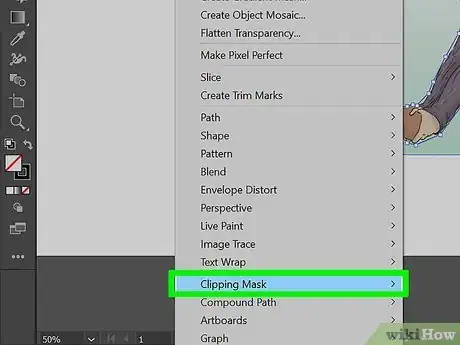
6Hover over Clipping Mask. This displays a submenu for creating and releasing a clipping mask.
-
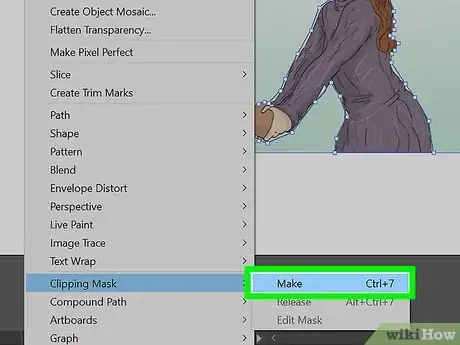
7Click Make. This creates a new clipping mask use the shape you drew. This will hide everything except what is within the clipping mask shape that you drew. This removes the background layer.
Creating a Background Layer
-
1Click the Layers icon. It has an icon that resembles a white square on top of a black square. Normally it's in the panel to the right. Click this icon to display the Layers menu.
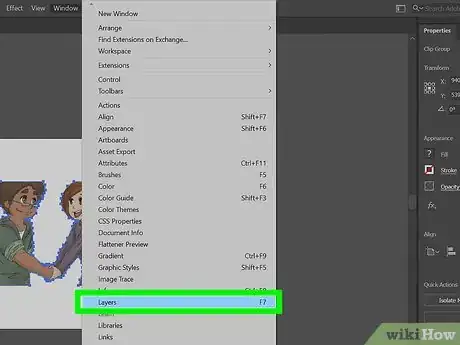
- Alternatively, you can click Window in the menu bar and then click Layers to open the Layers menu.
-
2Click the icon that resembles a white page. It's at the bottom of the Layers menu. This will create a new numbered layer (e.g. "Layer 2").
-
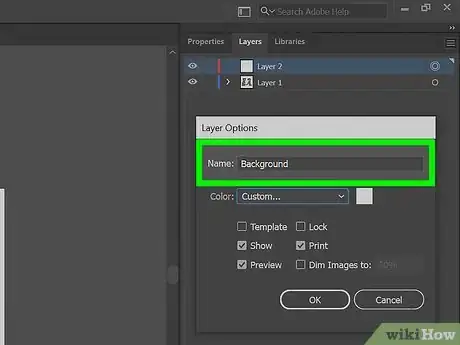
3Rename the new layer "Background." Use the following steps to rename the layer:
- Double-click the new layer you created in the Menu layer.
- Type "Background" next to "Name".
- Click Ok.
-
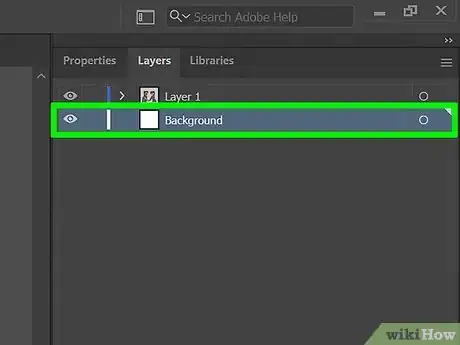
4Drag the layer to the bottom. You can move layers in the Layers menu by clicking and dragging them. Drag the Background layer to the bottom of the list. This ensures that all objects and artwork in the background layer appear behind all other layers in your Illustrator file.
-
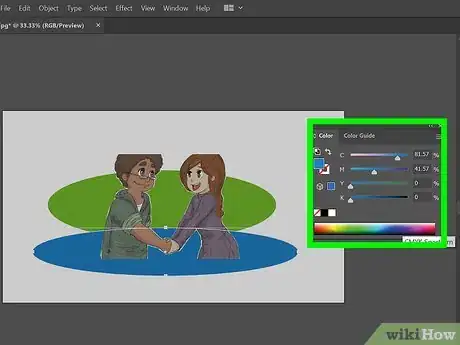
5Create your background artwork. Use the art tools to create your background artwork. If you just want to use a single color for your artwork, use the marquee tool to create a rectangle the size of your artboard. Then click the "Color" or "Swatches" menu to pick a color using the color-picker or one of the swatches.
- If there are objects in any of the other layers obstructing your view of the background layer, click the eyeball icon next to all other layers in the Layers menu to hide those layers.
- You can also place a raster image, such as JPEG or PNG into the background layer. Though Illustrator is not really designed to edit raster images. If you are using a lot of raster images, you may have an easier time using Photoshop or GIMP.
-
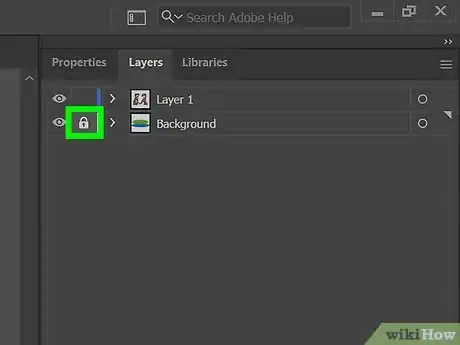
6Lock the background layer in place. Once you are finished creating your background, open the Layers menu. Click the empty square next to the eyeball icon next to the Background layer. You should see a lock icon appear next to the background layer. This locks the layer in place and prevents you from accidentally editing the background layer while you work on your other artwork.
Altering the Color of the Artboard
-
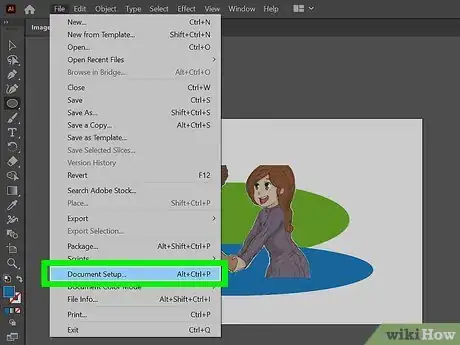
1Open “Document Setup.” While it is possible to alter the color of the artboard itself, this change is only visible in the digital version of the project. The altered artboard color will not appear in any printed versions of your work. Select File and choose Document Setup from the drop down menu.[1]
- This change only exists within Adobe Illustrator. When you print or export your project, the artboard will revert to its original white color. To change the background color permanently, you need to create a separate background layer.
-
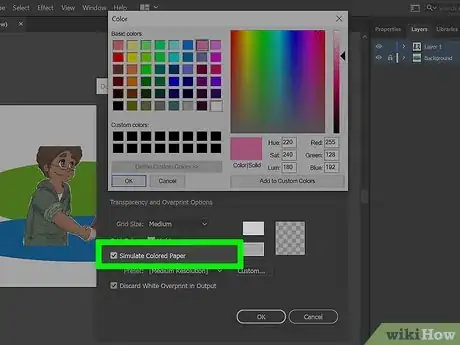
2Click the checkbox next to "Simulate Colored Paper". It's in the section labeled "Transparency."
- The “Simulate Colored Paper” feature mimics actual paper. The darker the paper, the darker your artwork will appear. If you set the background color to black, your artwork would disappear because it would not be visible on real black paper.[2]
-
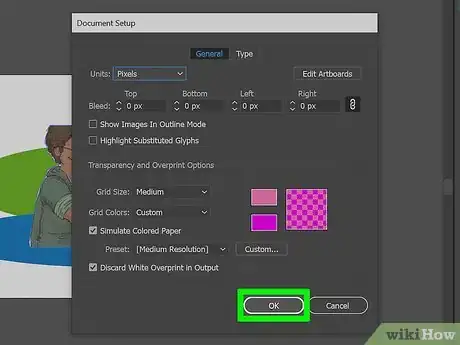
3Change the background color. Use the following steps to change the background color:[3]
- Click on the white rectangle to open up a “Color Palette” dialogue box.
- Click a color from one of the swatches or color picker.
- Click Ok.
References
- ↑ https://www.youtube.com/watch?v=6gFxJ78I6aY
- ↑ http://design.tutsplus.com/tutorials/seven-helpful-techniques-that-every-adobe-illustrator-artist-should-know--vector-36, https://www.youtube.com/watch?v=6gFxJ78I6aY
- ↑ http://design.tutsplus.com/tutorials/seven-helpful-techniques-that-every-adobe-illustrator-artist-should-know--vector-36, https://www.youtube.com/watch?v=6gFxJ78I6aY
About This Article
1. Place an image in Illustrator.
2. Draw a shape around the object in the photo you want to keep.
3. Select both the background image and the outline.
4. Click the Object menu.
5. Click Clipping Mask followed by Make.
6. Open the Layers menu in the panel to the right.
7. Click the icon that resembles a sheet of paper to create a new layer.
8. Add your background artwork or color to the new layer.
9. Drag the new layer to the bottom of the layers.
