This article was co-authored by wikiHow staff writer, Travis Boylls. Travis Boylls is a Technology Writer and Editor for wikiHow. Travis has experience writing technology-related articles, providing software customer service, and in graphic design. He specializes in Windows, macOS, Android, iOS, and Linux platforms. He studied graphic design at Pikes Peak Community College.
This article has been viewed 267,906 times.
Learn more...
This wikiHow teaches you how to crop your image with Gimp. When you crop an image, you cut a portion of an image from a larger image. For example, if you have a picture of you and your family, you can crop the image to remove all the tourists standing next to you.
Steps
Using the Crop Tool
-
1Open GIMP. GIMP has an icon that resembles a fox with a paintbrush in his mouth. Click the icon on Windows or Mac to open GIMP.
- If you haven't installed GIMP, go ahead and download GIMP and install it for free.
-
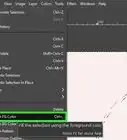
2Click File. It's in the menu bar at the top of the screen. This displays a drop-down menu.Advertisement
-
3Click Open. It's in the drop-down menu below "File". This opens a file browser you can use to select an image.
-
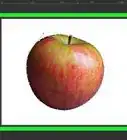
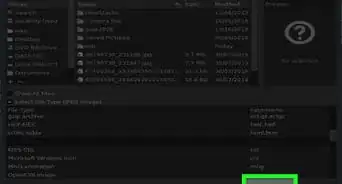
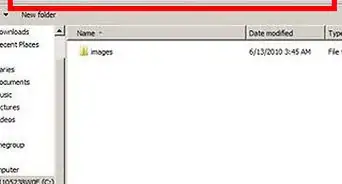
4Select an image and click Open. Use the file browser to navigate to an image you want to crop. You can click different folders in the left sidebar of the file browser. When you find the file you want to crop, click it to select it. Then click Open in the lower-left corner of the file browser.
- Alternatively, you can open the image in GIMP by right-clicking the file on your computer, selecting Open With, and then GIMP.
-
5Click on the crop tool in Gimp. It has an icon that looks like two 90 degree angle rulers forming a square. It's in the toolbar to the left.
- On older versions of GIMP, it may have an icon that resembles an Exacto knife.
-
6Drag a square around the portion of the image you want to keep. This creates a rectangle around the image section. The dark area outside the square is the area that will be cropped.
-
7Adjust cropping rectangle. To adjust the size of the cropping rectangle, click and drag just inside the borders and corners of the rectangle.
- If you want to use guides, click View in the menu bar, and then click the box next to "Show Guides". This displays rulers to the top and left of the image..
-
8Double-click the area inside the rectangle. This crops your image and removes the dark area outside the rectangle.
-
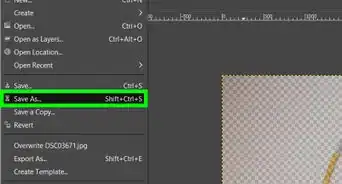
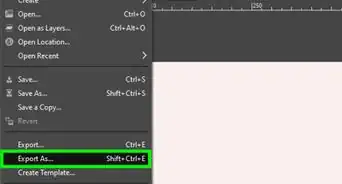
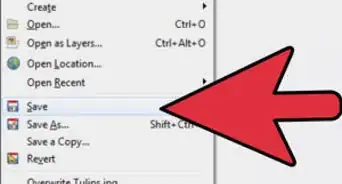
9Click File. It's in the menu bar at the top. This displays a drop-down menu.
-
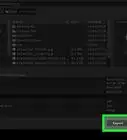
10Click Save. This saves the cropped version of the image.
- To save the image as a separate file, click Save As in the drop-down menu, and then type a name for the image and click Save.


Using the Selection Tool
-
1Open GIMP. GIMP has an icon that resembles a fox with a paintbrush in his mouth. Click the icon on Windows or Mac to open GIMP.
- If you haven't installed GIMP, go ahead and download GIMP and install for free.
-
2Click File. It's in the menu bar at the top of the screen. This displays a drop-down menu.
-
3Click Open. It's in the drop-down menu below "File". This opens a file browser you can use to select an image.
-
4Select an image and click Open. Use the file browser to navigate to an image you want to crop. You can click different folders in the left sidebar of the file browser. When you find the file you want to crop, click it to select it. Then click Open in the lower-left corner of the file browser.
- Alternatively, you can navigate to the file using Windows Explorer of the Finder on Mac, right-click on the image and then select Open With. Then click GIMP.
-
5Click the Selection tool. It's one of the two icons that resembles a rectangle or an oval with a dotted line around it. They're in the toolbar to the left.
- Use the rectangle selection tool to create a rectangle selection. Use the oval selection tool to create a round selection.
-
6Drag a circle or oval around an area of the image. This creates a rectangle with a dotted line inside around the selected area.
-
7Adjust the selected area. You can adjust the selected area by clicking and dragging inside the borders and corners of the rectangle around your selection.
-
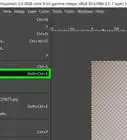
8Click Image. It's in the menu bar at the top of the screen. This displays a drop-down menu.
-
9Click Crop to Selection. It's in the menu bar below "Image". This removes everything except the area inside your selection.
-
10Click File. It's in the menu bar at the top. This displays a drop-down menu.
-
11Click Save. This saves the cropped version of the image.
- To save the image as a separate file, click Save As in the drop-down menu, and then type a name for the image and click Save.


Community Q&A
-
QuestionHow do I save an image I cropped in GIMP?
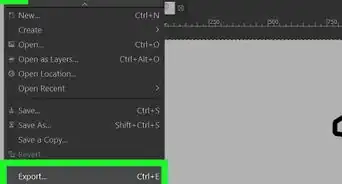
 Community AnswerOnce you have finished cropping your picture. Just double click the picture, go to 'Image' and click on 'Crop to selection.' When you are satisfied you have the desired result, click on 'file', then click on 'Export to' and click on the file that you wish it to save it to. This can be confusing as there will be other saved files you have worked on, including the one you just cropped. Ignore everything else and just click the file that you want to save to; such as 'pictures' or 'Gimp Cropped' or whatever you chose to call your file. It is always best to create a file to save your cropped photos to first in your 'pictures' file.
 -
QuestionWhat do I do if I can't find a save option even when I try closing to get a prompt?
 Community AnswerGo to the top left and click "File," then look down the list and hit "Save" or "Save As." Alternatively, use Ctrl+S (Control and S at the same time) to save.
 -
QuestionHow do I save a jpeg in gimp 2?
 Community AnswerUse 'Save As' in the file menu, and click the 'File Type' option and select 'JPEG', 'JPG', '.jpg' or '.jpeg'.
References
- http://docs.gimp.org/en/gimp-tutorial-quickie-crop.html – research source
About This Article

1. Open GIMP.
2. Click File in the menu bar at the top.
3. Click Open in the drop-down menu.
4. Select an image and click Open.
5. Click the crop tool in the toolbar to the left.
6. Drag a sqaure around the area you want to crop.
7. Double-click inside the selected area of the image.