X
wikiHow is a “wiki,” similar to Wikipedia, which means that many of our articles are co-written by multiple authors. To create this article, volunteer authors worked to edit and improve it over time.
This article has been viewed 10,220 times.
Learn more...
The gear is a circular part with teeth that interlock with other toothed parts to allow effective transfer of torque and motion from one area to another. Gears are essential components used in a wide array of different machines including automobiles, bicycles, clocks, and even can openers. If you're interested in designing gears, this wikiHow will show how to create a simple gear assembly using Siemens NX 12 CAD software.
Steps
-
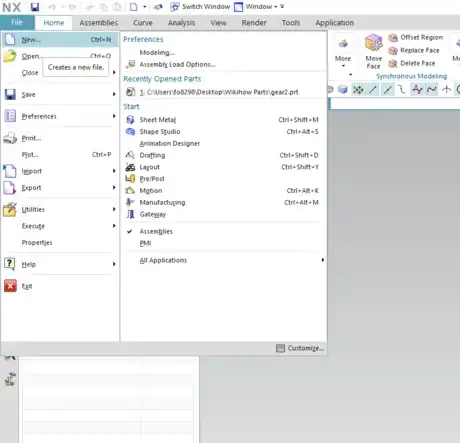
1Create a new project file. This can be done by opening Siemens NX 12, clicking on file in the top left corner, and clicking new in the drop-down menu.
-
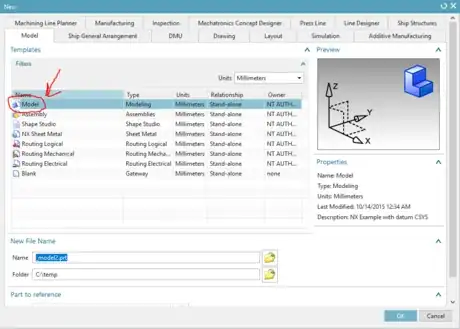
2Select "Model" as your project style. After clicking New, a menu will appear displaying various parameters of your new project. The only setting to worry about here is the type of project. Make sure Model is highlighted, and then click "OK".
Advertisement
Part 1
Part 1 of 3:
The Creation Process
-
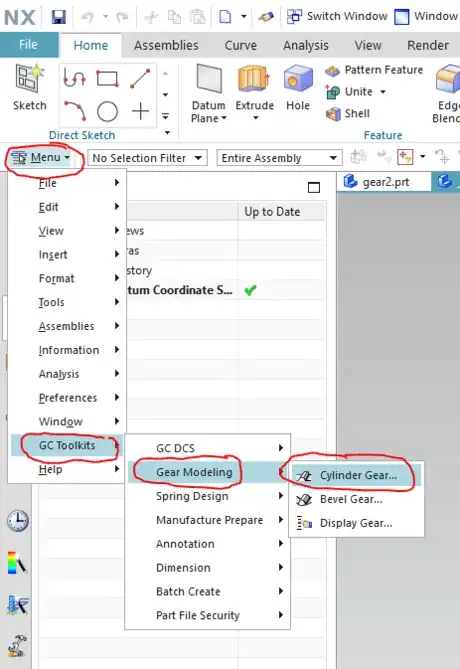
1Create the gears first. This is the easiest part of the creation process to start with. This can be done by accessing the gear tool kit creation menu by clicking menu in the top left corner of your screen, GC Toolkits, Gear Modeling, and finally Cylinder Gear. The gear modeling page will appear. Make sure "Create Gear" is selected, and then press OK twice.
-
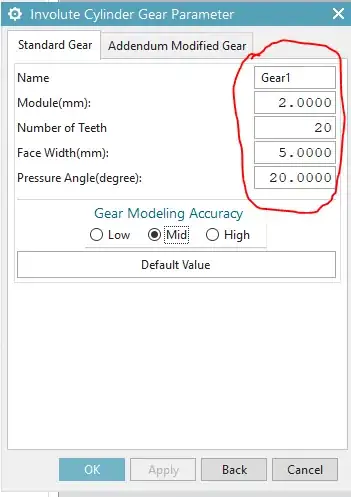
2Know how to use the gear menu. Once the gear menu has been opened, you will see several parameters associated with the dimensions of your gear. Any values can be used. However, values that are coherent with each other will make gears that are easier to design for. Example values can be seen in the image above.
-
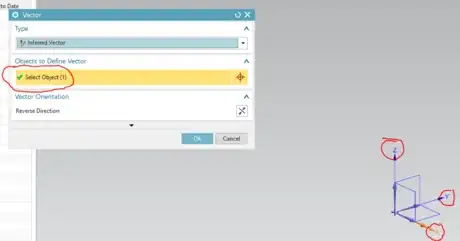
3Choose a vector for placement. After your parameters have been determined, click OK and a vector menu will appear. This menu serves to determine the orientation of your gear when placed in your project. The X,Y, or Z axis will all work equally. Click on one of the axis arrows to select it, then click OK.
-
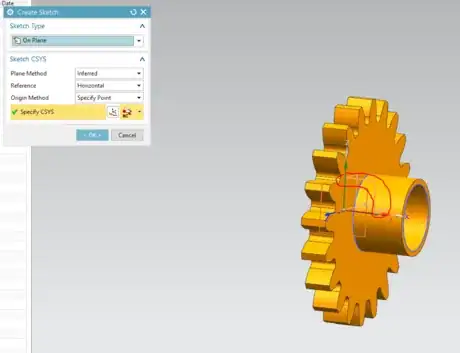
4Create the initial shaft hole extrusion. Now that you have created a gear, an extruded hole in the center of the gear needs to be added for attachment to a gear shaft.
- To start, create a new sketch. The sketch button can be found under file in the top left corner of your screen.
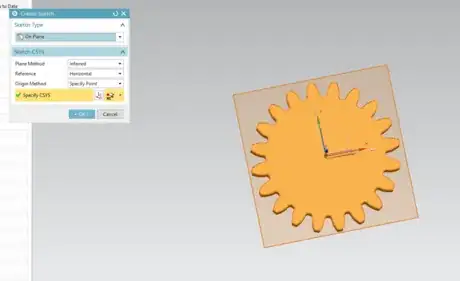
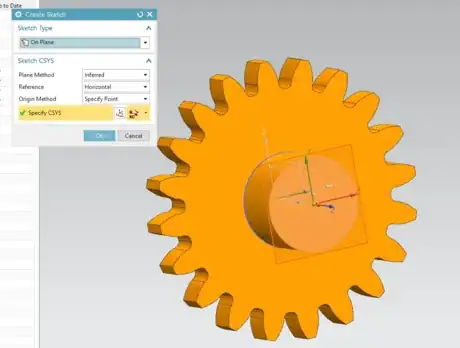
- After the sketch menu appears, click on the flat surface of your gear, as that is where the extruded hole will be.
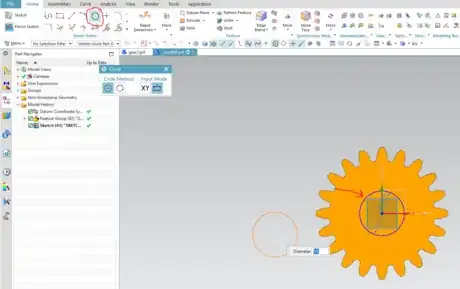
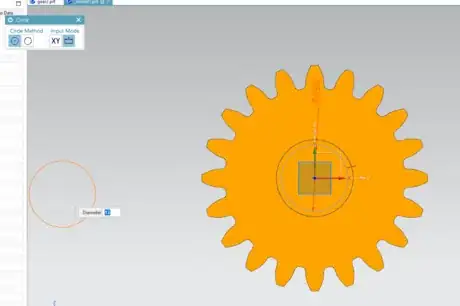
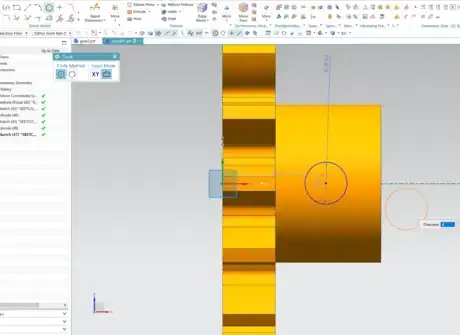
- Using the circle tool, make a circle in the middle of your gear. To use the tool, left-click the circle icon in the toolbar at the top, then left-click in the middle of your gear to start the circle. Either drag the circle to size or type in a specific diameter, then left-click one last time. Take note of the diameter of the circle that was made. Once this is done, left-click "Finish Sketch".
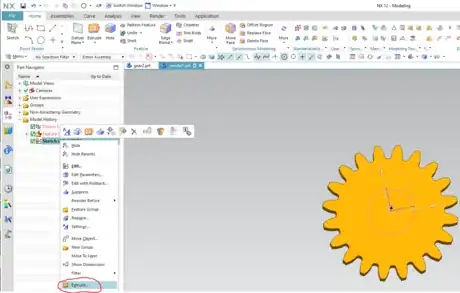
- Now, the sketched circle needs to be extruded to form a cylinder. To do this, right-click on the sketch in the Part Navigator on the left side. A drop-down menu will appear. Left-click the extrude option.
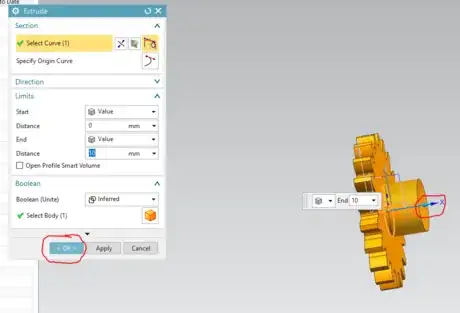
- Now, the extrusion menu should appear. Using the arrow slider on that part, drag the surface of your cylinder to any length, being sure not to make it too long. Once the length is decided, click OK to confirm the extrusion.
-
5Make the shaft hole. After the initial extrusion is made, a subtraction extrusion needs to be made to create a hole in the middle of the gear.
- Start a new sketch, and select the face of the extrusion you just made by clicking on it.
- Make a slightly smaller circle centered on top of the original circle using the Circle Tool found in the toolbar at the top. The icon for this looks like a circle. After making the circle, left-click Finish Sketch in the top left corner. Your part should look like the image shown.
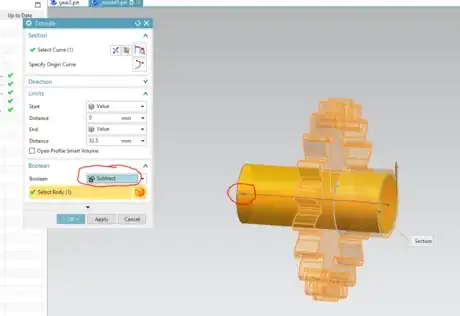
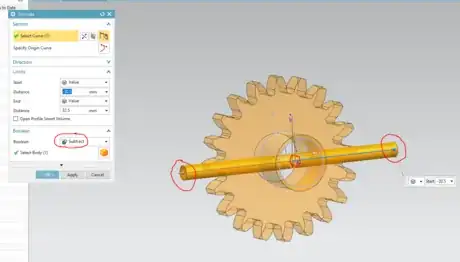
- Next, the sketched circle needs to be subtract extruded backwards through the entire gear to create a hole. Again, right-click the sketch in the Part Navigator and left-click Extrude. Under boolean, select subtract and then drag the extrusion arrow back through the gear.
-
6Create the pin holes. Two more small holes need to be made on either side of your new extrusion to create a space for a gear pin to be placed.
- Create a new sketch. When asked about the surface, click the outlined box that represents the axial plane that the side of your extruded shaft hole is on.
- Sketch a small circle in the middle of your extrusion, taking note of the diameter. Once you are done, left-click Finish Sketch.
- Subtract extrude the tiny circle through the entire length of the gear shaft hole. To do this, move the extrusion drag arrow both ways and have the boolean set to subtract.
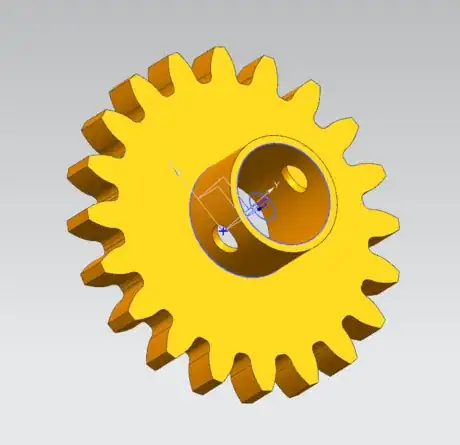
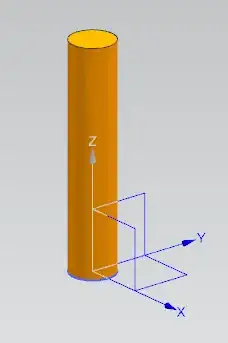
- The gear should now be complete. Feel free to make multiple gears, and note that they can also vary in size and number of teeth. The finished product should look like the image shown.
-
7Make the gear shafts. The gear shafts serve to hold and turn the gears when rotational force is applied.
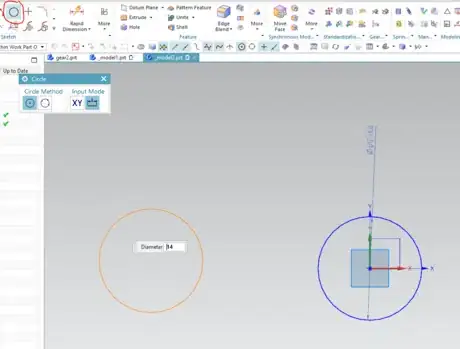
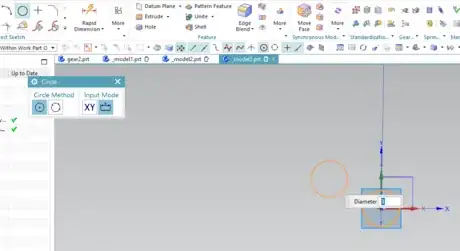
- Create a new model file, similar to before. Then, start a new sketch and make a circle that is 1-2mm smaller than the hole made in the middle of the gear. After that, left-click Finish Sketch.
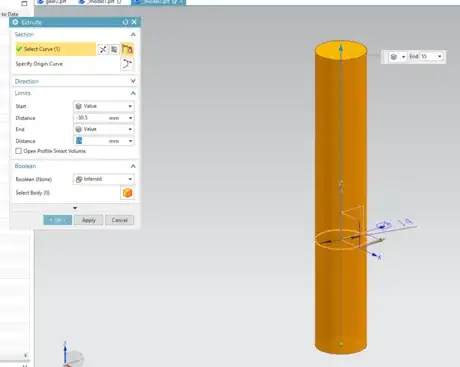
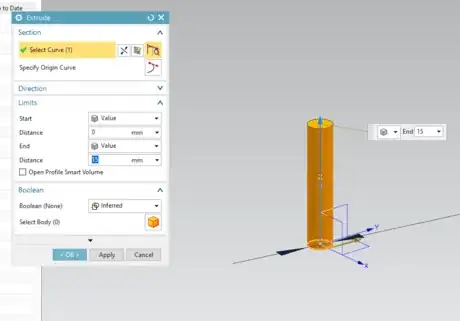
- Next, extrude the sketched circle to a decent length, long enough to hold the gears.
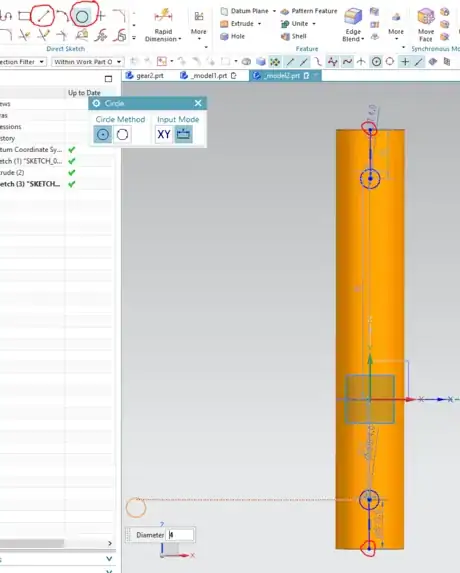
- Two holes, one on each end of the shaft need to be added so the pins can pass through. To do this, sketch two lines of equal length, each starting from the ends of the shaft. Then, sketch two circles, the center points being the endpoint of each line. Doing this will make the pin holes symmetrical.
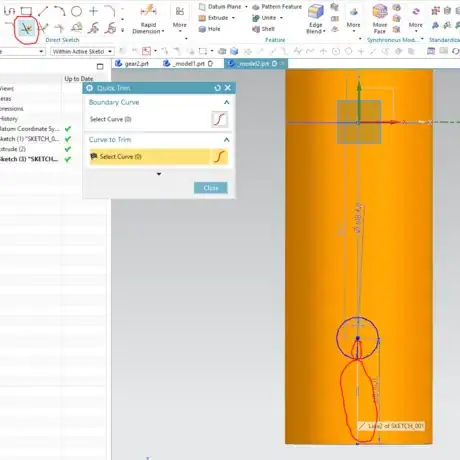
- Before finishing the sketch, select the Quick Trim tool and remove the two lines so only the circles remain. After, left-click Finish Sketch. Without doing this, the extrusion will not come out right.
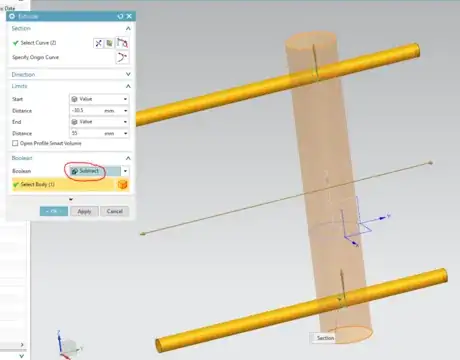
- Perform another subtract extrusion on the pin circles to create holes. This can be done in the same way as the other subtract extrusions.
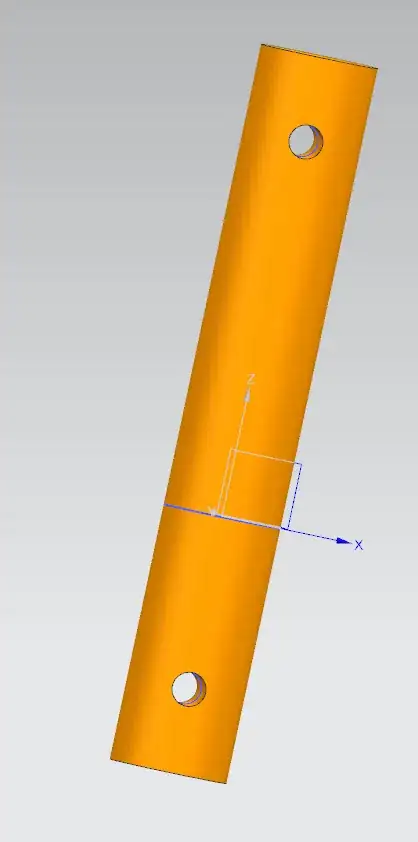
- The gear shafts are now complete, and they should look like the image shown.
-
8Create the shaft pins. Once the gears and the shafts are made, the gear pins are next. The pins will prevent the gears from sliding off the shafts. Create the pins the same way as the initial shaft.
- Sketch a small circle with the Circle Tool, and then extrude, creating a cylinder. Make sure the pin is long enough so part of it can stick out of each side of the shaft.
Advertisement
Part 2
Part 2 of 3:
The Assembly Process
-
1
-
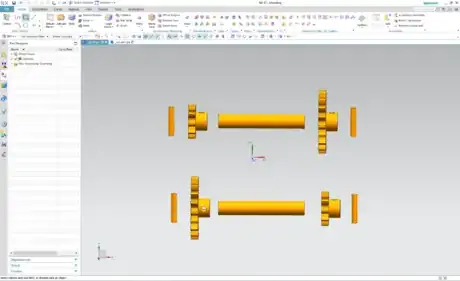
2Add in the parts. Now that the assembly project is created, the created parts need to be added to the workspace.
- To add a part, first locate and left-click the Add button in the top right corner.
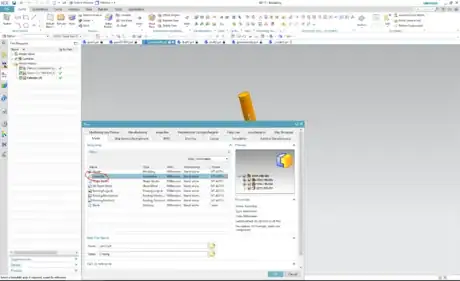
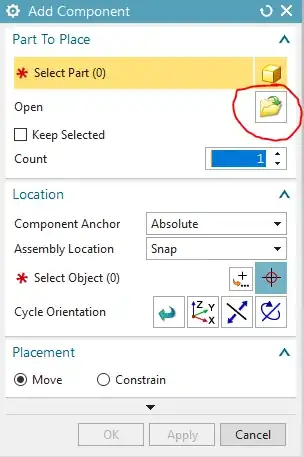
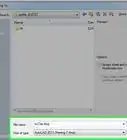
- The add component menu will appear. To add a part, left-click the manilla folder underneath Select Part. This will bring up the browser menu. Locate the part to be added, highlight it, and left-click OK.
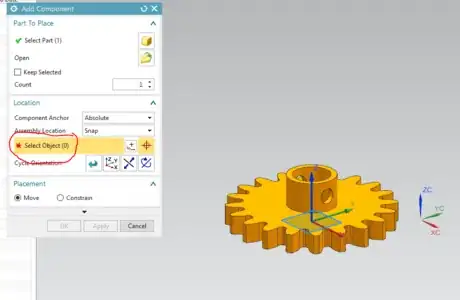
- To place the selected part, left-click Select Object and then left-click anywhere on the screen. Add all the created parts to the workspace.
-
3Move the added parts. Now that you have all of your parts added to the work surface, it is time to move them around to create a gear assembly.
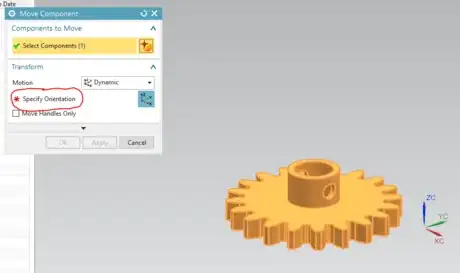
- To move your parts, click Move Component in the top right corner of the screen.
- The Move Component menu will appear. Left-click Select Component. A list of the available parts to select will appear. Either click the name of the part on the list, or click the part itself on the workspace.
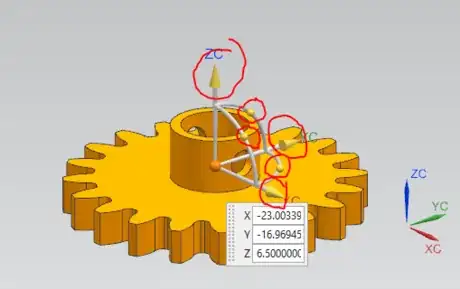
- After selecting the part, left-click Specify Orientation. The dynamic motion tool will appear next to the part on the workspace. This tool allows you to move the part in any axial direction, as well as rotate along any axis. This will be important to understand when constructing the assembly.
-
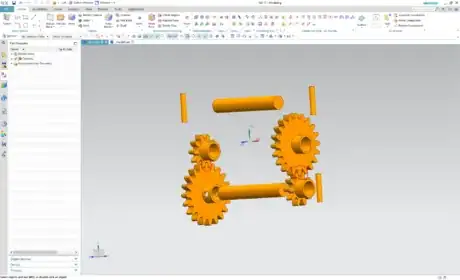
4Constructing the gear assembly. Now, using the Move Component feature discussed in the last step, the gear assembly can be constructed.
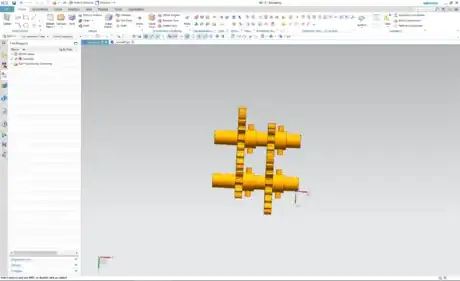
- To start, orient the gears so that the teeth of one are interlocked with the gear across from it as shown in the image above. Do this using the Dynamic Motion tool.
- Next, move the gears onto the shafts so that the pin hole on the gear aligns with the pin hole on the shaft.
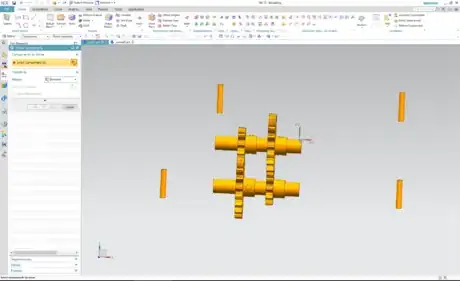
- Finally, move the gear pins so that they are passing through both the gears and the shaft, anchoring the gears in place. The final assembly should look something like the image shown.
Advertisement
Part 3
Part 3 of 3:
The Housing Unit and Finishing Up
-
1Create the housing unit. Now that the gear assembly is made, a housing unit needs to be made to hold the assembly.
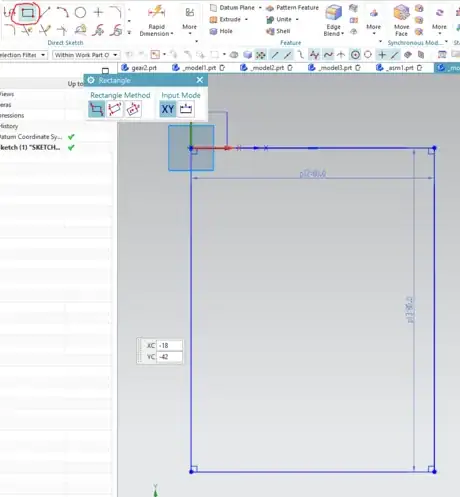
- Start a new sketch, and draw a rectangle using the Rectangle Tool. The rectangle needs to be large enough to fit the assembly while allowing room for the shafts to stick out one side.
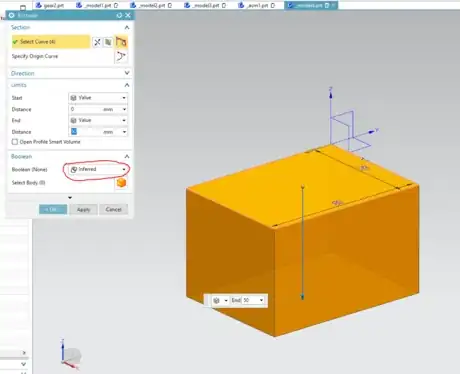
- Now, extrude the rectangle to form a rectangular cube.
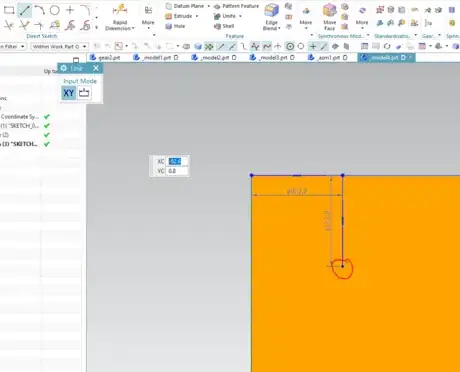
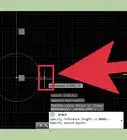
- Next, start a new sketch, selecting the face of the rectangular cube. Using the Line tool make small reference lines at two corners that are diagonal from each other. See the image for clarification.
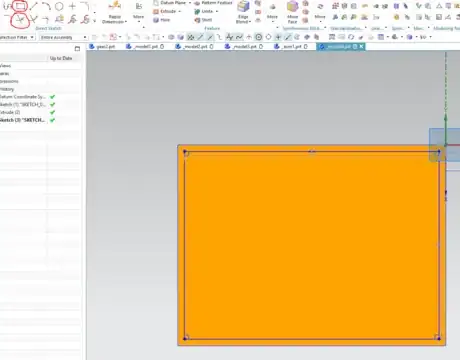
- Using the Rectangle Tool create a rectangle starting at the endpoint of the inner reference line and ending at the inner endpoint of the reference line diagonal to it. This will create a centered rectangle. See the image for clarification. Make sure to Quick Trim the reference lines after sketching the rectangle before finishing the sketch.
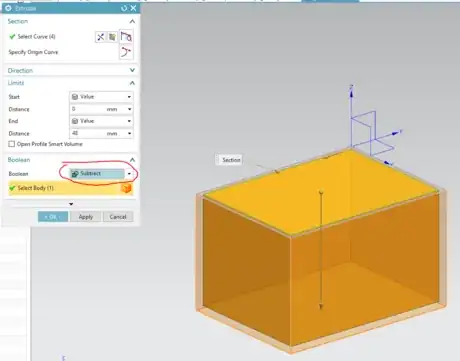
- Next, subtract extrude the sketch almost to the bottom of the rectangular cube. The resulting part should look like a box.
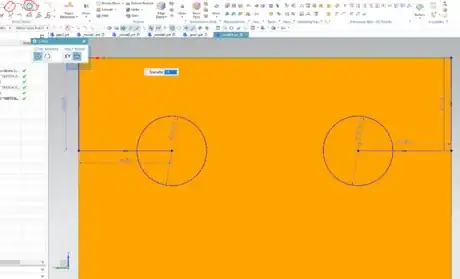
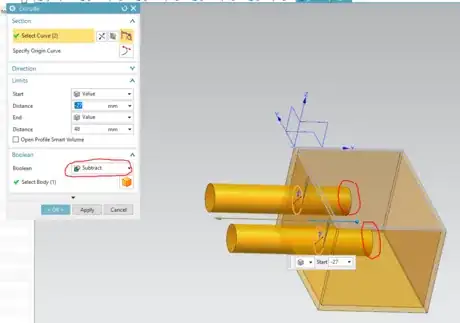
- Start another sketch on the side of the box. Using the Circle Tool sketch two evenly spaced circles on the side of the box. You can use reference lines makes this process easier. These circles should be spaced in a way so that the gear shafts will line up when the assembly is placed in the housing unit. Again, make sure to Quick Trim the reference lines before finishing the sketch.
- Perform a subtract extrusion on the new sketch. Make sure that the extrusion only creates holes on one side of the housing unit.
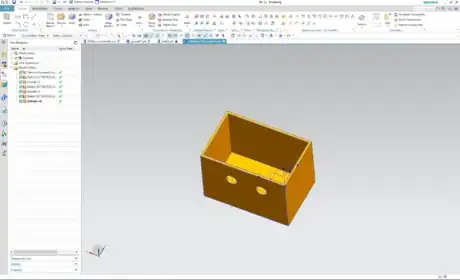
- The finished housing unit should look like this image.
-
2Add in the housing unit and finish the project. Now that the housing unit is complete, add it to your assembly model.
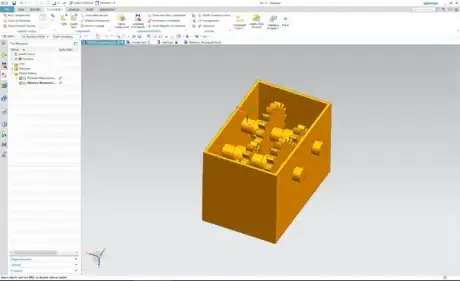
- Move the part so that it houses the gear assembly. Make sure to orient the gear assembly so that the shafts are sticking out of the holes in the side of the housing unit.
- The finished project should look like this image.
-
3Know that you are now finished. This model can be 3d printed or manufactured for use in the real world.
Advertisement
About This Article
Advertisement
