X
wikiHow is a “wiki,” similar to Wikipedia, which means that many of our articles are co-written by multiple authors. To create this article, 17 people, some anonymous, worked to edit and improve it over time.
This article has been viewed 413,967 times.
Learn more...
If you’re upgrading to a newer hard drive, or your old hard drive is about to bite the dust, you may be considering cloning it. Cloning your drive will keep all of your old data perfectly intact and ready to use on a brand new hard drive. Follow this guide to learn how.
Steps
-
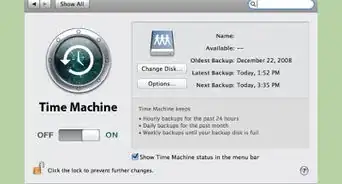
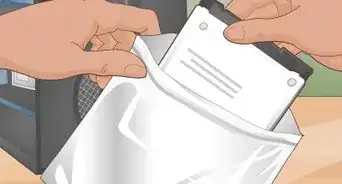
1Backup important data. While the cloning process should not result in any data being lost, it is always prudent to make sure that important files are backed up just in case. Backup your files onto a removable drive, DVDs, or onto cloud storage services online.
-
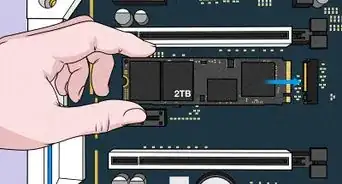
2Install the drive that you wish to clone to. When you clone a drive, you copy the existing drive to a new one. The new drive needs to be installed before you can clone your existing one.
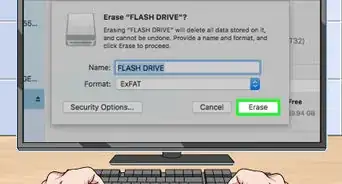
- The new drive does not need to be formatted in order to clone to it.
Advertisement -
3Install your cloning software. In order to clone a hard drive, you need to install special software to do it. You can either buy professional software such as Norton Ghost, or download a freeware program such as HDClone. This guide will cover how to use both.
- Norton Ghost will convert the remaining free space on the new drive into the same partition as the cloned disk. This means that any extra space left over after copying the disk will be available for the operating system to use without having to create a new partition.
-
4Clone the drive using Norton Ghost. From the main menu, select Ghost Advanced, and then click the Clone button.
- Set your source drive. This is the drive that you are copying FROM. Double check to make sure that you have the right drive selected, otherwise you may copy the blank hard drive to your old one, overwriting all of your data.
- Set your destination drive. This is the drive you are copying TO. This is the drive that you just installed. You can see the model and size of each selection below the frame.
- Click Next to get to the summary. This will be your last chance to ensure that your settings are correct before the cloning process starts. When you are ready, click Run Now. Your system will reboot and Ghost will load in DOS.
- Wait for the cloning process to finish. Depending on how much data you are copying, this could take quite some time. After the cloning is complete, your system will reboot again and Windows will load. You can verify that the drive was cloned by opening My Computer and checking the new drive.
- At this point you are still running off of your old drive. To start running off of your new drive, proceed to Step 6
-
5Clone the drive using HDClone. Burn the HDClone image file to a CD so that you can boot from it. When you boot from the CD, a DOS interface will load.
- Use the arrow keys/mouse click to set your Source disk. The Source disk is the hard drive that you are copying FROM.
- Use the arrow keys/mouse click to set your Destination disk. The Destination disk is the hard drive you are copying TO. Double check that you have the correct drives selected so that you don’t accidentally copy over your old data with the blank disk.
- Confirm options. Use advanced options for safer copying/cloning.
- Click on start to start cloning process and wait for the cloning process to complete. This can take a significant amount of time, especially if your hard drives are large. Once the process is complete, your new drive will have an exact copy of the old drive, and the rest of the space will be unallocated.
- If you want to append that unallocated space onto the partition that Windows XP is on, use Partition Magic. Otherwise you can create a new partition with it to use as storage.
- Note that you can copy entire disk to disk including all partitions and you can also copy single partition to new disk. Your new disk should be of larger size than your current disk/partition. Extra space will be left UN-partitioned and you can partition that later according to your requirements.
-
6Remove your old drive. Once you’ve verified that the cloning process has been successful, power down your computer and remove your old hard drive entirely. Make sure that your jumper settings are set correctly on the new drive.
-
7Power on the system. Ensure that everything boots normally and functions as it should. If your hard disk is not detected, make sure that your jumper settings are set to Master on the hard drive. Once you know that everything is working OK, you can put the old drive back in and format it.
- You may be asked to reactivate your copy of Windows. This will not always happen, but if it does, simply call the number provided and Microsoft will provide you with a reactivation code over the phone.
- If you are cloning the drive to put it into a new computer, you will have to perform a repair install of Windows XP in order for everything to function correctly. When doing this, you will have to call Microsoft to obtain a reactivation key.
Advertisement
Warnings
- Make sure you copy in the right direction. Nothing is worse than copying a blank drive to your existing drive and losing all your data!⧼thumbs_response⧽
- If continuing to use the old computer, don't violate your license agreements⧼thumbs_response⧽
- If continuing to use the old computer on the same network, you may have IP address conflicts.⧼thumbs_response⧽
Advertisement
About This Article
Advertisement
-a-Hard-Drive-in-Windows-XP-Step-1.webp)
-a-Hard-Drive-in-Windows-XP-Step-2.webp)
-a-Hard-Drive-in-Windows-XP-Step-3.webp)
-a-Hard-Drive-in-Windows-XP-Step-3Bullet1.webp)
-a-Hard-Drive-in-Windows-XP-Step-4.webp)
-a-Hard-Drive-in-Windows-XP-Step-4Bullet1.webp)
-a-Hard-Drive-in-Windows-XP-Step-4Bullet2.webp)
-a-Hard-Drive-in-Windows-XP-Step-4Bullet3.webp)
-a-Hard-Drive-in-Windows-XP-Step-4Bullet4.webp)
-a-Hard-Drive-in-Windows-XP-Step-4Bullet5.webp)
-a-Hard-Drive-in-Windows-XP-Step-5.webp)
-a-Hard-Drive-in-Windows-XP-Step-5Bullet1.webp)
-a-Hard-Drive-in-Windows-XP-Step-5Bullet2.webp)
-a-Hard-Drive-in-Windows-XP-Step-5Bullet3.webp)
-a-Hard-Drive-in-Windows-XP-Step-5Bullet4.webp)
-a-Hard-Drive-in-Windows-XP-Step-6.webp)
-a-Hard-Drive-in-Windows-XP-Step-7.webp)
-a-Hard-Drive-in-Windows-XP-Step-7Bullet1.webp)
-a-Hard-Drive-in-Windows-XP-Step-7Bullet2.webp)
