This article was co-authored by wikiHow staff writer, Hunter Rising. Hunter Rising is a wikiHow Staff Writer based in Los Angeles. He has more than three years of experience writing for and working with wikiHow. Hunter holds a BFA in Entertainment Design from the University of Wisconsin - Stout and a Minor in English Writing.
There are 14 references cited in this article, which can be found at the bottom of the page.
The wikiHow Video Team also followed the article's instructions and verified that they work.
This article has been viewed 28,231 times.
Learn more...
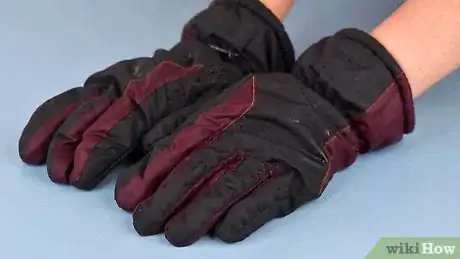
We know it’s a lot of fun to shred down the slopes, but your gear can get pretty dirty from snow, slush, and sweat. While you can usually just leave your gloves out to dry after most runs, giving them a deep clean 2–3 times during the season helps them last longer. We’ll walk you through how to properly care for your gloves no matter how dirty they are so they’re clean for your next trip to the ski hills!
Steps
Routine Cleaning
-
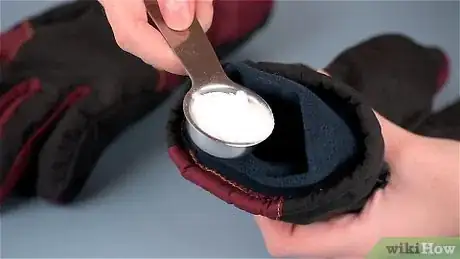
1Shake baking soda inside your gloves if they’re smelly but not dirty. The liners inside your gloves absorb sweat and could smell after your ski runs. Hold your glove so the fingers point down and sprinkle some baking soda inside the fingers. Hold the opening closed and shake your glove so the baking soda spreads throughout the liner. Empty the baking soda into your trash can and shake out the excess.[1]
- You can also use cornstarch if you don’t have baking soda.
- The baking soda will absorb the odors and oils built up in the liner to help your gloves smell fresh again.
- There may be a slight residue inside your gloves after adding baking soda. Try shaking them out a little harder to get rid of what’s left over.
- There are some commercial deodorizing sprays made for ski gloves, but they’re not always effective on strong odors.
-
2Rub dirt off the outer shells with a dry cloth or stiff-bristled brush. If you only have a little dirt on the surface, lay your glove flat on a table so the palm faces up. Apply gentle pressure with a cleaning cloth or stiff-bristled brush, and scrub up from the wrist towards the ends of the fingers. Flip the glove over and brush the other side to remove all of the loose dirt.[2]
- You can wear the glove on your hand if it makes it easier for you to clean.
- Shake your glove after brushing it to help get rid of any grit you loosened up.
Advertisement -
3Treat spots with a cloth soaked in water. Dip the end of a cleaning cloth in lukewarm water to get it wet. Apply gentle pressure against the glove with your cloth to work the dirt out from the fabric. Once you lighten the spot, leave your glove to air-dry before wearing it again.[3]
- You can use water on any type of gloves, including those made from wool, nylon, synthetic, and waterproof material.
- Water should be enough to get rid of surface spots and stains. If water doesn’t work, then you may need to do a more thorough wash.
-
4Disinfect the outsides of waterproof gloves with rubbing alcohol. Put some rubbing alcohol into a spray bottle and apply it directly onto your gloves. Leave the alcohol to sit on your gloves for about 5 minutes so the alcohol kills all of the germs on the surface. Wipe off the excess alcohol with a cleaning cloth or paper towel.[4]
- You can also use hydrogen peroxide if you don’t have any rubbing alcohol.
Hand-Washing
-
1Mix mild laundry detergent with lukewarm water. Choose a gentle detergent, such as Woolite or one made for infant clothes, since it won’t be as harsh on your gloves.[5] Fill a large bowl or sink with clean lukewarm water. Pour in about 1 teaspoon (4.9 ml) of your detergent and mix it thoroughly until it's sudsy.[6]
- Check the laundry tag inside of your gloves to see if it specifies a different type of detergent.
- Avoid using standard detergents, fabric softeners, or harsh chemicals since it could cause your gloves to break down faster.
-
2Scrub the outer shells clean with a cloth soaked in the cleaning solution. Hold the glove above the soapy water or wear it so it’s easier to work with. Dip the end of a lint-free cloth in the water and use it to wipe the outside of the glove. Work the cloth over all of the seams and between the fingers to get rid of any dirt that’s trapped on the surface.[7]
- You can also wear both of your gloves and dip your fingers in the water. Lace your fingers and rub them together to scrape at the dirt.
-
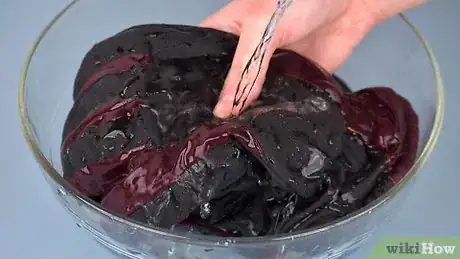
3Submerge the gloves in the cleaning solution to clean the insides. Set your gloves in the bowl and push them completely underwater. Gently rub your gloves together so the soap absorbs further into the shells and liners to kill odor-causing bacteria. Be careful not to twist or wring your gloves, or else you might damage the seams.[8]
- If your gloves have removable liners, you can take them out to wash and dry them separately. You can hand-wash the liners in the same solution. Otherwise, you can leave the liners inside the shells.
-
4Rinse the soap out from your gloves and liners with clean water. Turn your faucet onto lukewarm water and hold your gloves underneath the stream. Squeeze your gloves gently to get rid of excess soap. Keep rinsing your gloves until the water runs clear.[9]
- Leftover detergent inside your gloves might cause irritation.
Machine Washing
-
1Check the care tags on your gloves to see if they're machine-safe. Some ski gloves are more delicate than others, so you may not be able to throw them into your washing machine. Look for care tags near the cuffs of the gloves and read through it carefully. Only clean them in your washing machine if it specifically says you can on the tag.[10]
- If you have the time, hand-wash your gloves instead since they’re less likely to get damaged.
-
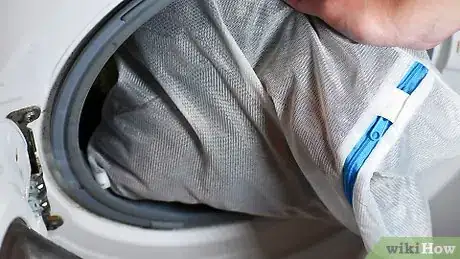
2Put your gloves in a mesh bag. Choose a bag that’s large enough for all the gloves your washing. Zip the bag up so your gloves don’t fall out in the middle of the cycle. That way, the gloves or fabric won’t get caught in the machine and you’re less likely to damage them.[11]
- You can buy a mesh bag online or from the laundry supply section at a local department store.
-
3Add the gloves to a load of similar colors and fabrics. If you don’t want to waste water doing a load with just your gloves, put in other garments you want to wash. Avoid adding any rough materials that could catch on your gloves, or else you could damage them.[12]
-
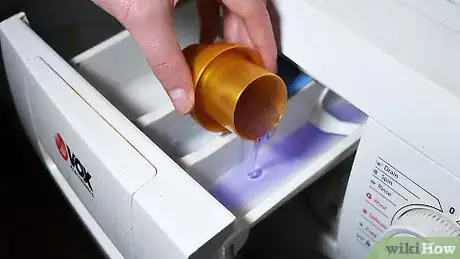
4Wash your gloves with bleach-free detergent. When you’re picking a detergent, choose something that’s gentle or made for washing infant clothes since they won’t be as harsh.[13] Put the standard amount of detergent in your washing machine that you normally would for the load size.
- Avoid using fabric softener when you wash your gloves since it could affect the waterproofing and make it less effective.
- You may want to run an empty cycle with just water to clear out residual detergent stuck inside the machine.
-
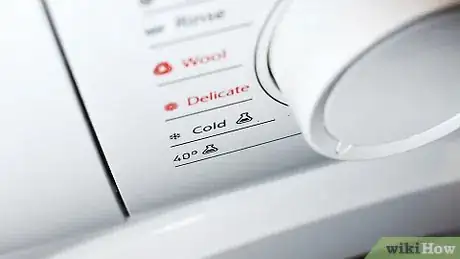
5Run your washing machine on a gentle cycle with cold water. Turn your washing machine to the “Delicates” or “Gentle” cycle so your gloves are less likely to get damaged. Use the coldest water so your gloves retain their shape. Let the cycle run completely so your gloves get clean.[14]
- Don’t use any regular or speed cycles on your machine since it could damage your gloves or cause them to stretch.
Drying and Waterproofing
-
1Squeeze excess water out from the gloves. Hold your gloves so the fingers point up and water drains out from the wrist opening. Gently squeeze your gloves without twisting or stretching them. Try to get rid of as much water as you can so your gloves dry faster.[15]
- Avoid twisting your gloves to wring them out since you could rip the seams.
- You can also press the glove inside a towel instead of squeezing it to soak up more water.[16]
-
2Put on your gloves briefly while they’re wet to restore their shape. Slide the damp gloves onto your hands and make fists to help keep the fabric flexible. Work your fingers back and forth a few times until you’re happy with how the gloves fit your hands.[17]
- Since washing your gloves can cause them to distort, they may not fit properly if you just leave them to dry.
-
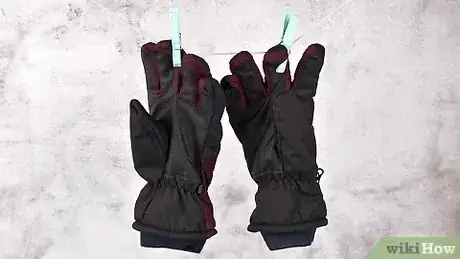
3Hang your gloves away from heat sources to dry. Find a place that’s out of direct sunlight or sources of heat so your gloves can air-dry without getting damaged.[18] Clip one of the glove’s fingers to a line with a clothespin so water can drip out from inside of them. Leave them alone on the line until they’re completely dry before you wear them again.[19]
- Sunlight or heat can cause cracking, tearing, or shrinking while your gloves dry.
- You might be able to tumble-dry your gloves if it says so on the laundry care tag.
-
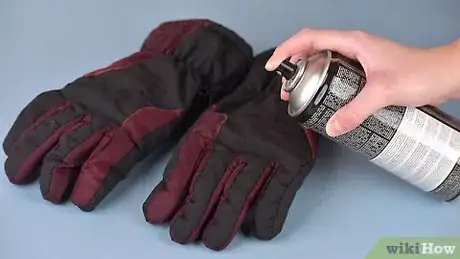
4Spray durable water repellent onto waterproof gloves. Use a sponge or lint-free cloth to spread the DWR over the entire surface of your gloves, especially near the seams. Leave the DWR on your gloves for 5 minutes so it soaks in before wiping it off with a clean cloth.[20]
- You can buy a durable water repellent (DWR) from an outdoors store.
- Washing gloves remove their waterproofing, so always reapply it once they’re dry.
Warnings
Things You’ll Need
Routine Cleaning
- Baking soda
- Cleaning cloth or stiff-bristled brush
- Rubbing alcohol
Hand-Washing
- Mild laundry detergent
- Bowl
- Cleaning cloth
Machine Washing
- Washing machine
- Mesh bag
- Bleach-free detergent
Drying and Waterproofing
- Clothespins
- Durable water repellent
References
- ↑ https://slopehound.com/how-to-wash-ski-gloves/
- ↑ https://youtu.be/8p_Tis0S-RE?t=57
- ↑ https://www.blackdiamondequipment.com/on/demandware.static/-/Sites-bdel/default/dw69361700/instructions/S16_Instructions/Glove_Care_Instructions.pdf
- ↑ https://www.superiorglove.com/blog/clean-winter-gloves-thinsulate-leather
- ↑ https://slopehound.com/how-to-wash-ski-gloves/
- ↑ https://youtu.be/8p_Tis0S-RE?t=79
- ↑ https://www.freethepowder.com/pages/washing-cleaning-ski-gloves
- ↑ https://www.freethepowder.com/pages/washing-cleaning-ski-gloves
- ↑ https://www.blackdiamondequipment.com/on/demandware.static/-/Sites-bdel/default/dw69361700/instructions/S16_Instructions/Glove_Care_Instructions.pdf
- ↑ https://slopehound.com/how-to-wash-ski-gloves/
- ↑ https://www.mountainwarehouse.com/expert-advice/how-to-wash-ski-gloves
- ↑ https://www.freethepowder.com/pages/washing-cleaning-ski-gloves
- ↑ https://www.freethepowder.com/pages/washing-cleaning-ski-gloves
- ↑ https://www.freethepowder.com/pages/washing-cleaning-ski-gloves
- ↑ https://slopehound.com/how-to-wash-ski-gloves/
- ↑ https://youtu.be/8p_Tis0S-RE?t=156
- ↑ https://www.outsideonline.com/2410190/ski-gloves-care-storage
- ↑ https://www.blackdiamondequipment.com/on/demandware.static/-/Sites-bdel/default/dw69361700/instructions/S16_Instructions/Glove_Care_Instructions.pdf
- ↑ https://slopehound.com/how-to-wash-ski-gloves/
- ↑ https://www.outsideonline.com/2410190/ski-gloves-care-storage
- ↑ https://slopehound.com/how-to-wash-ski-gloves/
- ↑ https://youtu.be/hP4CzFDASWU?t=33
- ↑ https://www.freethepowder.com/pages/washing-cleaning-ski-gloves
- ↑ https://www.outsideonline.com/2410190/ski-gloves-care-storage
