This article was co-authored by wikiHow Staff. Our trained team of editors and researchers validate articles for accuracy and comprehensiveness. wikiHow's Content Management Team carefully monitors the work from our editorial staff to ensure that each article is backed by trusted research and meets our high quality standards.
wikiHow marks an article as reader-approved once it receives enough positive feedback. In this case, 95% of readers who voted found the article helpful, earning it our reader-approved status.
This article has been viewed 71,012 times.
Learn more...
Wool carding involves separating and straightening sheep’s wool with two brushes so that it can be used to make fiber art or yarn for knitting. These brushes closely resemble pet hair brushes but are made specifically for preparing wool fibers. Carding can also be used to create various fiber blends or combine different colors. Once you are familiar with the process, you can begin hand processing wool at home.
Steps
Washing the Wool
-
1Shake off any superficial dirt or vegetation. You will want to card only clean wool, as any dirt particles could hamper your ability to use the wool carders. Freshly shorn sheep’s wool will also have dirt deep in the fibers, so you will need to be sure you wash it thoroughly.
-
2Fill a basin with warm water. Grab a bucket or clean out a sink to use as a washing basin. The basin should be large enough to comfortably contain the amount of wool you would like to clean. The temperature should be at approximately 180 degrees Fahrenheit (82 Celsius). Water that is too hot will strip the wool of natural oils.Advertisement
-
3Pour in several squirts of dishwashing detergent. To protect the woolen fibers, avoid soap or detergents that contain bleach or similar whitening additives. Stir the detergent into the water until the water is soapy.[1]
- For best results, use a soap or detergent with a pH between 7 and 9.
- Most mild dish soaps are neutral (a pH of 7) and should be safe to use for cleaning wool.[2]
- Mild dish soaps can be purchased at any drug or grocery store near you.
-
4Submerge your wool. Let the wool soak for about ten minutes in the basin of warm water. This should loosen the dirt particles, making it easier for the dirt to separate from the wool or for you to remove it with some light scrubbing. Rub the wool with your hands to wash it thoroughly.[3]
- Repeat the process as necessary. You may need to soak the wool 2-3 times before it is completely clean.
-
5Drain your sink. Remove the wool and pull the stopper to allow your sink to drain or dump the water out of your bucket. Rinse out any remaining dirt in your sink or bucket.
-
6Rinse the wool of all soap. You will know it has been thoroughly rinsed when you notice that the bubbles from the detergent are gone. You may need to rinse the wool three or more times.[4]
-
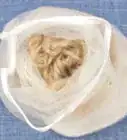
7Place the wet wool on top of a thick towel. This will absorb the excess water in the wool, allowing it to dry a bit faster. Wrap it in the towel and gently squeeze to pull out as much excess moisture as possible.[5]
-
8Lay the wool flat to dry. You can do this by clearing a space on a desk or countertop and laying the wool on another clean and dry towel. You could also lay it flat on a drying rack. Allow the wool to dry overnight. Do not attempt to card the wool until it is completely dry.


Hand-Carding Wool
-
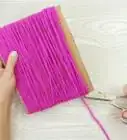
1Purchase hand carders from a spinning or hobby store. Carders are wooden paddles covered in pin board and they often closely resemble cat or dog hair brushes. Be sure to avoid purchasing carders made for cotton and purchase ones specifically made for wool.
- Wool carders come in small and large sizes. Larger sizes can be harder to manage if you have little upper body strength.
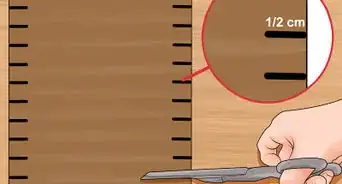
- Some wool carders have teeth that are very close together. They are harder to drag apart but align the wool into finer wool.
- Hand carders have different types of teeth as well, which are used for different purposes. Carders with coarse teeth are used for carding coarse fibers, such as wool and mohair. Hand carders with fine teeth are generally used for carding softer fibers like cotton and angora.
-
2Cover one carder with a thin layer of wool. The wool should be touching the side of the carder with the pin board. You will want to cover it the surface of the carder until almost all the teeth are covered but not so there is an excess of wool hanging off the side of the carder. Do not cover other carder with wool.
-
3Sit down with an empty lap. Place the full carder on the on your left knee with the wool facing up. Hold the handle of this carder with your left hand. Switch hands and knee if your left hand is your dominant hand.
-
4Hold the empty carder by the handle in your right (or dominant) hand. The carder should be oriented so that the pin paper is facing down and toward the wool on the other carder.
-
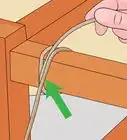
5Brush the empty carder over the top of the other carder. Begin at the top end of the full carder (opposite the handle). Work your way gently from the top to the bottom in full strokes moving in one direction. There is no need to press very hard. The pin paper should grab a few fibers at a time, straightening it onto the second carder.[6]
-
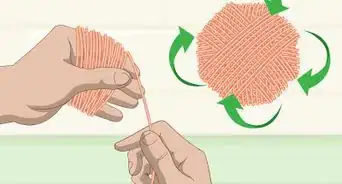
6Repeat the process until all of the wool is transferred onto the right carder. If you see any knots, continue brushing until they are removed and transferred onto the surface of the other carder. This could take up to five minutes to complete, depending on how fast or slow you prefer to go.


Refining Carded Wool
-
1Repeat the hand carding process to further refine the wool. Transfer the now-full carder to the left knee. Take the empty carder into your right hand. Gently brush the empty carder over top the full one, as you did previously.
-
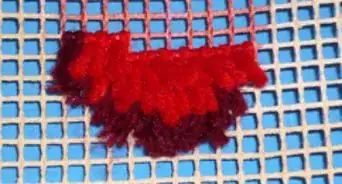
2Continue to switch carders. You will continue to switch your carders until no dirt appears and the wool is very uniform. Look closely at the brushed fibers. If they are falling in parallel lines, then it is ready.
-
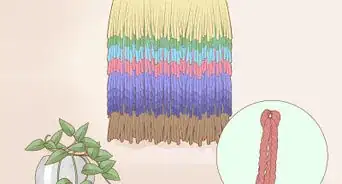
3Lift the refined carded wool from the carder. Start at the top of the carder and slowly move to the handle, lifting the wool the whole way. You can use the other carder to help lift the top of the fibers up and back. As you lift, you can gently and loosely roll the wool until it resembles a burrito. Once the fiber is rolled, it is referred to as a rolag.[7]


Community Q&A
-
QuestionI washed my wool in the washing machine and it matted badly. How can I untangle the badly matted felt so that I can still make wool roving out of it?
 Community AnswerWhen this happens, it is known as "felting" the wool. This happens as a result of the agitation in the washing machine and there is usually nothing that can be done except use it in a different project, such as a felted bowl, purse, or blanket.
Warnings
- Your arms and shoulders could get tired after carding a large amount of wool or if you have been doing it for a long time. Be sure to take a break and stretch every half hour or so.⧼thumbs_response⧽
Things You'll Need
- Hand carders
- Freshly shorn sheep’s wool
- Breathable bags
- Water
- Dishwashing detergent
- Bucket
- Towel


References
- ↑ http://www.hobbyfarms.com/how-to-card-wool-4/
- ↑ http://alphaclean.com.au/ph-and-cleaning-chemicals-what-you-need-to-know/
- ↑ http://www.hobbyfarms.com/how-to-card-wool-4/
- ↑ http://www.hobbyfarms.com/crafts-and-nature/how-to-card-wool.aspx
- ↑ http://www.hobbyfarms.com/how-to-card-wool-4/
- ↑ https://www.youtube.com/watch?v=BN21_sOzFy4
- ↑ http://joyofhandspinning.com/how-to-prepare-fiber-with-hand-carders/
About This Article

Before carding your own wool at home, purchase a set of hand carders from your local spinning or hobby store. Then, wash the wool in a solution of warm water and mild dish soap to remove the dirt and let it dry by laying it flat on a thick towel. Next, cover the pin board of 1 of your carders with the freshly washed wool, then brush the empty carder over the top and keep brushing until all the wool is transferred to the other carder. Switch carders and repeat the brushing process, and continue to switch carders until all the wool falls in parallel lines. To learn more, like how to remove your processed wool from the carder, scroll down!