X
wikiHow is a “wiki,” similar to Wikipedia, which means that many of our articles are co-written by multiple authors. To create this article, 12 people, some anonymous, worked to edit and improve it over time.
This article has been viewed 35,908 times.
Learn more...
A nifty stool can be created using strong cardboard and your cutting and gluing skills. This cardboard stool is a cool design project for high school students or something great to kill the time. It might also be useful if you need more seats for your next student party.
Steps
Part 1
Part 1 of 2:
Making the stool base
-
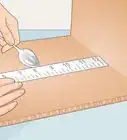
1Bend a rectangular piece of cardboard at each third of the cardboard piece. This is needed so as form the cardboard into a triangle. For guidance in where to bend, see the bend lines provided in the image.
-
2Cut a slit into each end of the cardboard piece. The slit at one end should be on the bottom corner, while the slit at the other end should be on the top corner. See the image for the precise locations of the slits. These slits allow for clipping into each other to form a locked triangle when folded in place.Advertisement
-
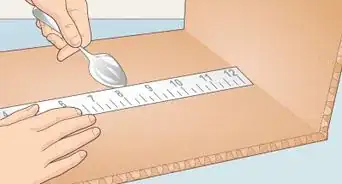
3Make the triangle. Fold the cardboard piece to make two triangles in exactly the same way. When done, you should have something that looks like the triangles in the image. Make a halfway cut at the arrow marks shown in the image, on both triangles.
-
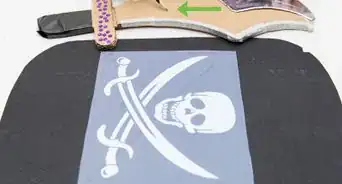
4Clip the two triangles together. Refer to the image to help you with the over-locking.


Advertisement
Part 2
Part 2 of 2:
Making the seat
-
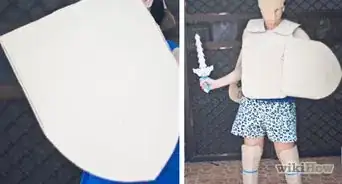
1Take a large piece of cardboard and place it under the stool base.
-
2Draw a line around it to help you see what you have to cut out when the stool base is removed.
-
3Cut the seat out. By following the line you'd drawn in place, it should fit perfectly on your stool.
-
4Glue the seat onto the stool. Allow to try firmly.
-
5Test out the stool. Sit on it gently and enjoy making your own easy furniture.


Advertisement
Community Q&A
-
QuestionCan this hold 225 pounds?
 Community AnswerNo, it is unlikely that it will be able to hold 225 pounds.
Advertisement
Warnings
- If the stool gets wet, it may disintegrate.⧼thumbs_response⧽
- Do not swing on the stool or sit on it heavily, it will likely break.⧼thumbs_response⧽
- When cutting out the cardboard be sure to be careful with the knife/scissor you're using.⧼thumbs_response⧽
- If you're making this project and under the age of 15, it is highly recommended that you get supervision from an adult because it can be tricky to get the measurements right.⧼thumbs_response⧽
Advertisement
Things You'll Need
- Large pieces of strong, sturdy cardboard
- Knife/scissor
- Pencil
- Measurement instrument
- Strong glue


References
- Initial author won a competition for this design, held at the author's school.
About This Article
Advertisement