wikiHow is a “wiki,” similar to Wikipedia, which means that many of our articles are co-written by multiple authors. To create this article, 54 people, some anonymous, worked to edit and improve it over time.
This article has been viewed 446,052 times.
Learn more...
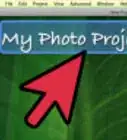
Sometimes, you can end up with pictures that are almost perfect except they are missing one person you really want in them. Instead of trying to get everyone back in the same place to recreate the picture with all the people you want, you can add them to your picture using a photo editor such as Adobe Photoshop. If you follow a few steps, you can add a person to a photo in no time.
Steps
Getting the Person in the Photo
-
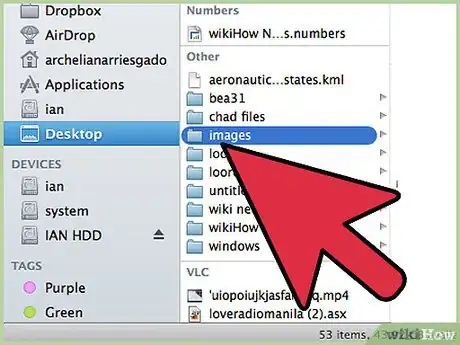
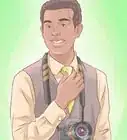
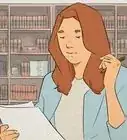
1Pick your photos. When you are trying to add a person to a picture, you want to make sure that you have a picture of the absent person that matches the photo you want to add them to. For example, if you want to add your best friend to a picture of a group of friends on the beach, don't try to use a picture of her in a Christmas sweater. It won't look right and people will be able to tell that you manipulated the photo.
- If you can find a picture where your friend is on a simple or uncomplicated background, that would be ideal. The busier the background, the more work you'll have to do when you erase it later.
- You want the picture of the person you are adding to be as big or bigger than the one you want to add them to. If you have to enlarge the person you are adding, they will become pixelated and give away your hard work to make them look like they belong in the picture.
- Also try to match color tone and lighting. If you are all on a beach, try to find one of your friend in the sun. You can manipulate the colors later, but it will be harder for you to work with later.[1]
-
2Select the person. You need to open up the photo of the figure you are cutting out in Photoshop. Pick the lasso tool from your toolbar. It will be the icon that looks like a lassoed rope that is the third icon down from the top of the side toolbar. Start from a place near your figure and, holding down your left mouse key, loop around your figure. Once you get all the way around the person, the lines you drew will become highlight lines, which are dashed, moving lines around the edges you drew.Advertisement
-
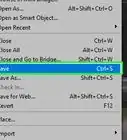
3Copy and paste the figure. Now that your figure is highlighted, you need to copy the figure so you can paste it over into the group photo. Click on the Edit menu option at the top of the screen. From the pull down menu, click Copy. Now, you need to open your group photo. Once it is open, click on the picture. Then, go back up to the Edit menu and choose Paste from the pull down menu. This will paste your highlighted figured from the original image into the group image.
-
4Resize the figure. Now that your figure is in your image, you need to resize it to make it match the people in the group. To do this, you will use the Free Transform tool. Make sure the figure layer is selected, which you can do from the Layer window, which is typically on the right side of your work space. Once the figure layer is chosen, go to the Edit menu option and choose Free Transform. A box will appear on the outside of your layer. Holding down the shift key, click your mouse on the corner of the box and pull the box in, making the figure smaller. Keep shrinking until the figure looks about the same size as the people in the group photograph.
-
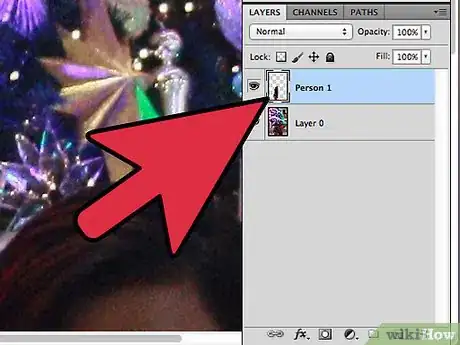
5Erase the extra background. To make the figure look like she belongs in the image, you need to erase the original background from around the figure. To do this, you will need the eraser tool. To begin, click on the figure layer from the layer window. At the bottom of the layer window, there is a button with a grey rectangle with a white circle in the middle called the mask layer button. Click on this to isolate the image from the other layers. Now, click on the eraser tool on the toolbar on the left, which is about halfway down the bar and has a rectangular eraser on it. From the top of the screen, there are eraser options. Click the down arrow and change the size of the brush to something around 60 or 70 pixels by sliding the arrow over or typing in the new size. Also change the hardness at the bottom of the menu to 0. Now you can erase most of the extra background around your figure.
- Get close to the figure but don't erase any part of the figure. The extra bits left around their body will be erased with a smaller brush.
- If they are on a white or solid color background, you can use the magic wand tool to isolate the background and delete it. Just click the magic wand tool, select the color of the background, and then press delete once it is all highlighted.[8] [9]
-
6Finish isolating the figure. Now that the majority of the background is erased, you need finish removing all the excess background to isolate the figure. In your eraser options as the top, change the size of your brush to something between 20 and 30 pixels. You also need to change the hardness to at least 50. Once your eraser is done, zoom in on the picture by hitting the plus sign or changing the percentage on the bottom of your window. Get as close as you can, making the edges of the figure easy to see. Erase the rest of the background from the figure.[10] [11]
- If you mess up or accidentally erase part of the figure, you can simply press the undo button under Edit on the menu bar.
Matching the Person to the Photo
-
1Move the layer. Now that your figure is the same size as the rest of the group and is isolated, you need to move the layer to the position you want them to be in. To do this, make sure the figure layer is selected. Click the move tool, which is the one on the top of the toolbar on the left side of the screen. Once you click it, grab your figure layer and hold down the left mouse button while you drag it to the place you want it.[12]
-
2Change the lighting. Now that the figure is the same size as the others, you need to match the color of them. With the figure layer selected, click on the icon beside the mask button on the bottom of the layer screen. It has a bi-color circle on it. When you click it, a menu screen will pop up. Click on the Curves option, which will make a dialog window pop up. It will have a square with a diagonal line through the middle of it. Click on the line in the middle, halfway up from the middle, and halfway down from the middle. Each of the dots that appear will allow you to move the line. Now you need to play with the levels in this option. You can move the lines up and down, adding and subtracting light and contrast as you go. Play around with the layer until it matches the group layer.
- If there is only a bit of a different between the layers, you can just change the brightness and contrast from the Image menu bar. Simply adjust the lines back and forth.
- You may have a dialog box pop up with you try to make a Curves layer on your figure. When it pops up, press OK to make the Curves mask layer.
- You can also change the lighting of the original group photo as well. If you want to change it, click on the background layer and pick the same icon on the bottom of the screen and follow the same steps as with the figure layer until the two layers are close to each other.[13]
-
3Match the color. Now that the lighting is right on your figure, you need to make the hues of their skin match. To do this, make sure your figure layer is selected. Press the same bi-color circle at the bottom of the layer screen and choose Hue/Saturation from the menu. From the screen, you can change Hue, Saturation, and Brightness. Hue will change the color the highlight and low light colors to a different color. Saturation will change the concentration of the colors on your, making them brighter or duller. The brightness will change the overall lightness of the figure. You should play around with the dials until the figure matches the color of the group.[14] [15] [16]
Community Q&A
-
QuestionAfter adding the person into the photo and clicking "save," the photo is no longer there. How do I save the entire edited file?
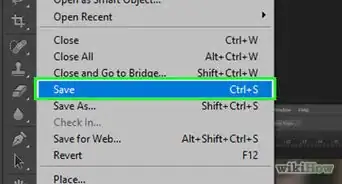
 Community AnswerYou are probably saving it as a Photoshop file instead of an image file. Use "Save As" and make sure you choose a file type like "JPG" or "PNG." Give it a different file name from the original file, so you know which one is which.
 -
QuestionIf someone says they won't be in a portrait, can I photoshop them in?
 Community AnswerIf they don't want to be in the portrait, ask them if they would be okay with you adding them in via photoshop. If they don't want you to, respect their wishes.
References
- ↑ http://mashable.com/2013/08/26/how-to-photoshop-a-person/
- ↑ http://mashable.com/2013/08/26/how-to-photoshop-a-person/
- ↑ https://www.youtube.com/watch?v=TbDL6b97kY0
- ↑ http://mashable.com/2013/08/26/how-to-photoshop-a-person/
- ↑ https://www.youtube.com/watch?v=TbDL6b97kY0
- ↑ http://mashable.com/2013/08/26/how-to-photoshop-a-person/
- ↑ https://www.youtube.com/watch?v=TbDL6b97kY0
- ↑ http://mashable.com/2013/08/26/how-to-photoshop-a-person/
- ↑ https://www.youtube.com/watch?v=TbDL6b97kY0
- ↑ http://mashable.com/2013/08/26/how-to-photoshop-a-person/
- ↑ https://www.youtube.com/watch?v=TbDL6b97kY0
- ↑ https://www.youtube.com/watch?v=TbDL6b97kY0
- ↑ https://www.youtube.com/watch?v=6Ha5oX4-rqI
- ↑ https://www.youtube.com/watch?v=6Ha5oX4-rqI
- ↑ http://mashable.com/2013/08/26/how-to-photoshop-a-person/
- ↑ https://www.youtube.com/watch?v=TbDL6b97kY0
About This Article
To add people to a photo, try using a program like Adobe Photoshop to copy and paste them in. Before you begin, choose 2 photos that are compatible. For example, if your base photo is on a beach, you’ll want to choose a photo of the person that’s well lit. Open up the image of the person in Photoshop, and select them using the lasso tool. Start at their head and loop the lasso tool around their entire body. Then, click Edit and Copy to copy their image onto the clipboard. Now, open up your group photo and click Edit and Paste to paste them in. Make sure to resize the added person so they match the size of everyone else. You can do this with the Free Transform tool. If there’s any original background surrounding the added person, use the Eraser tool to get rid of it. To learn how to adjust the lighting in your photoshopped image, read on!
